All posts by admin

Time to step up with a direct drive wheel

Watching a lot of videos about DirectDrive wheels over the years, I finally made my mind to be a big spender and upgrade.

But of course, had to do it with focus on keeping some sort of limit since these are expensive.

I also had some requirements

  • Cheap as possible, without compromise on quality
  • Not locked into an ecosystem
  • DIY friendly so I can add my own rims.
  • Good quality since its gonna last for +10 years

Sim-plicity

My eyes kept focusing on a small almost unknown british company Sim-plicity. They had the product that fullfilled my requierements but their webpage is too minimalistic and gives only little information about their products, basically no pictures. When trying to ask questions to their prebuy support, there were 5 days delay in answers. Searching for other owners, I ended up joining a facebook group to get my answers. Almost everyone have prasing words for their products.

This gave me enough comfort to buy it and saved 100€ in exchange of some waiting time.

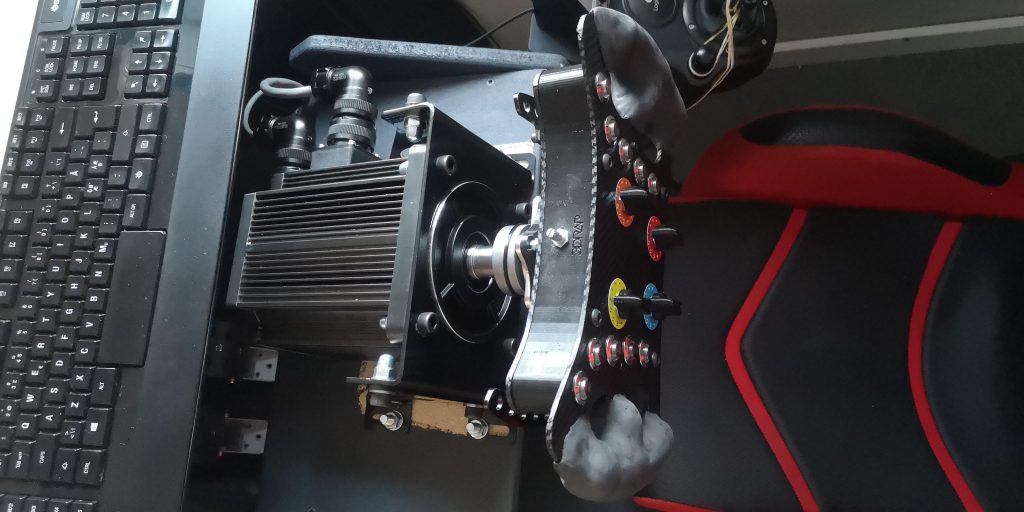
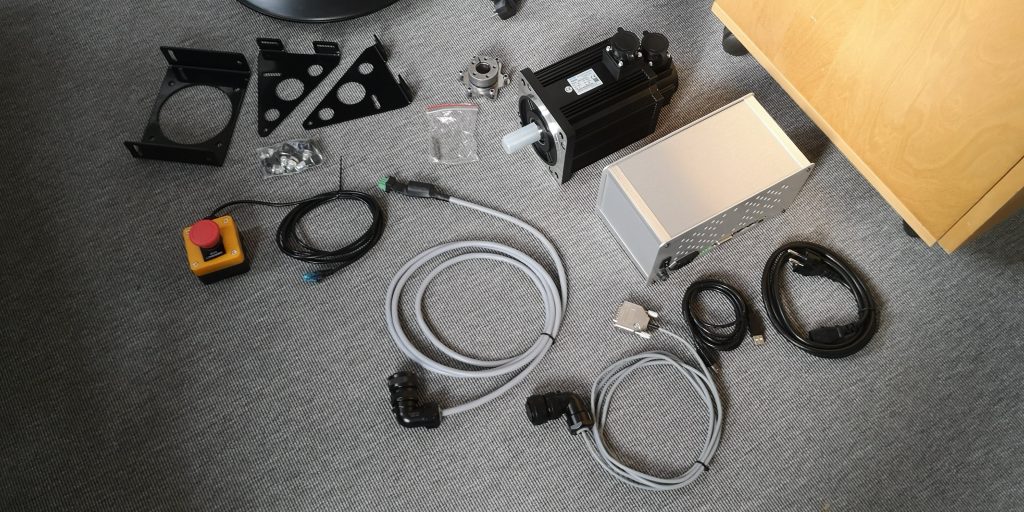
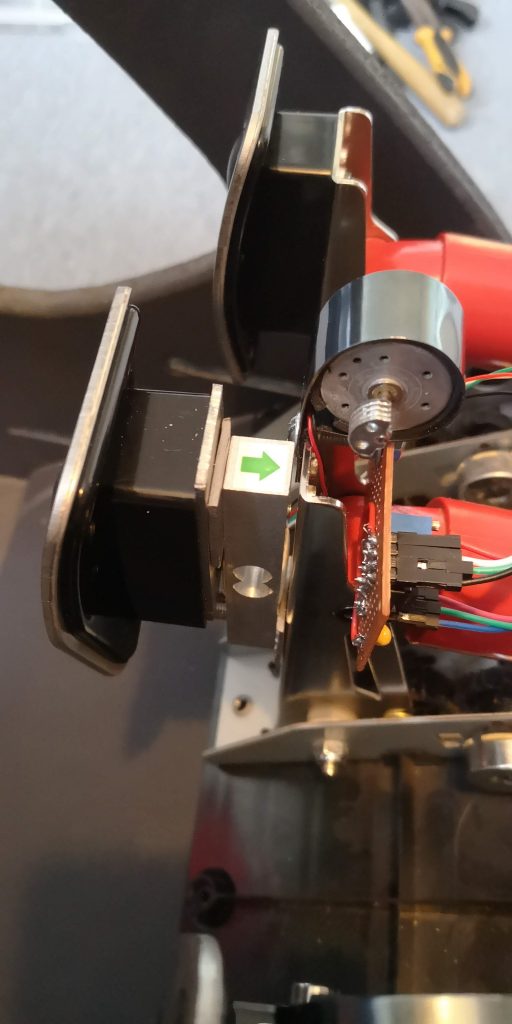
I bought the SW20V3, its a 20nm Mige, so it have more than enough power, and sturdy to last. Sim-plicity do their own firmware and systemboards, but seems they do it well.

This is what you get

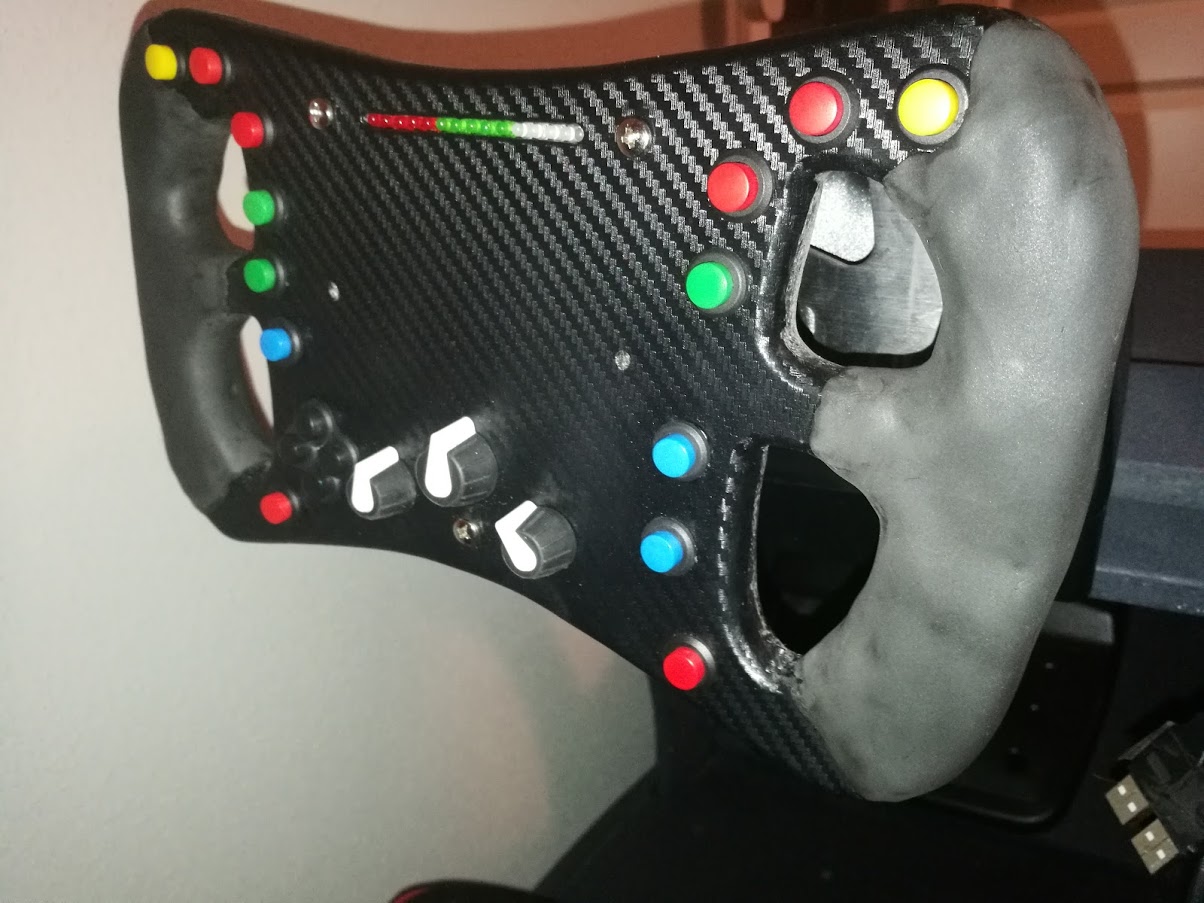
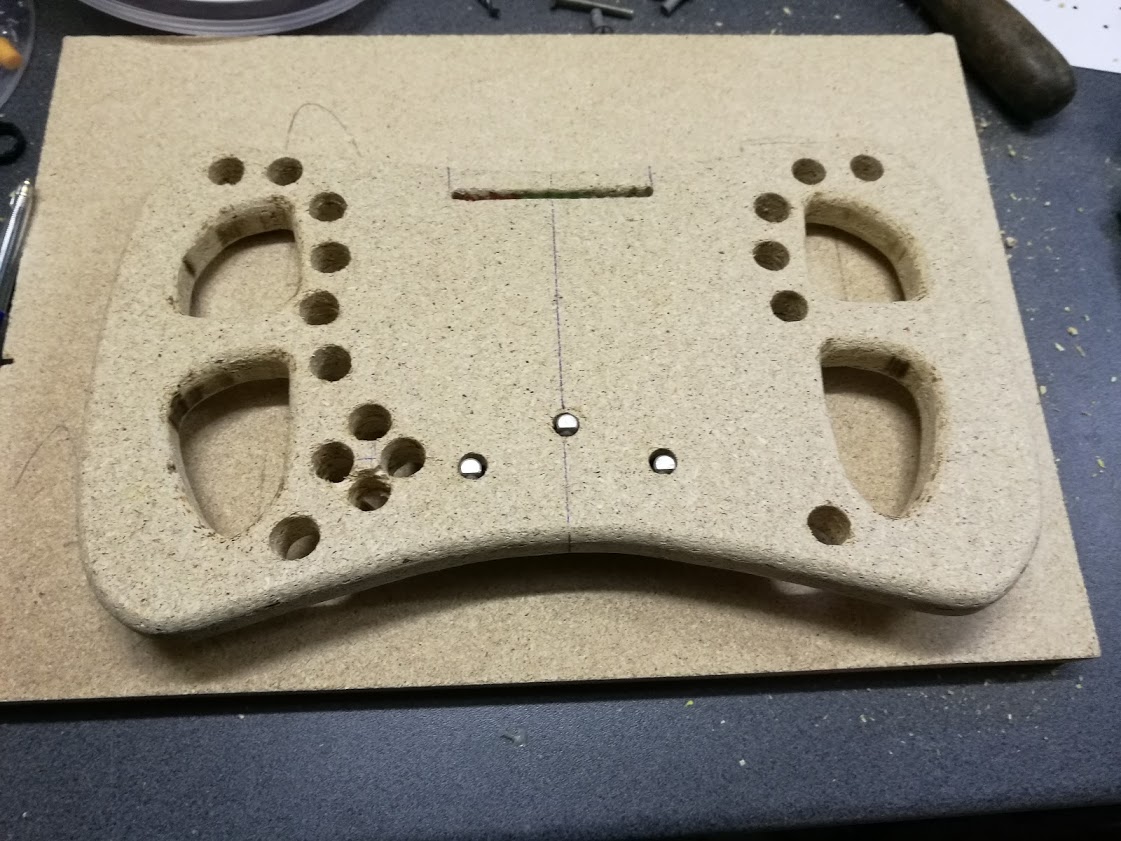
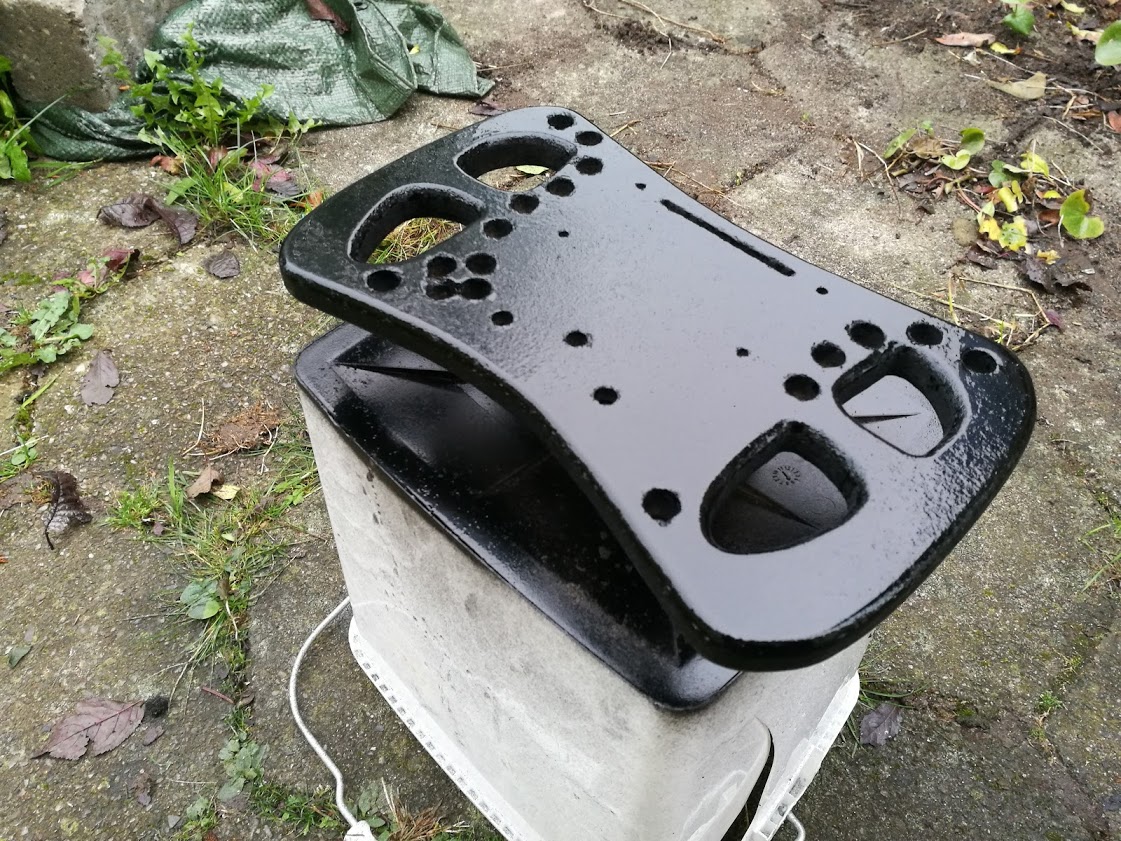
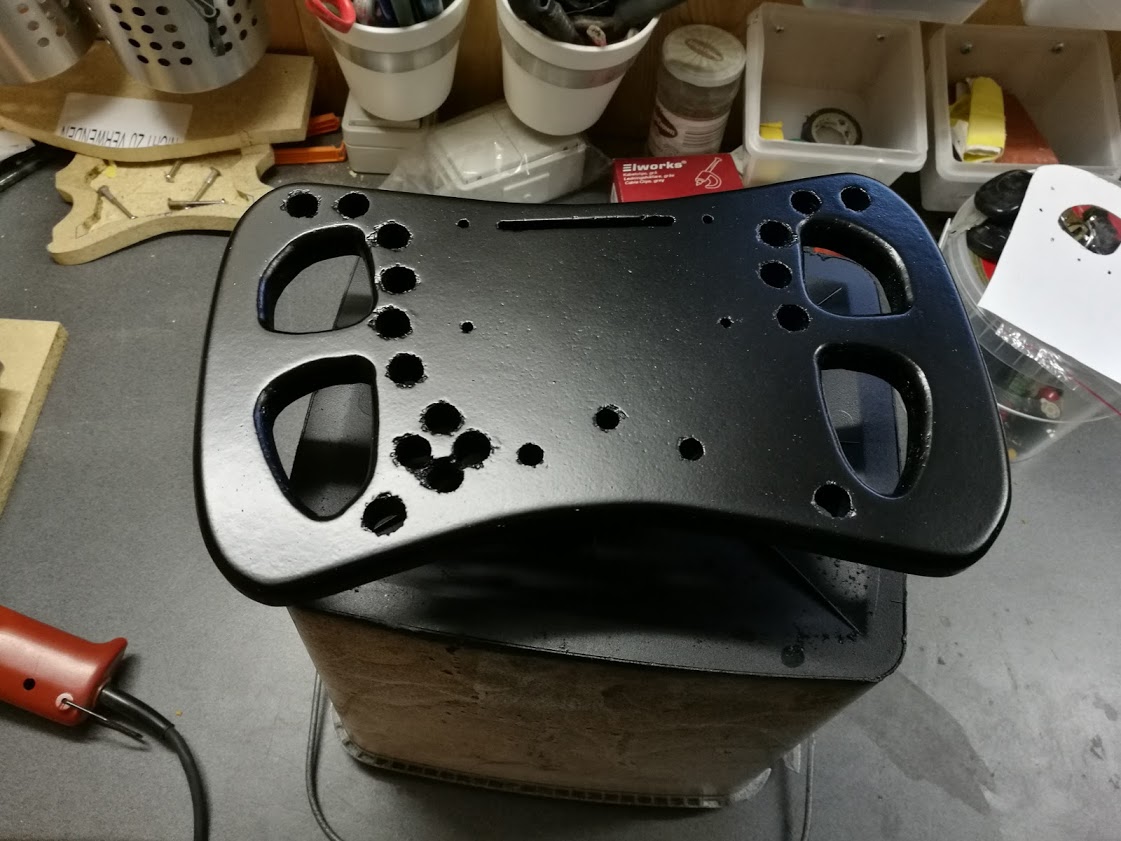
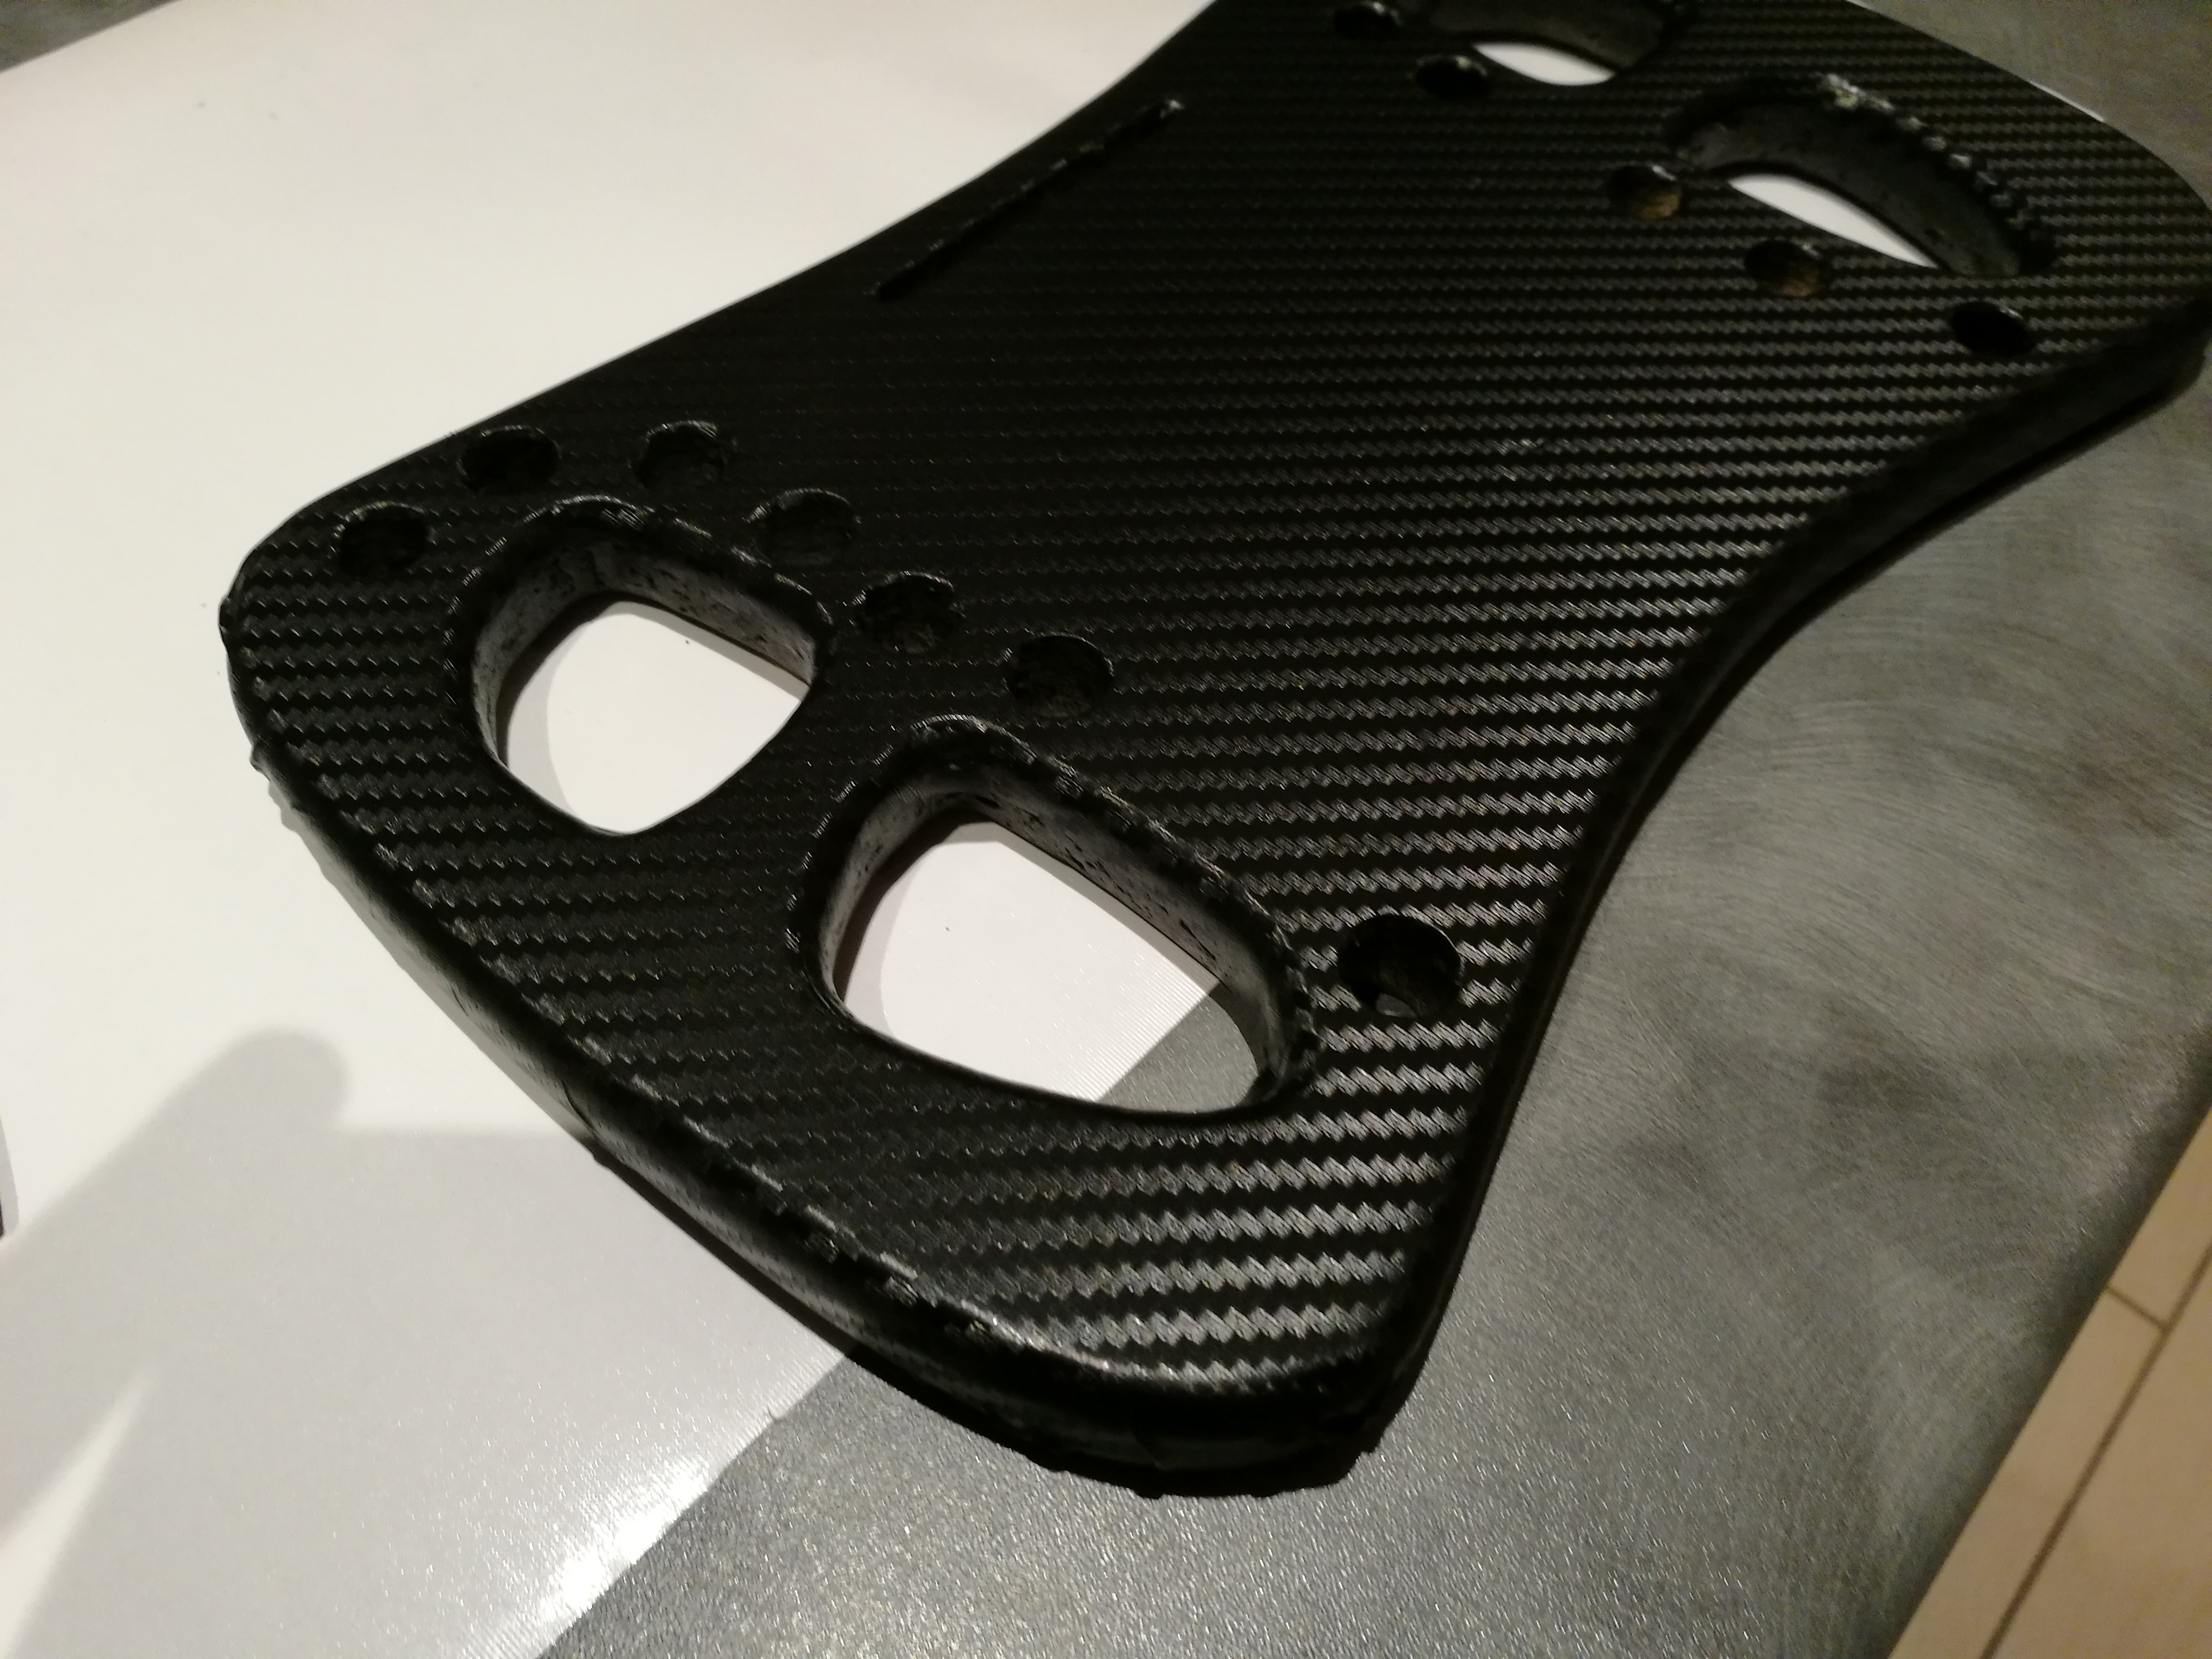
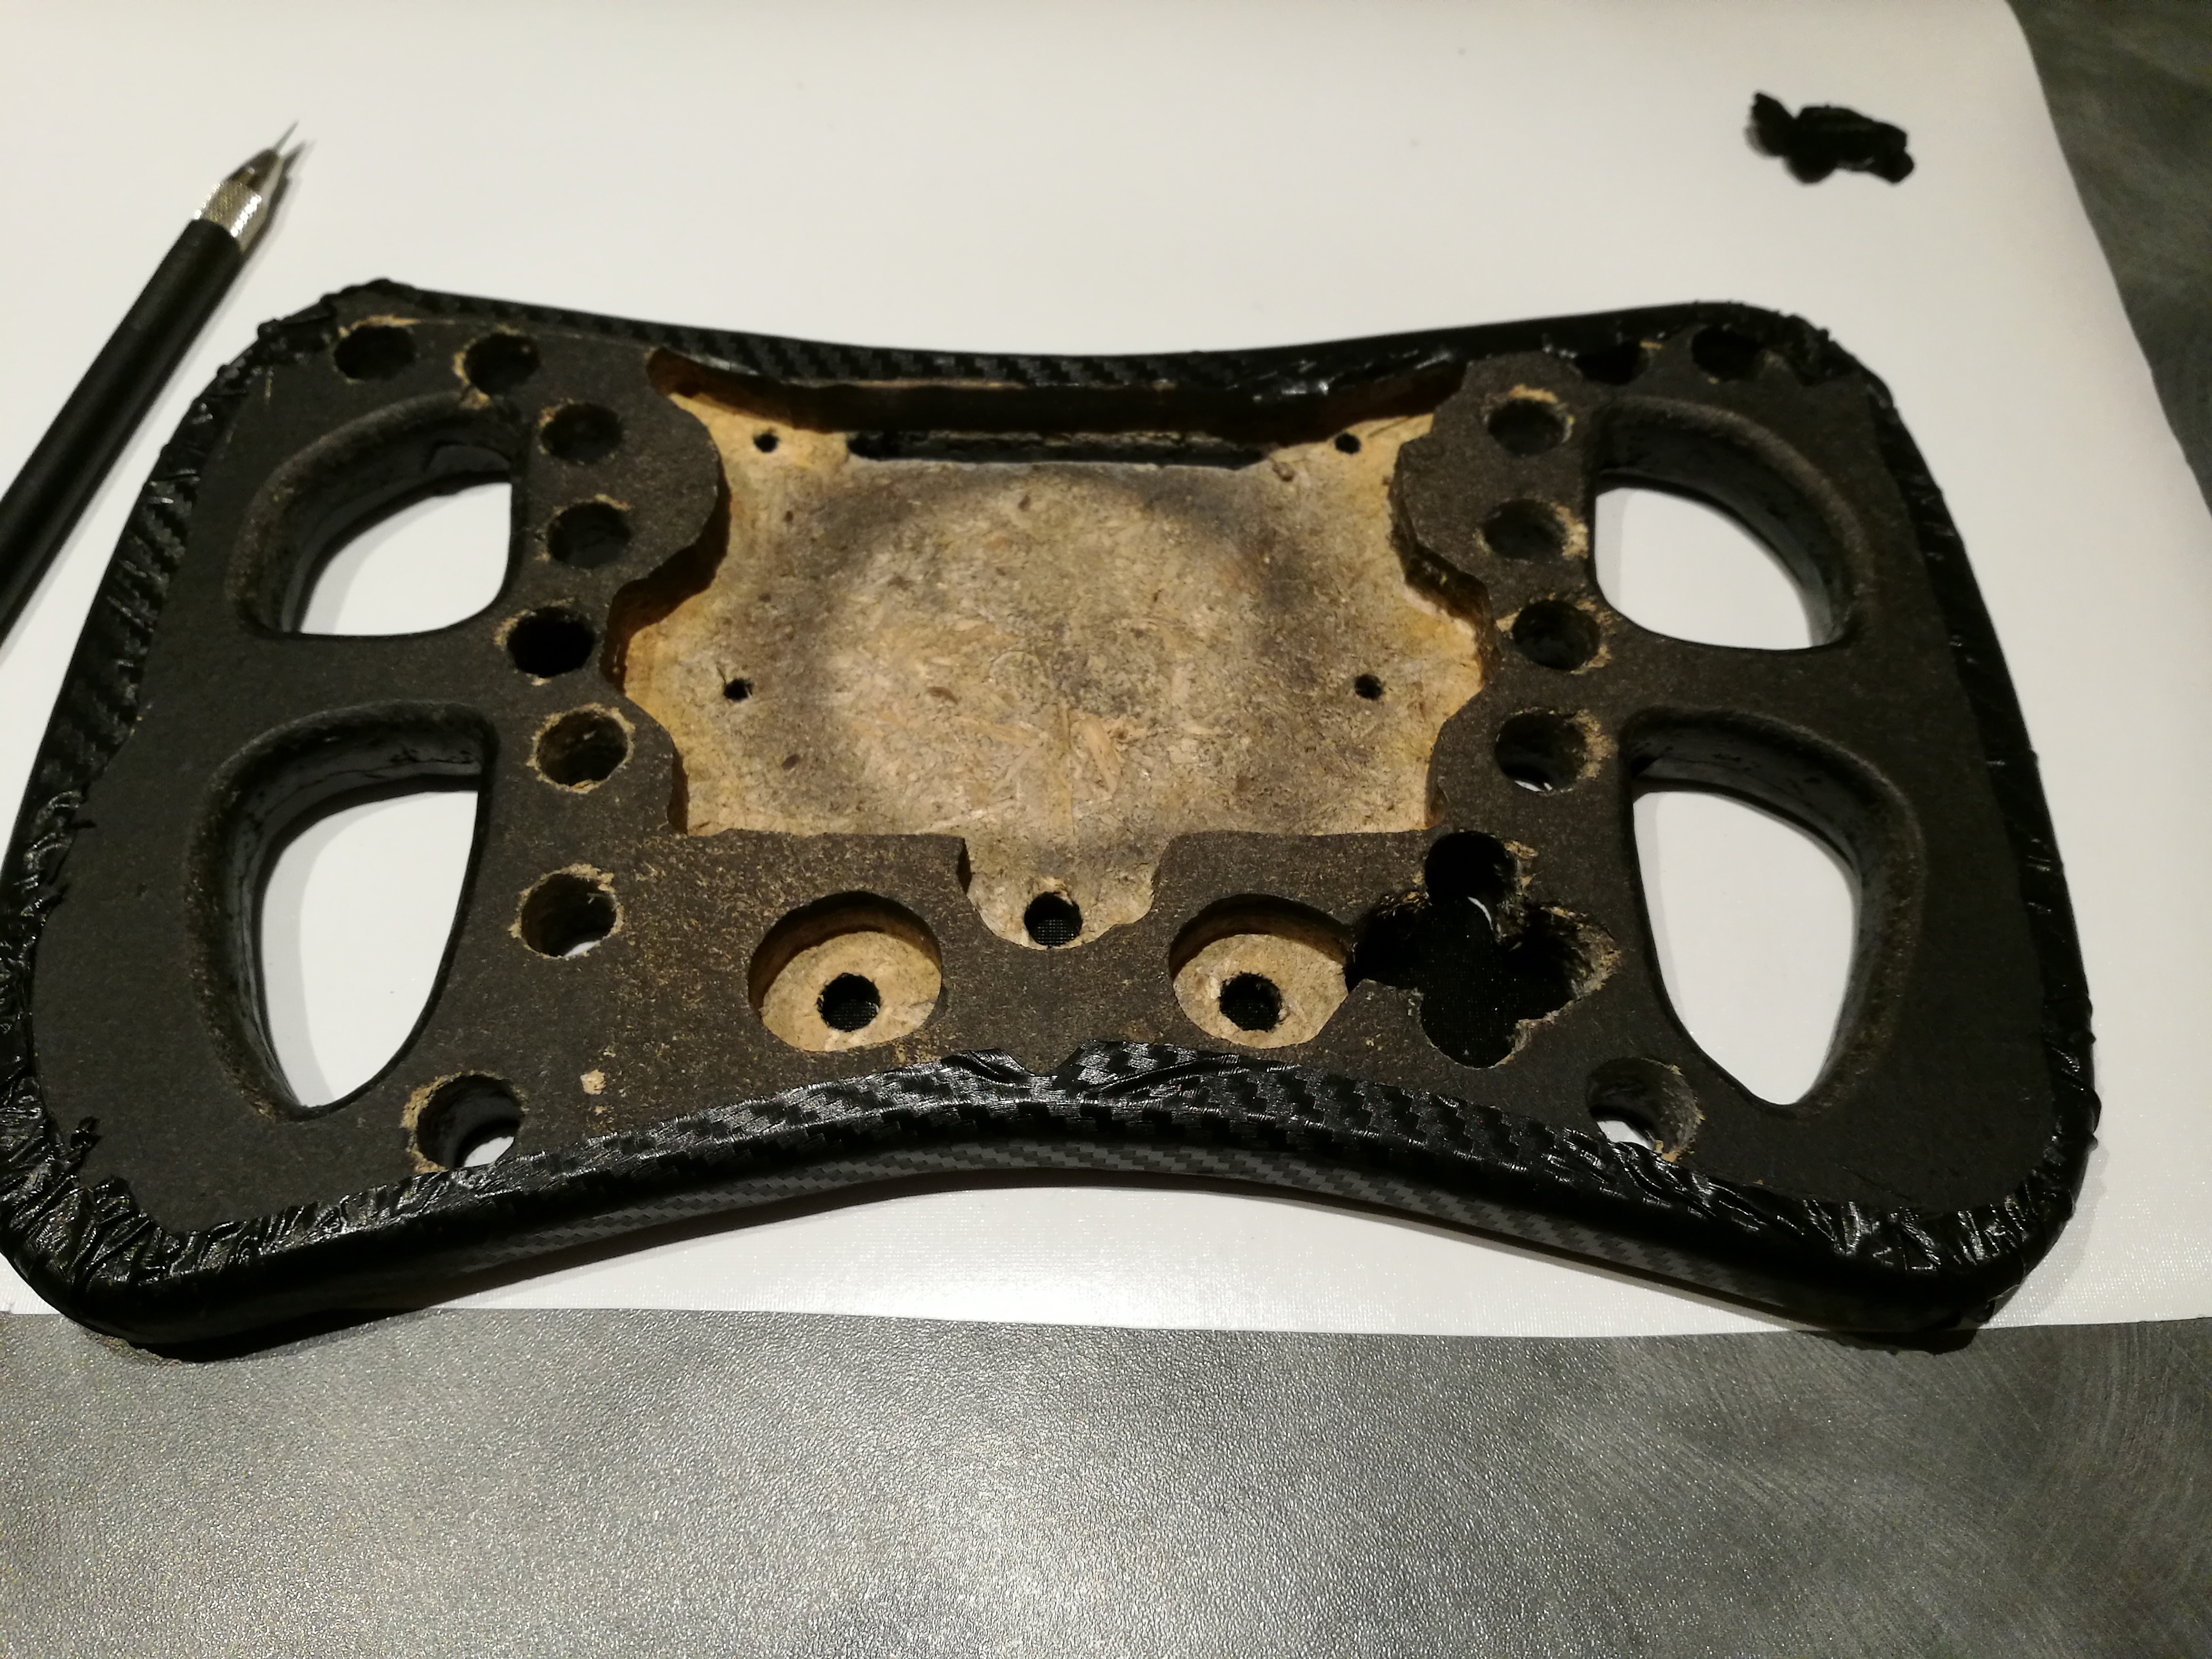
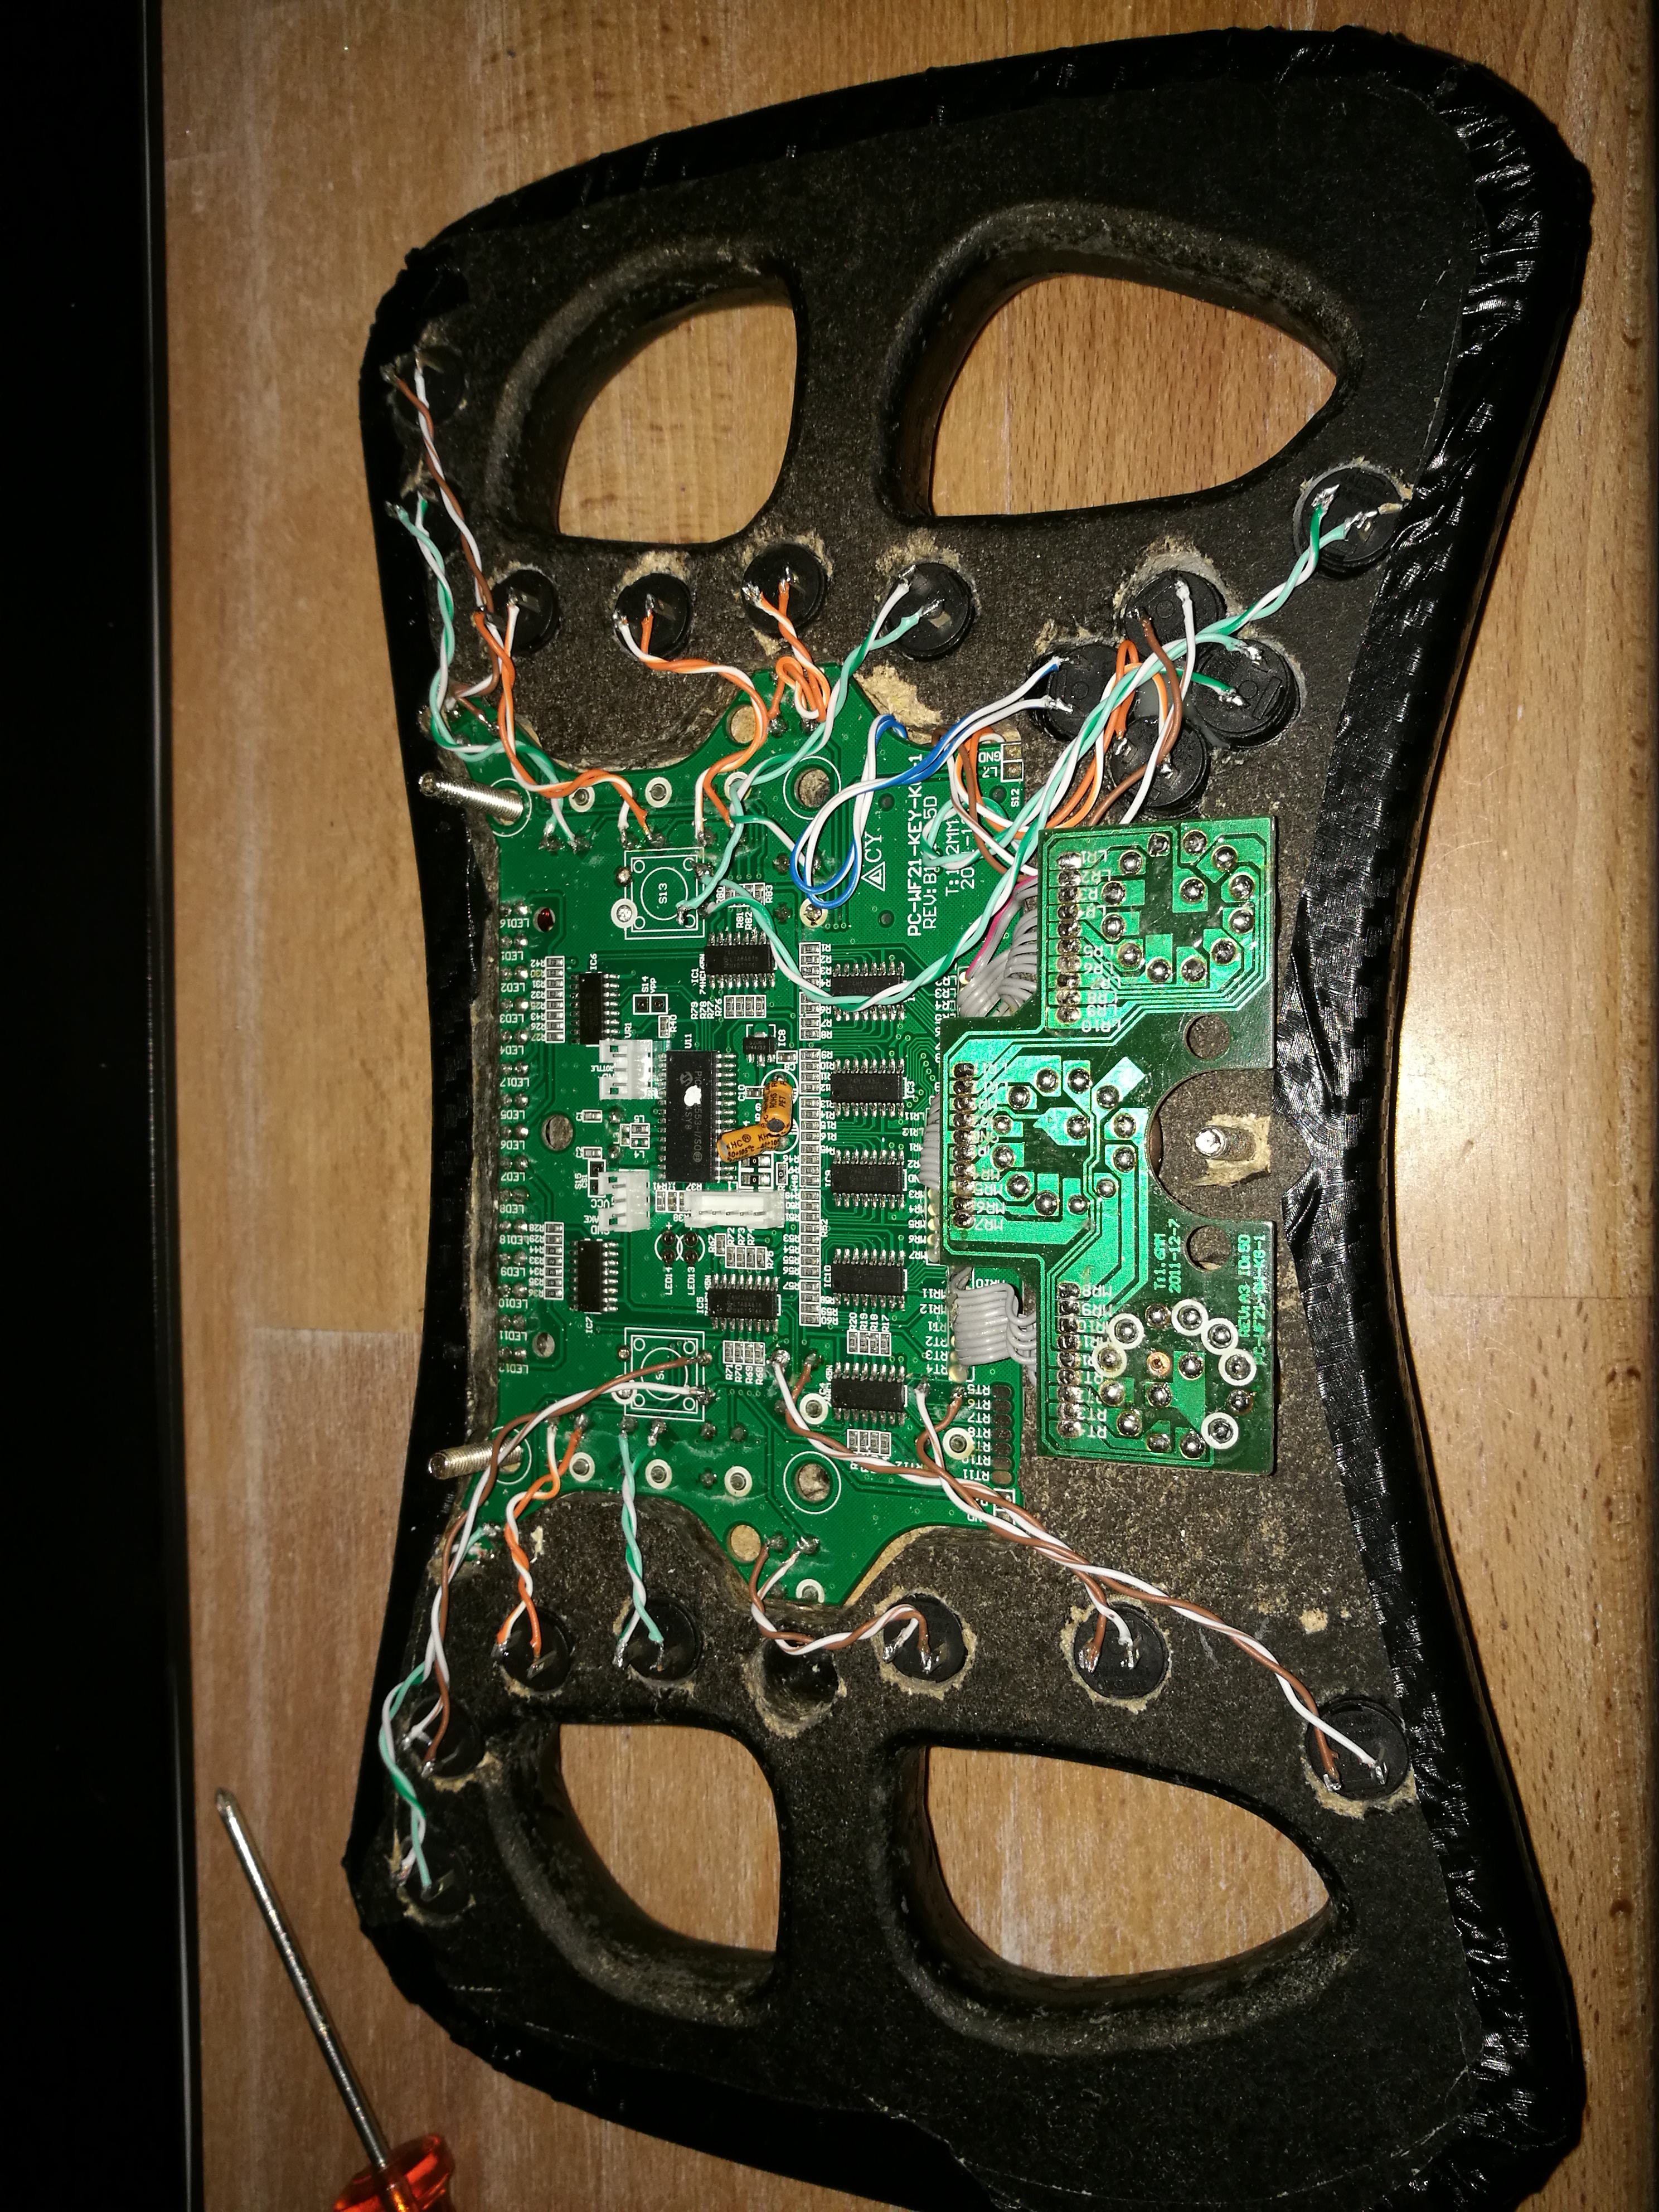
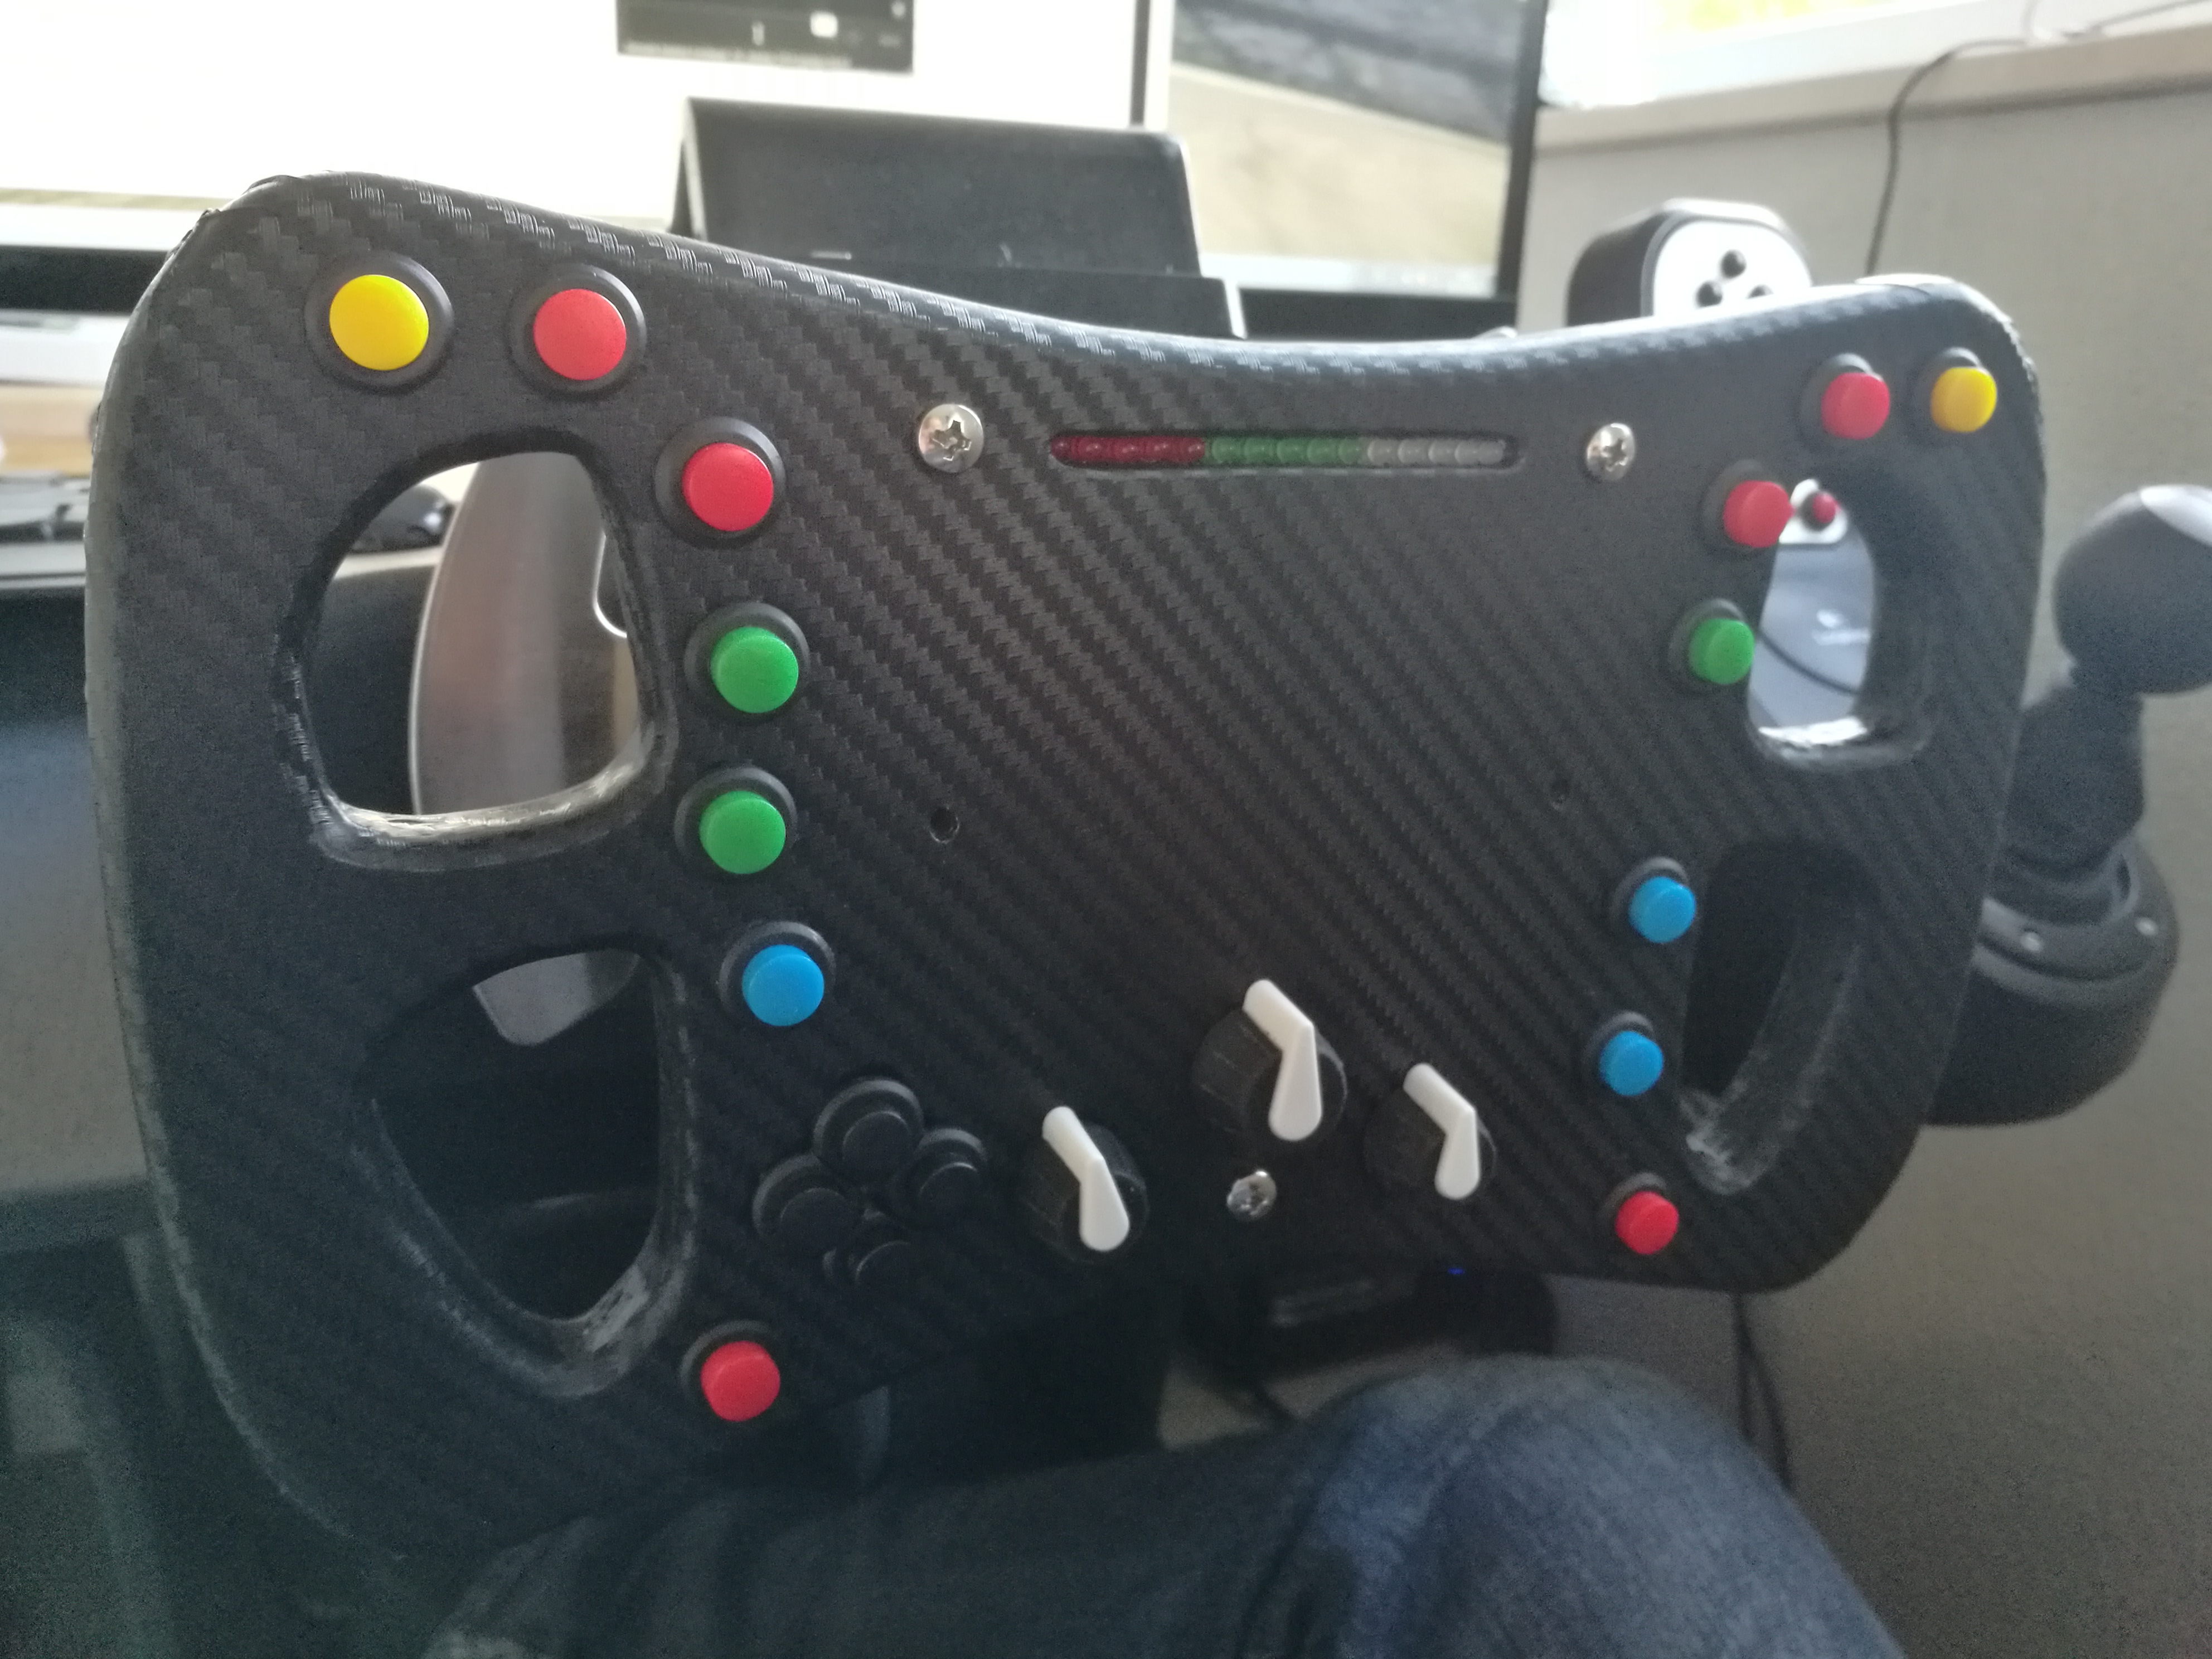
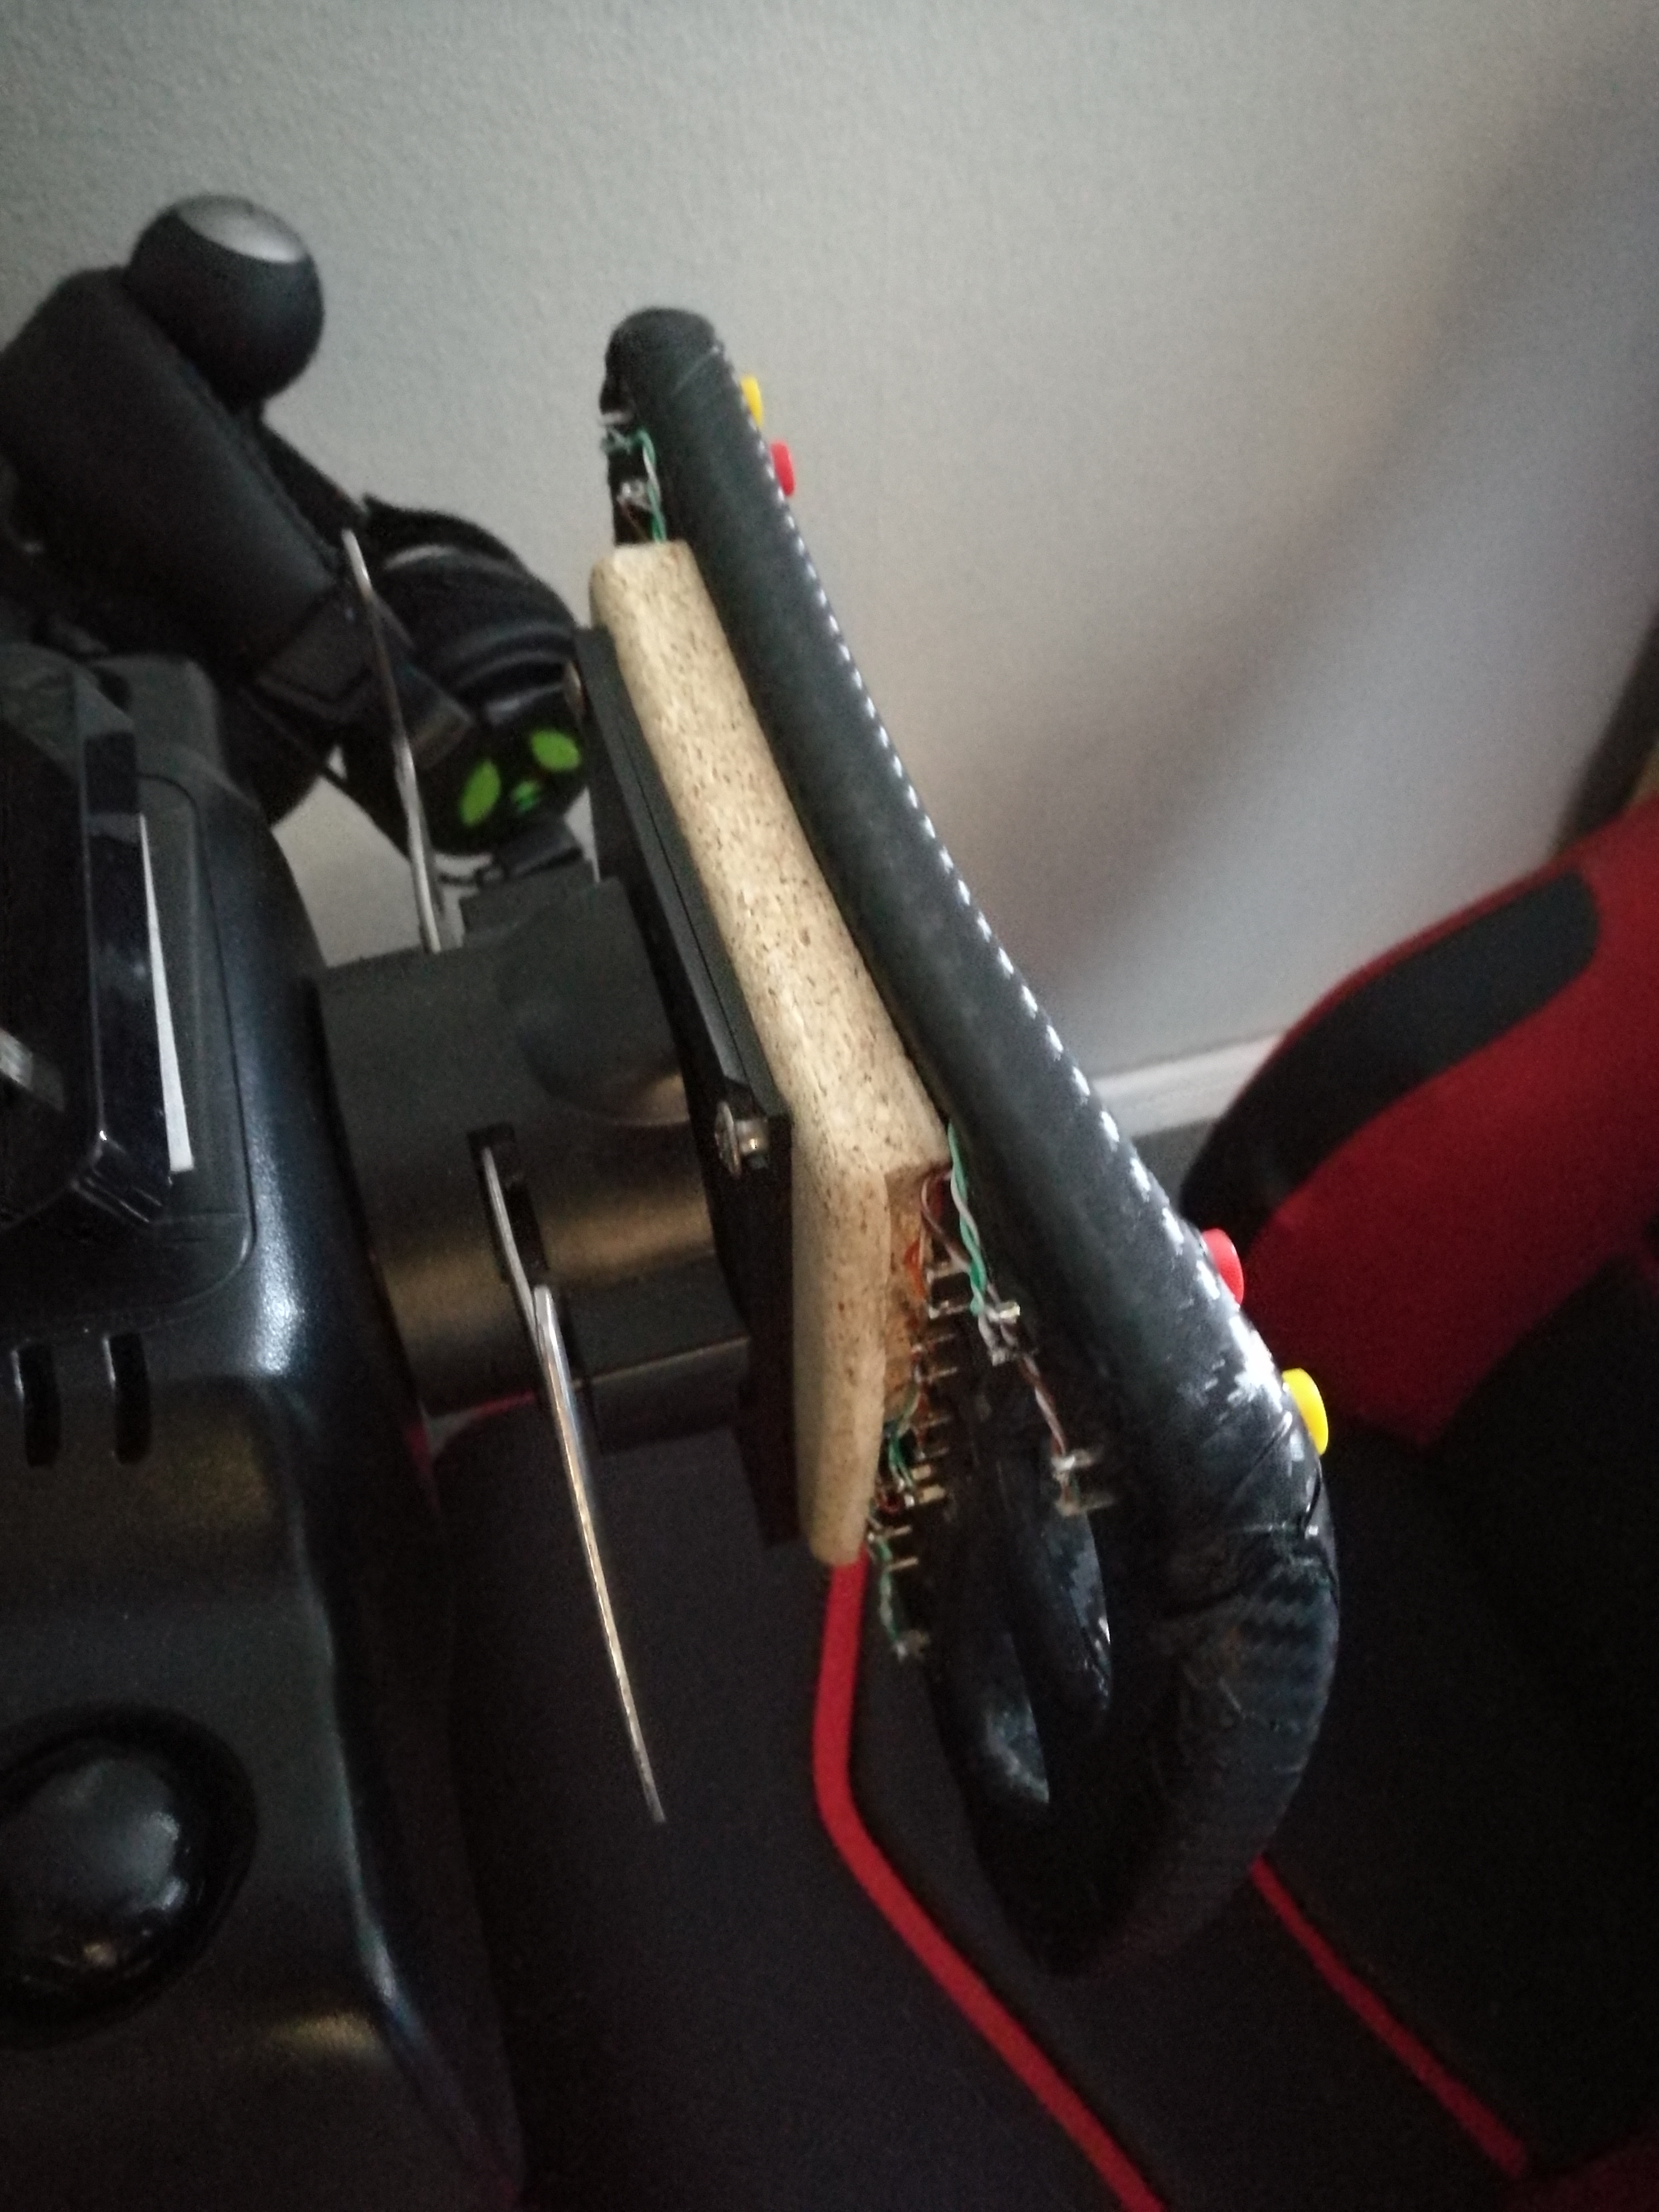
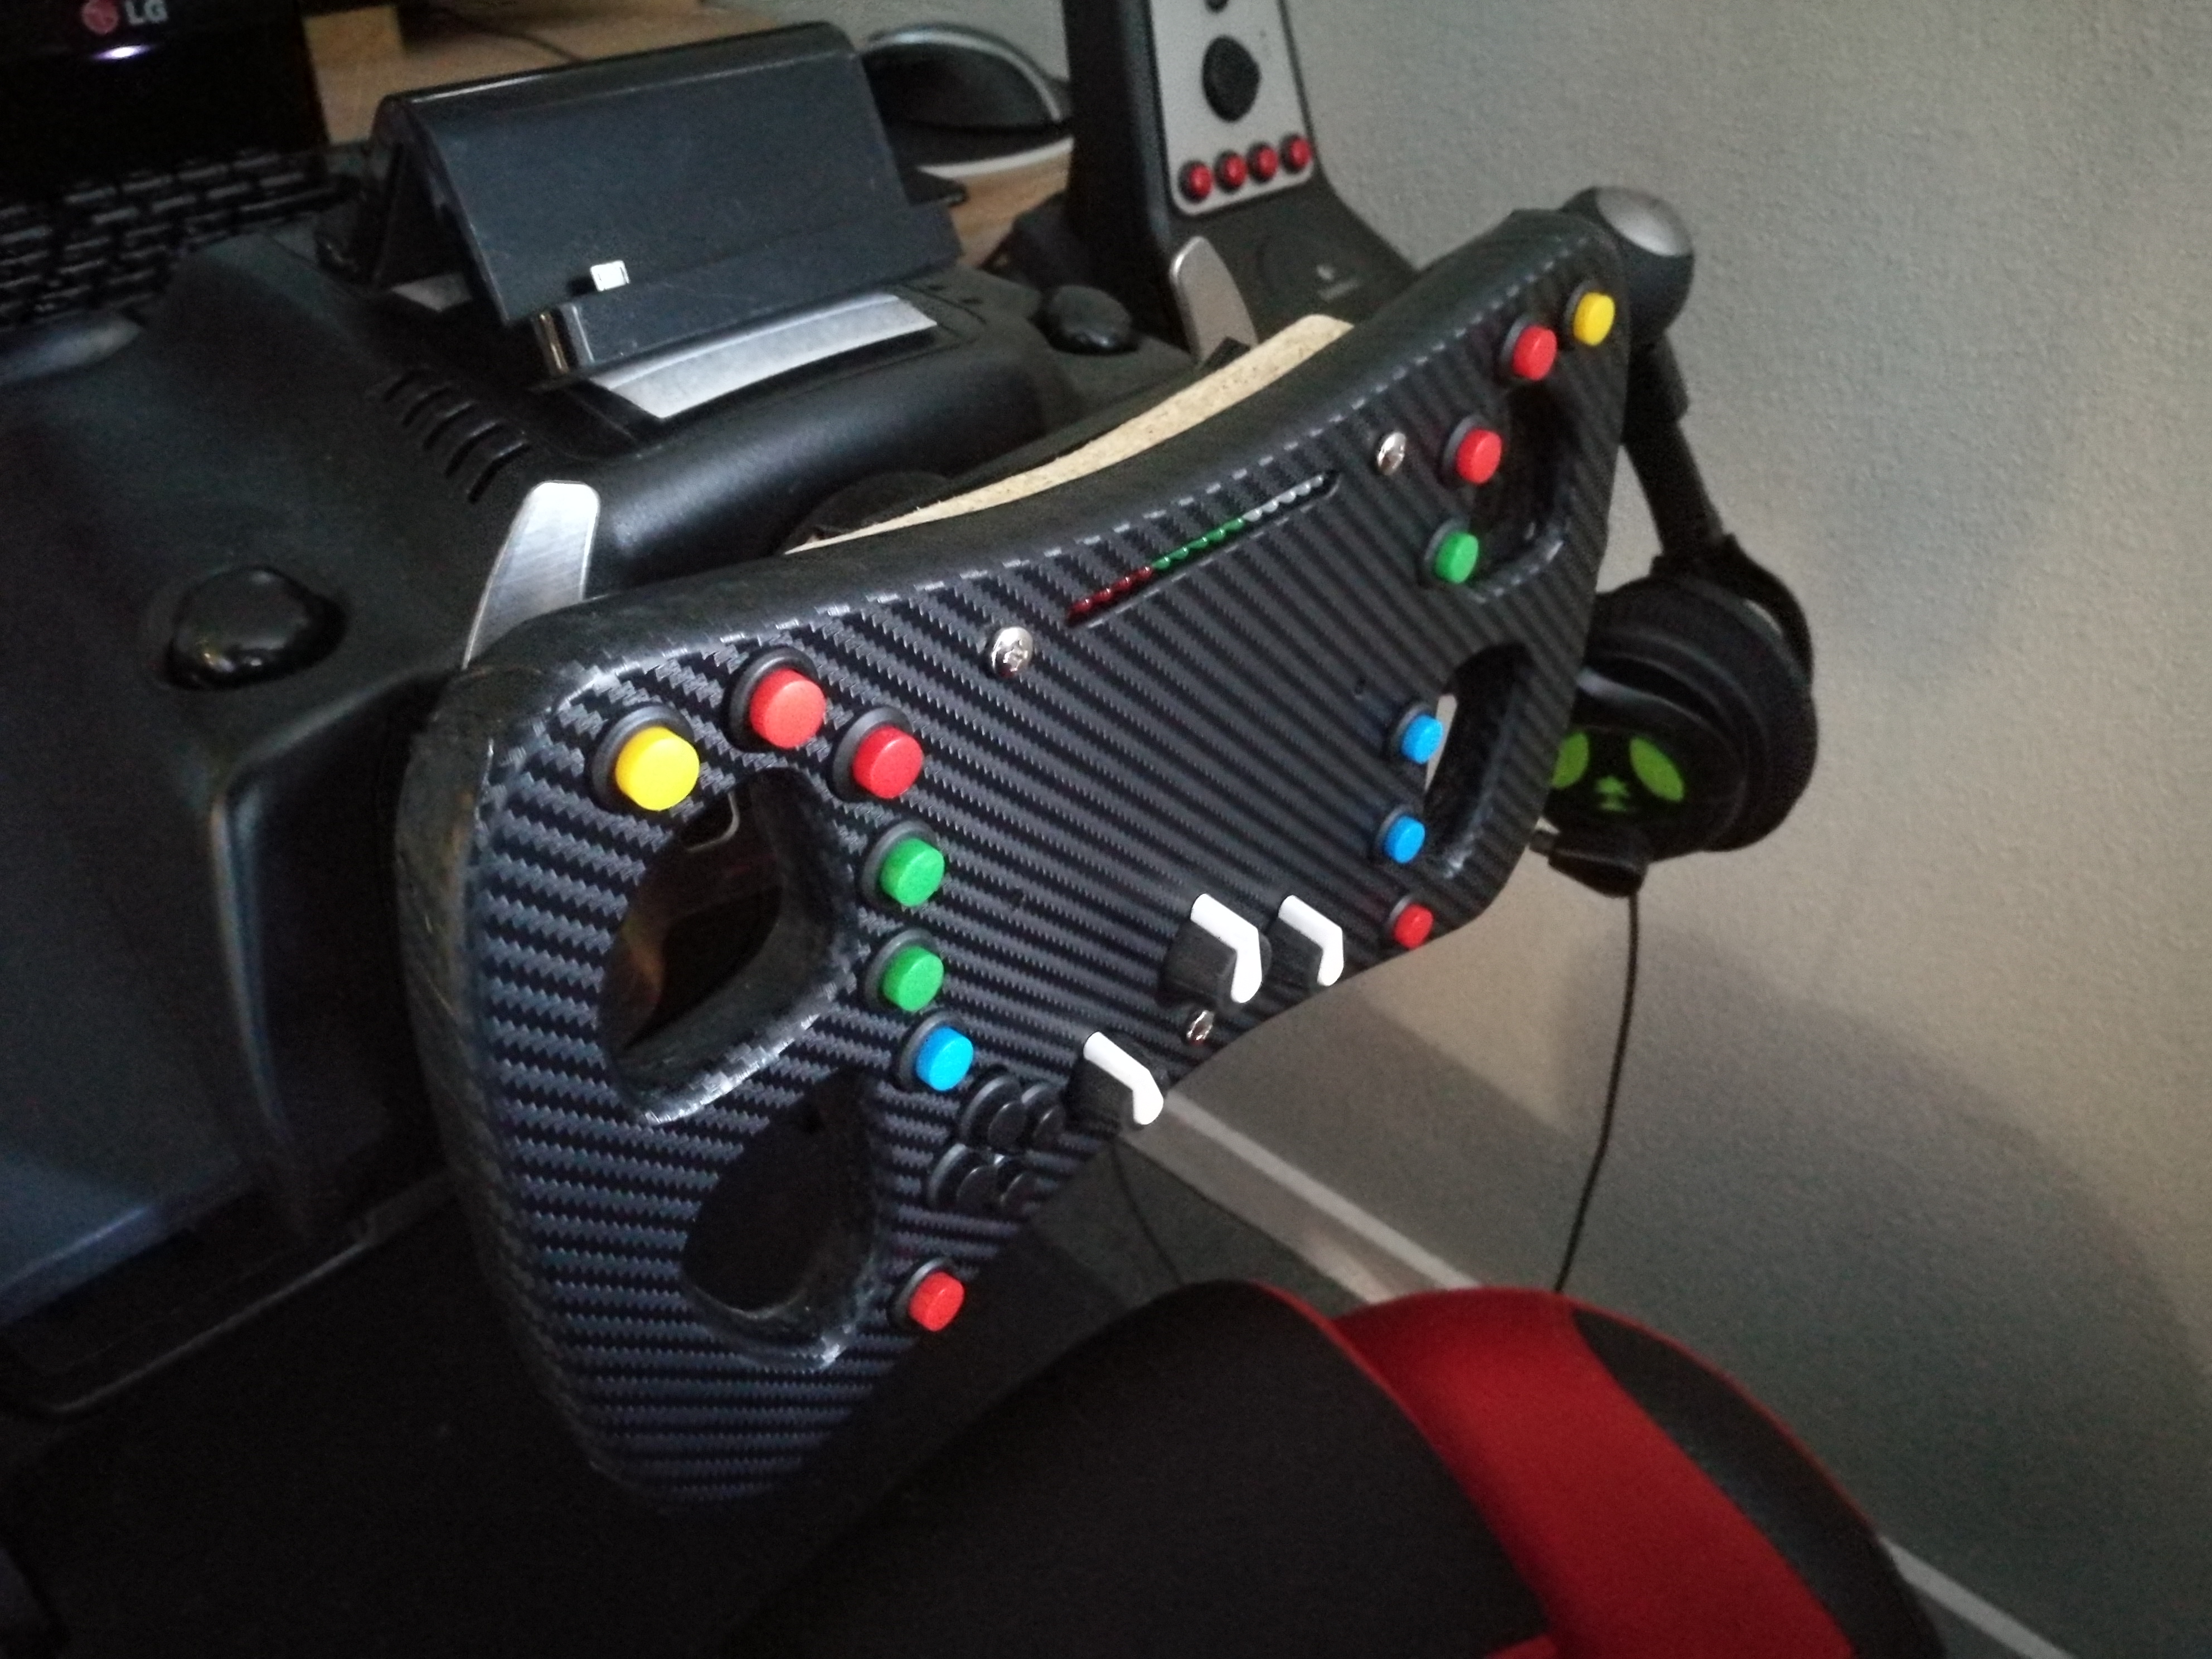
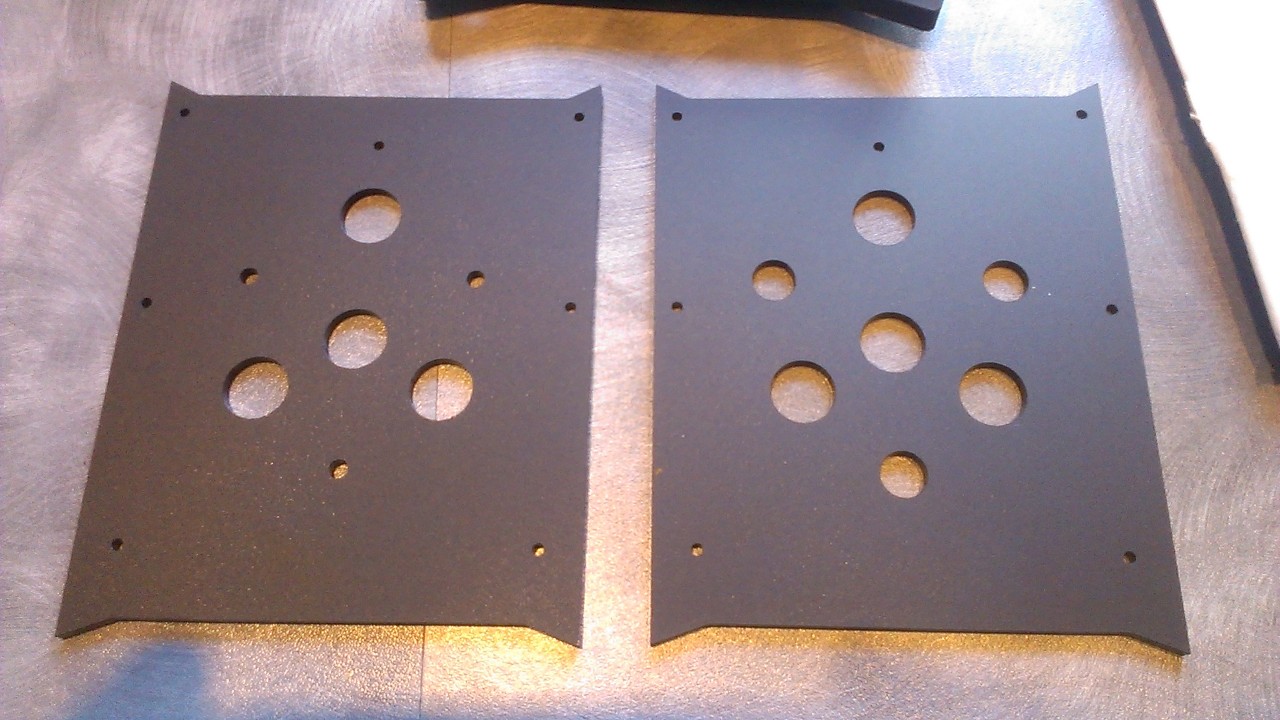
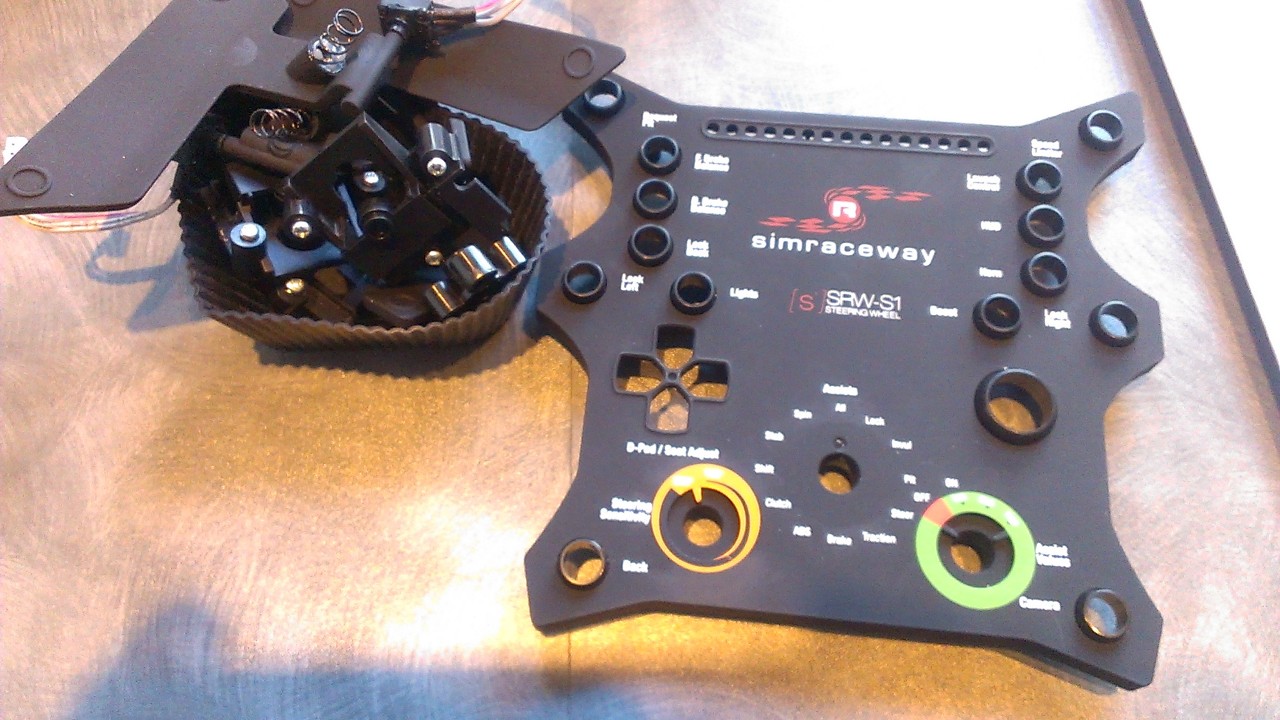
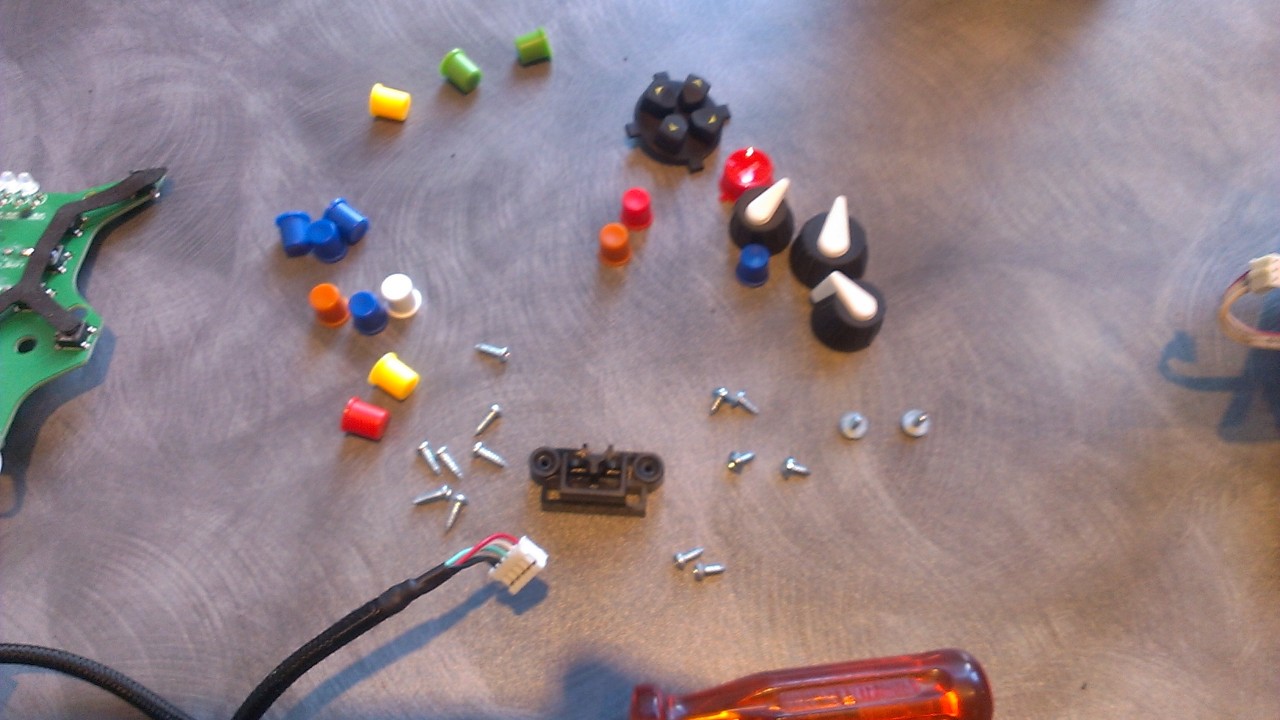
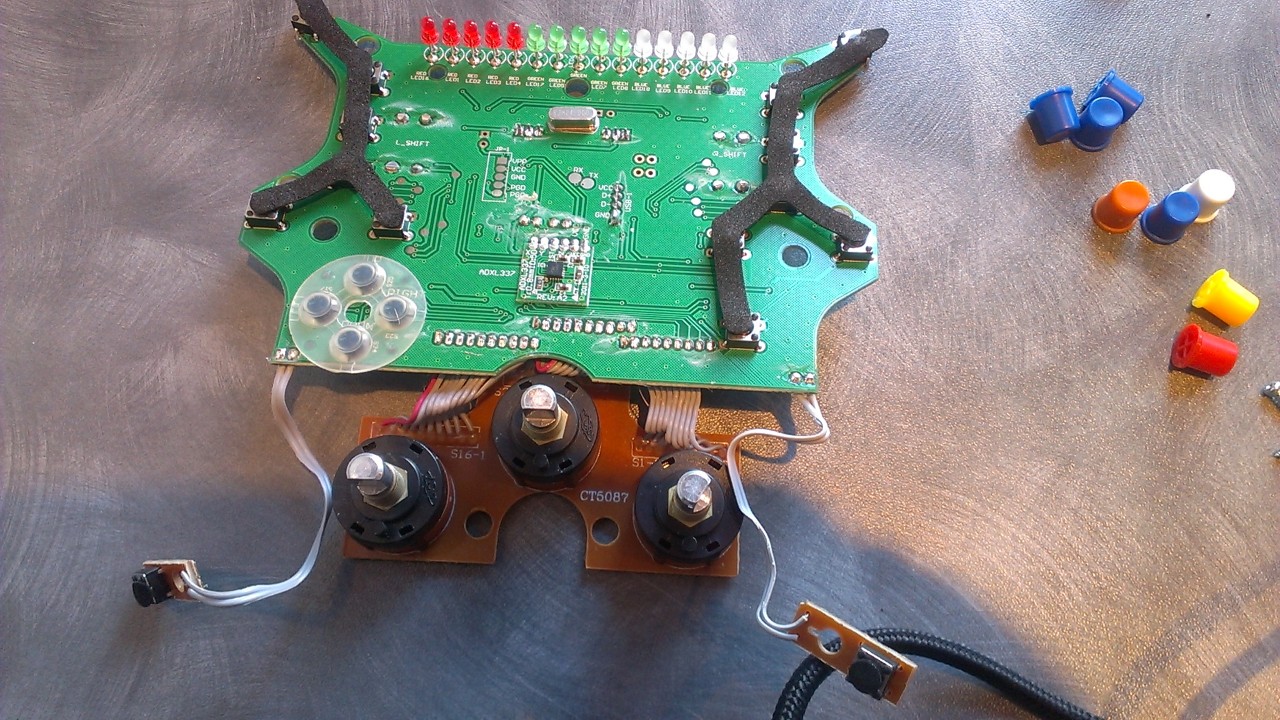
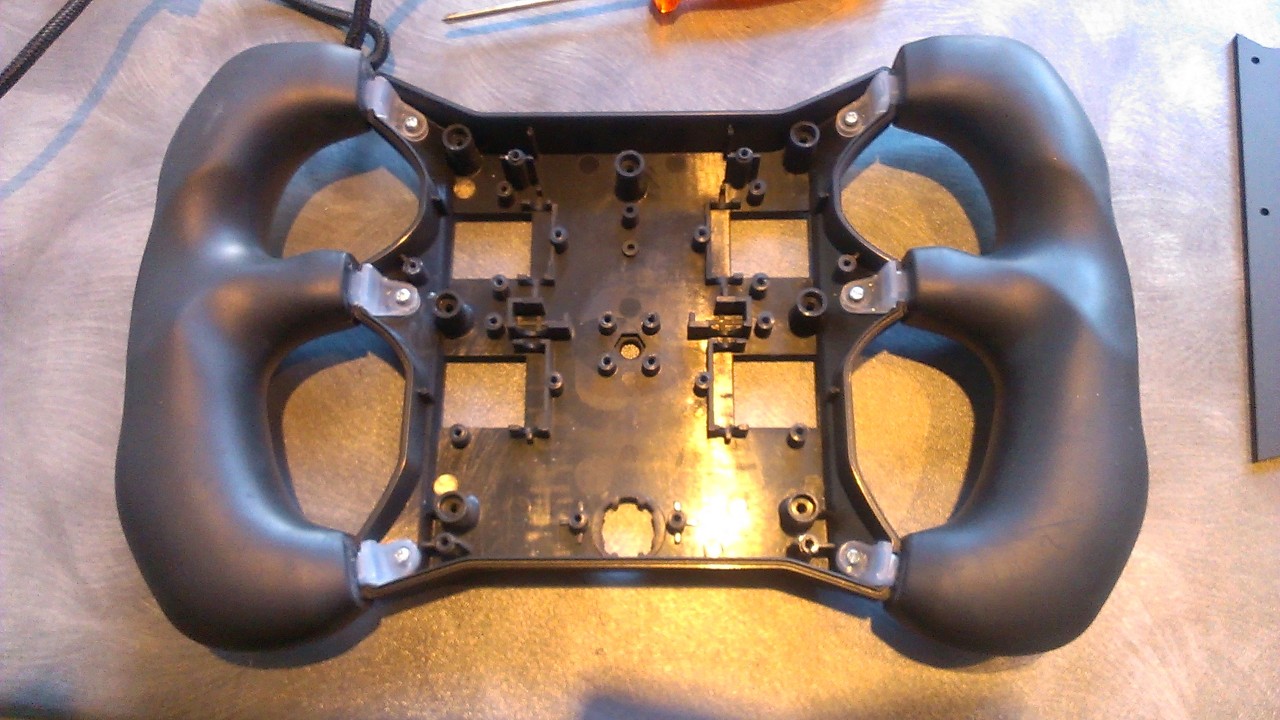
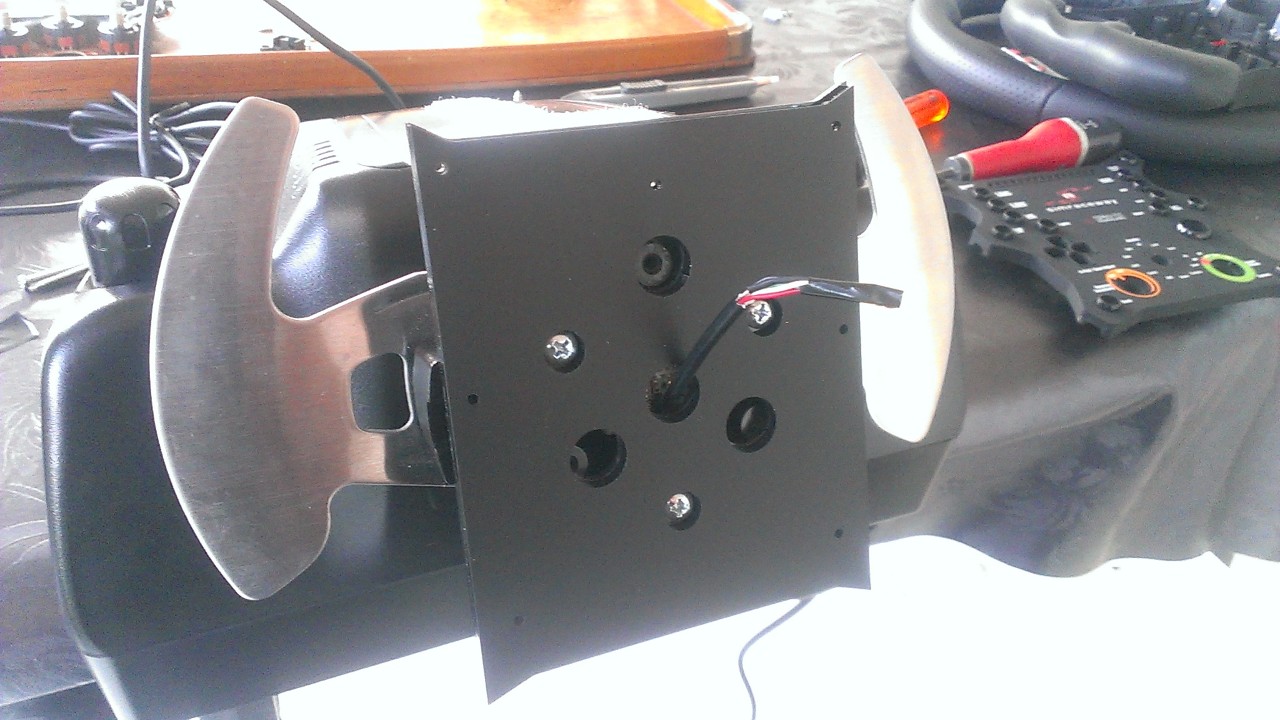
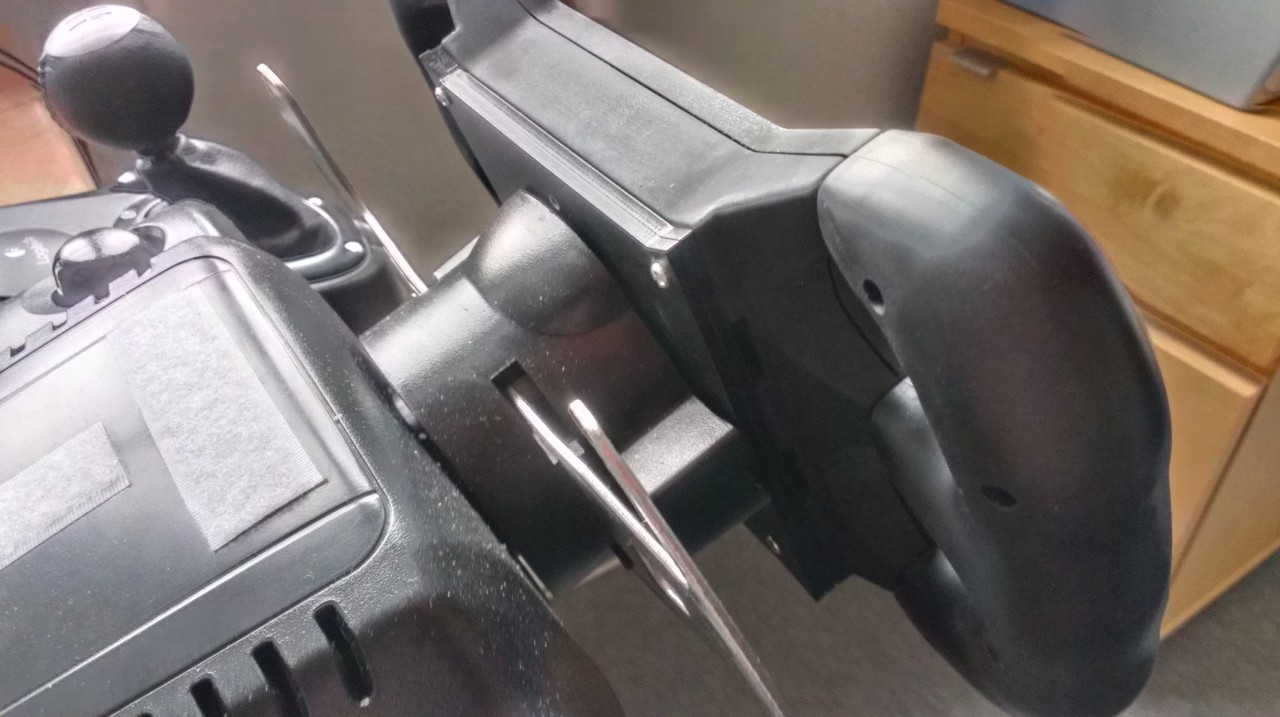
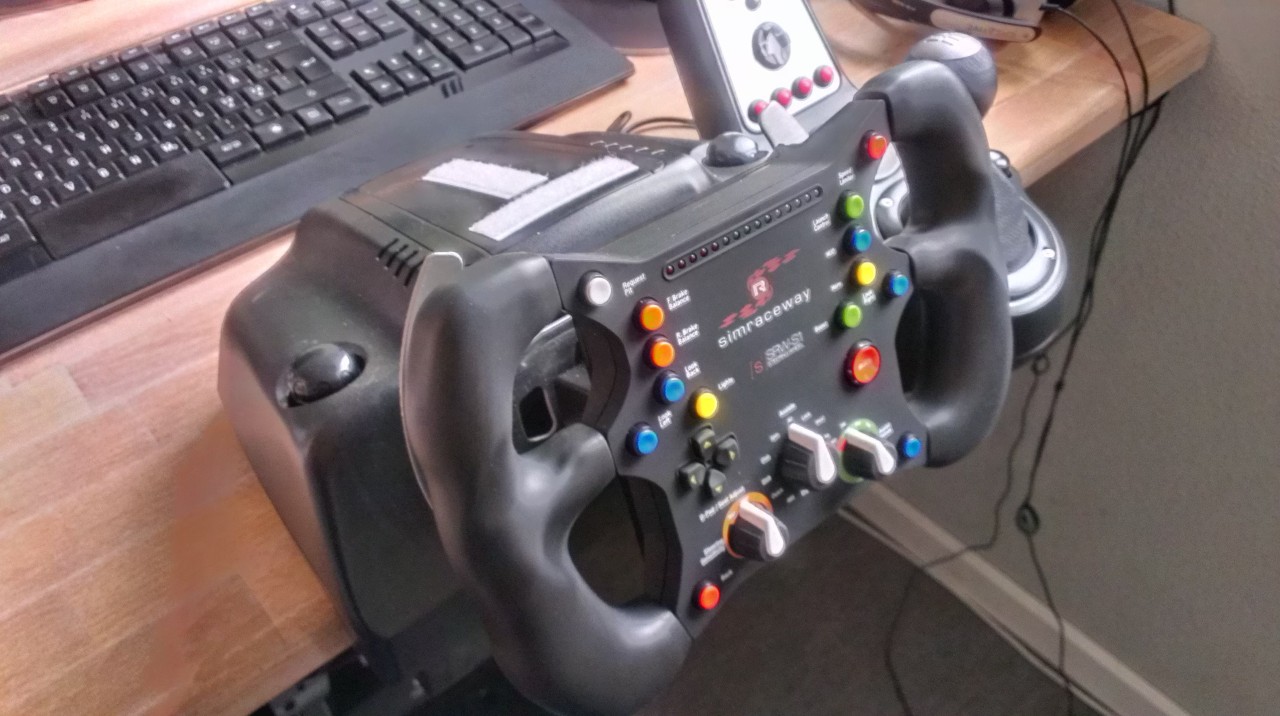
3Drap DIY steering wheel

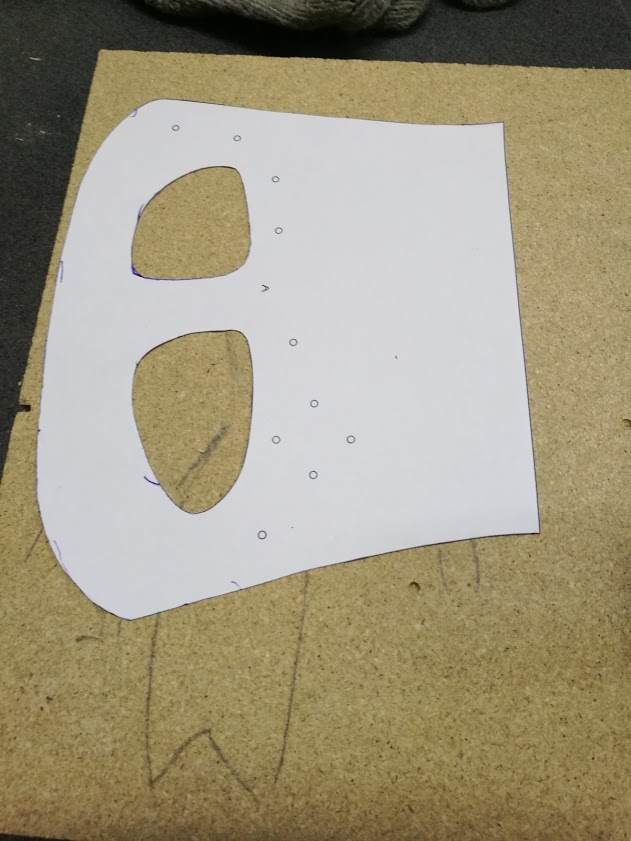
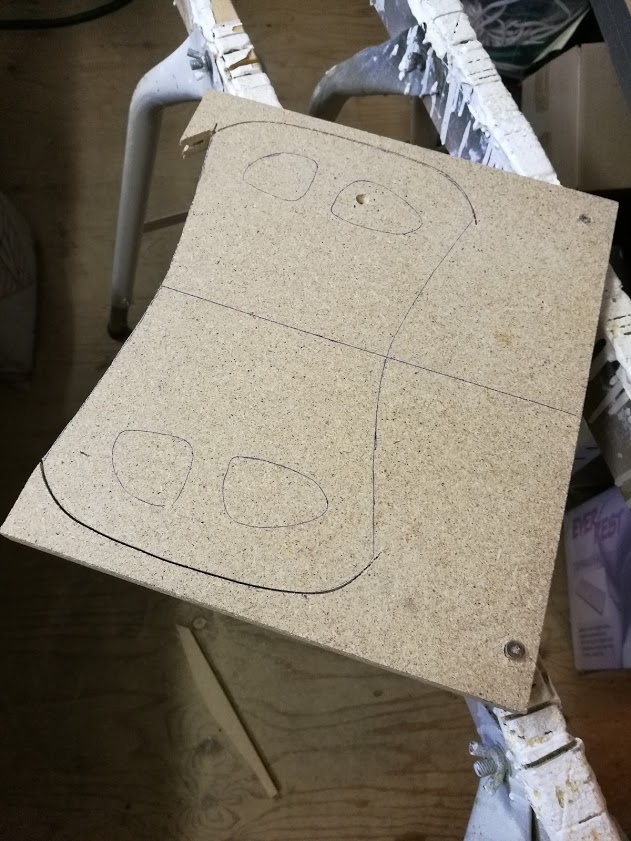
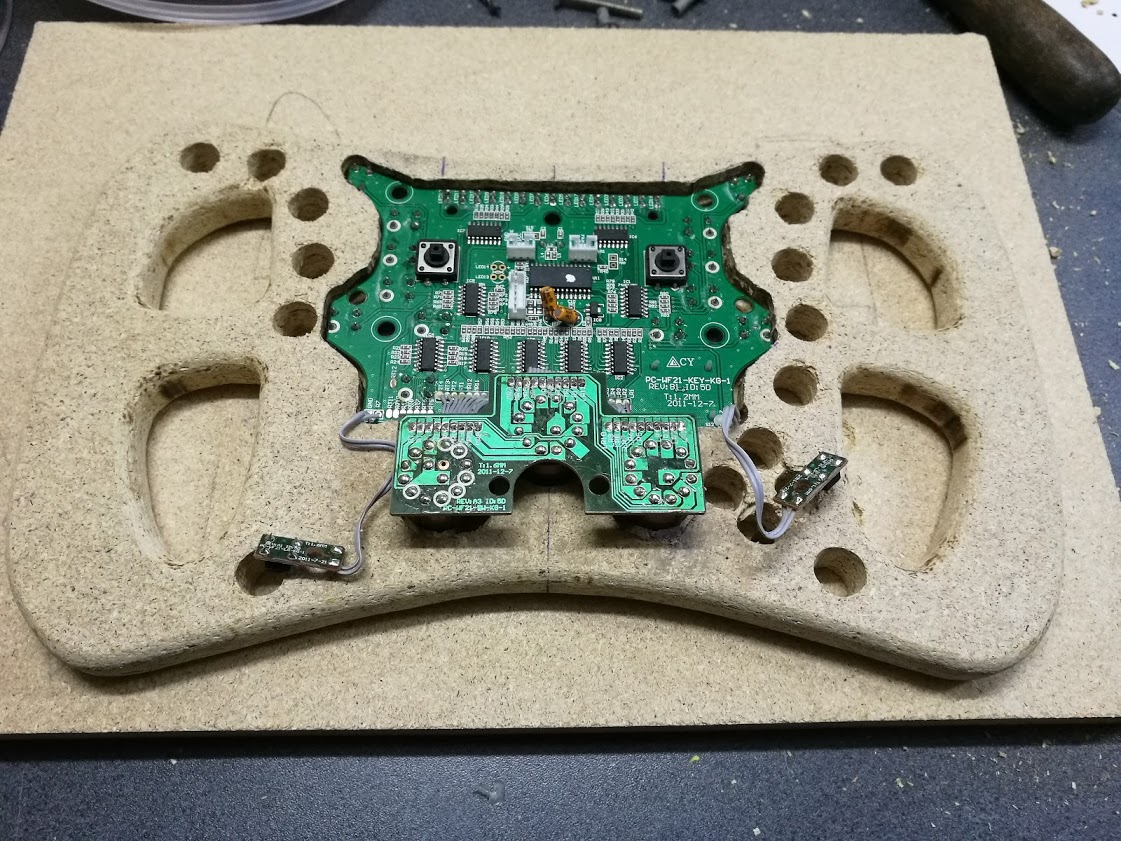
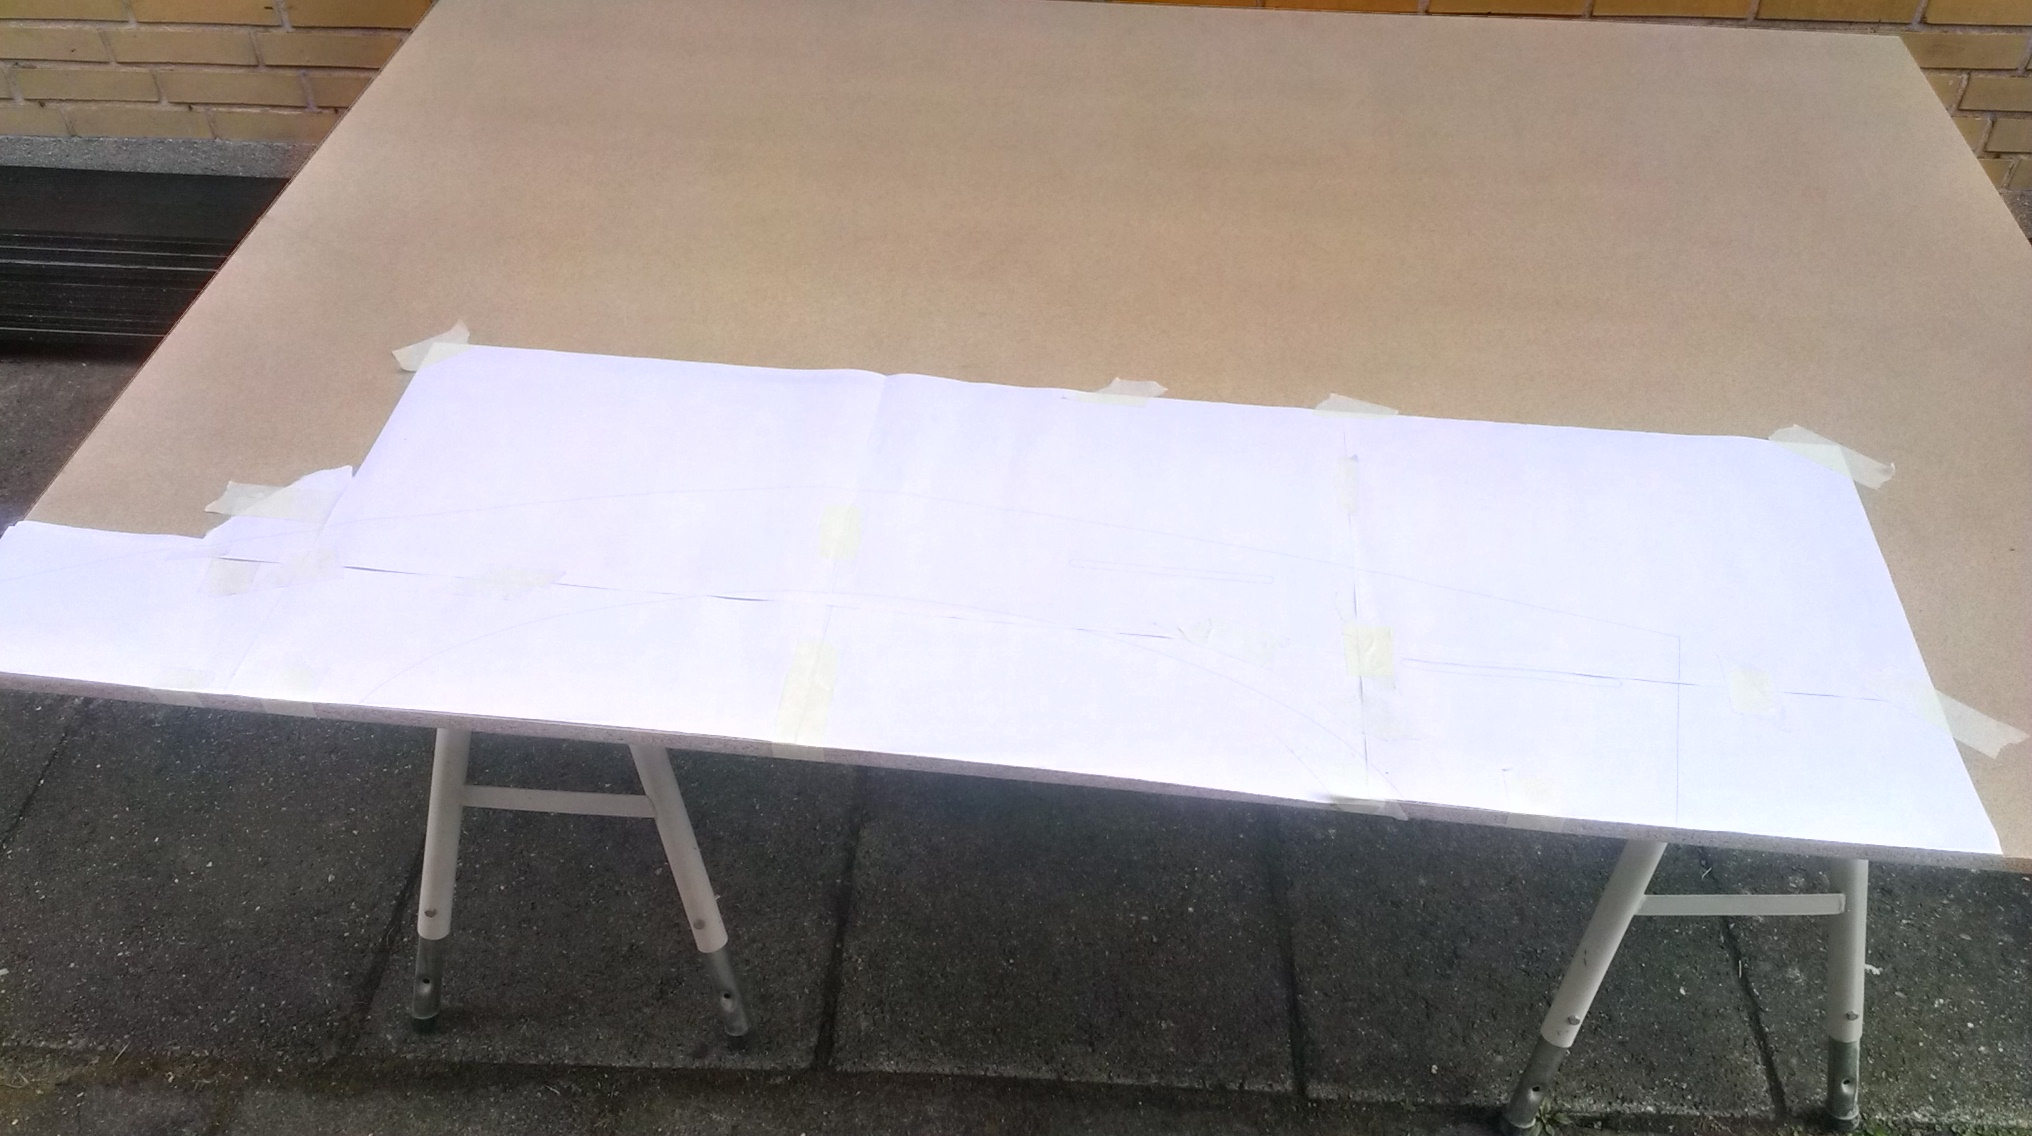
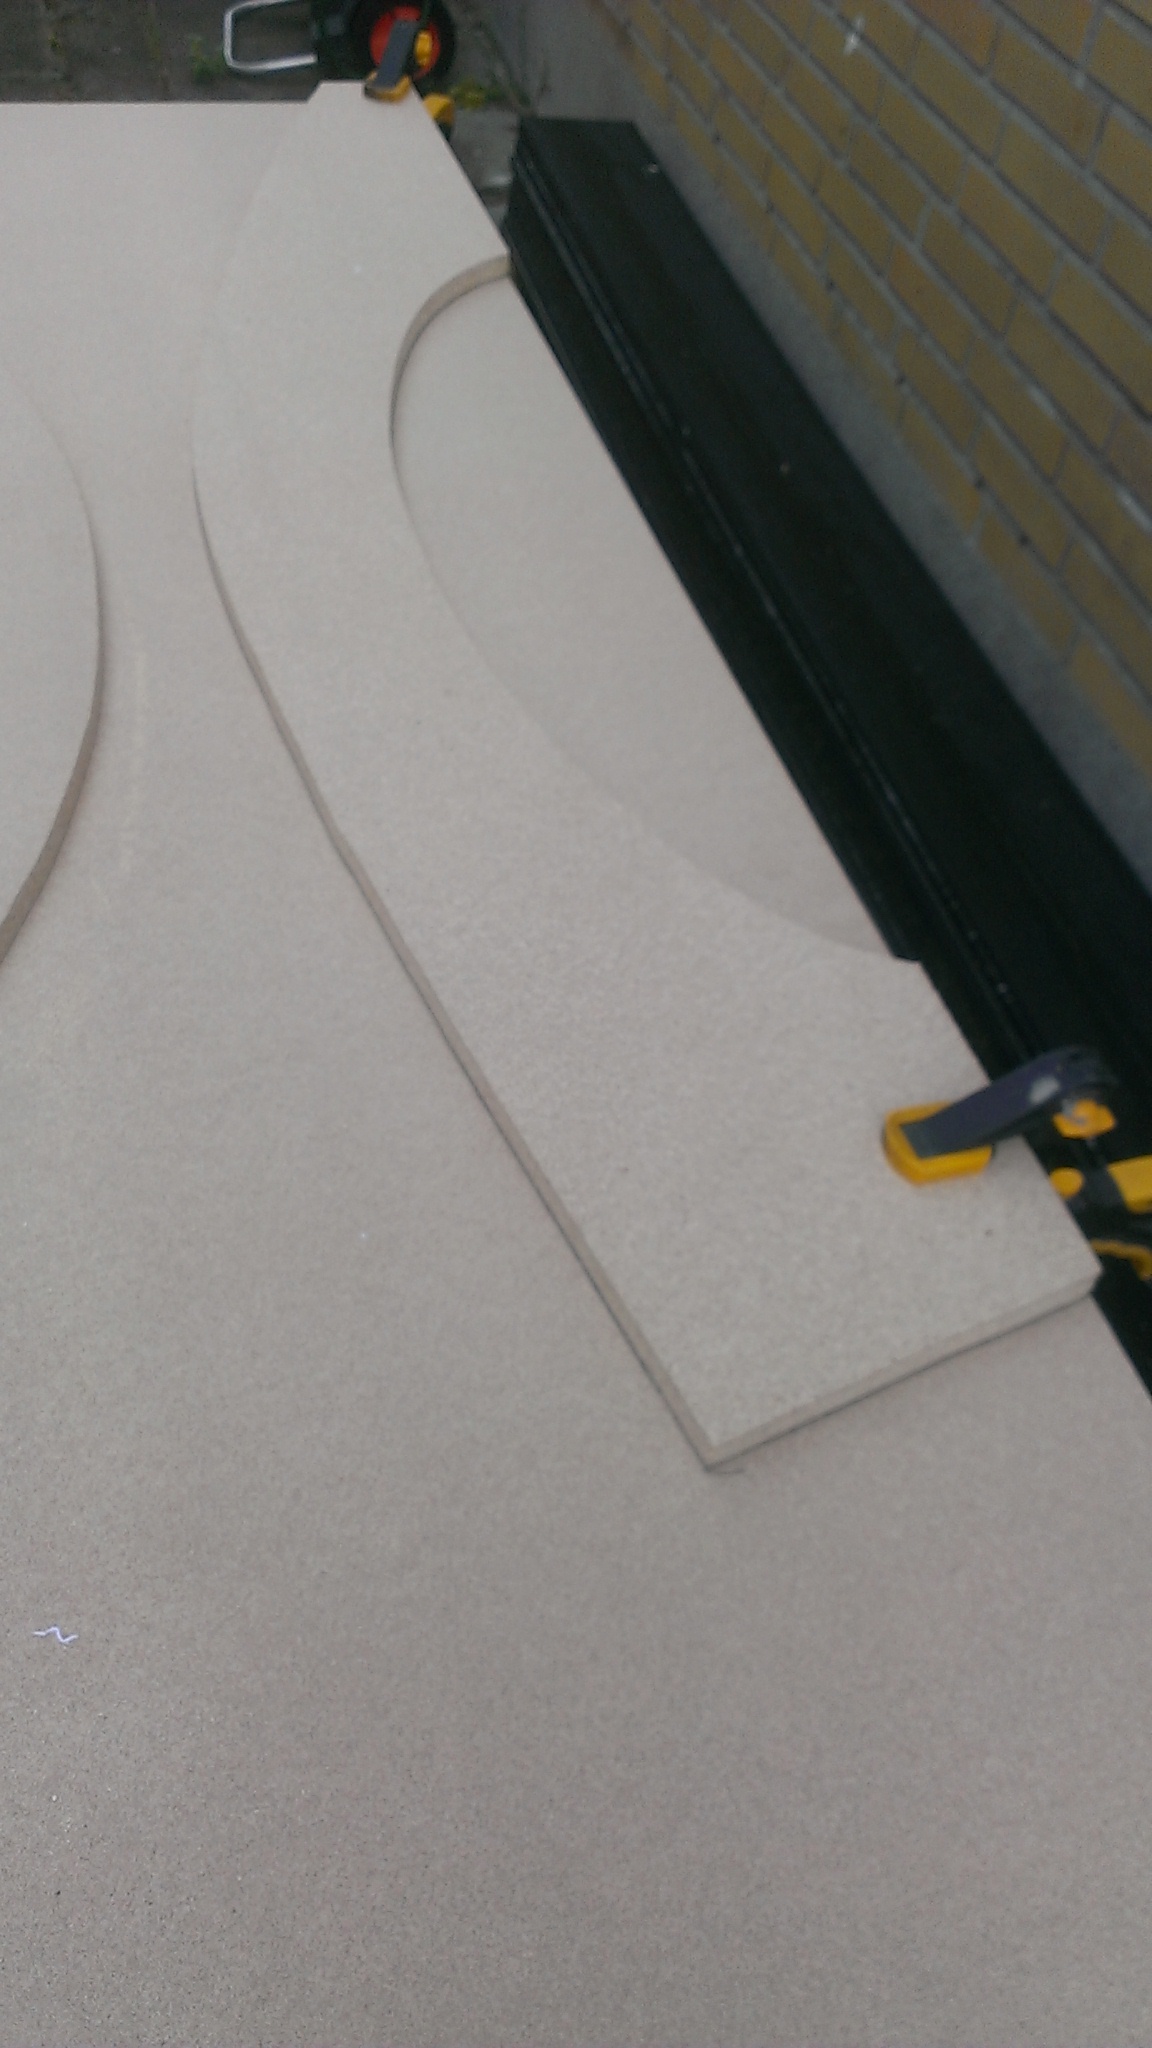
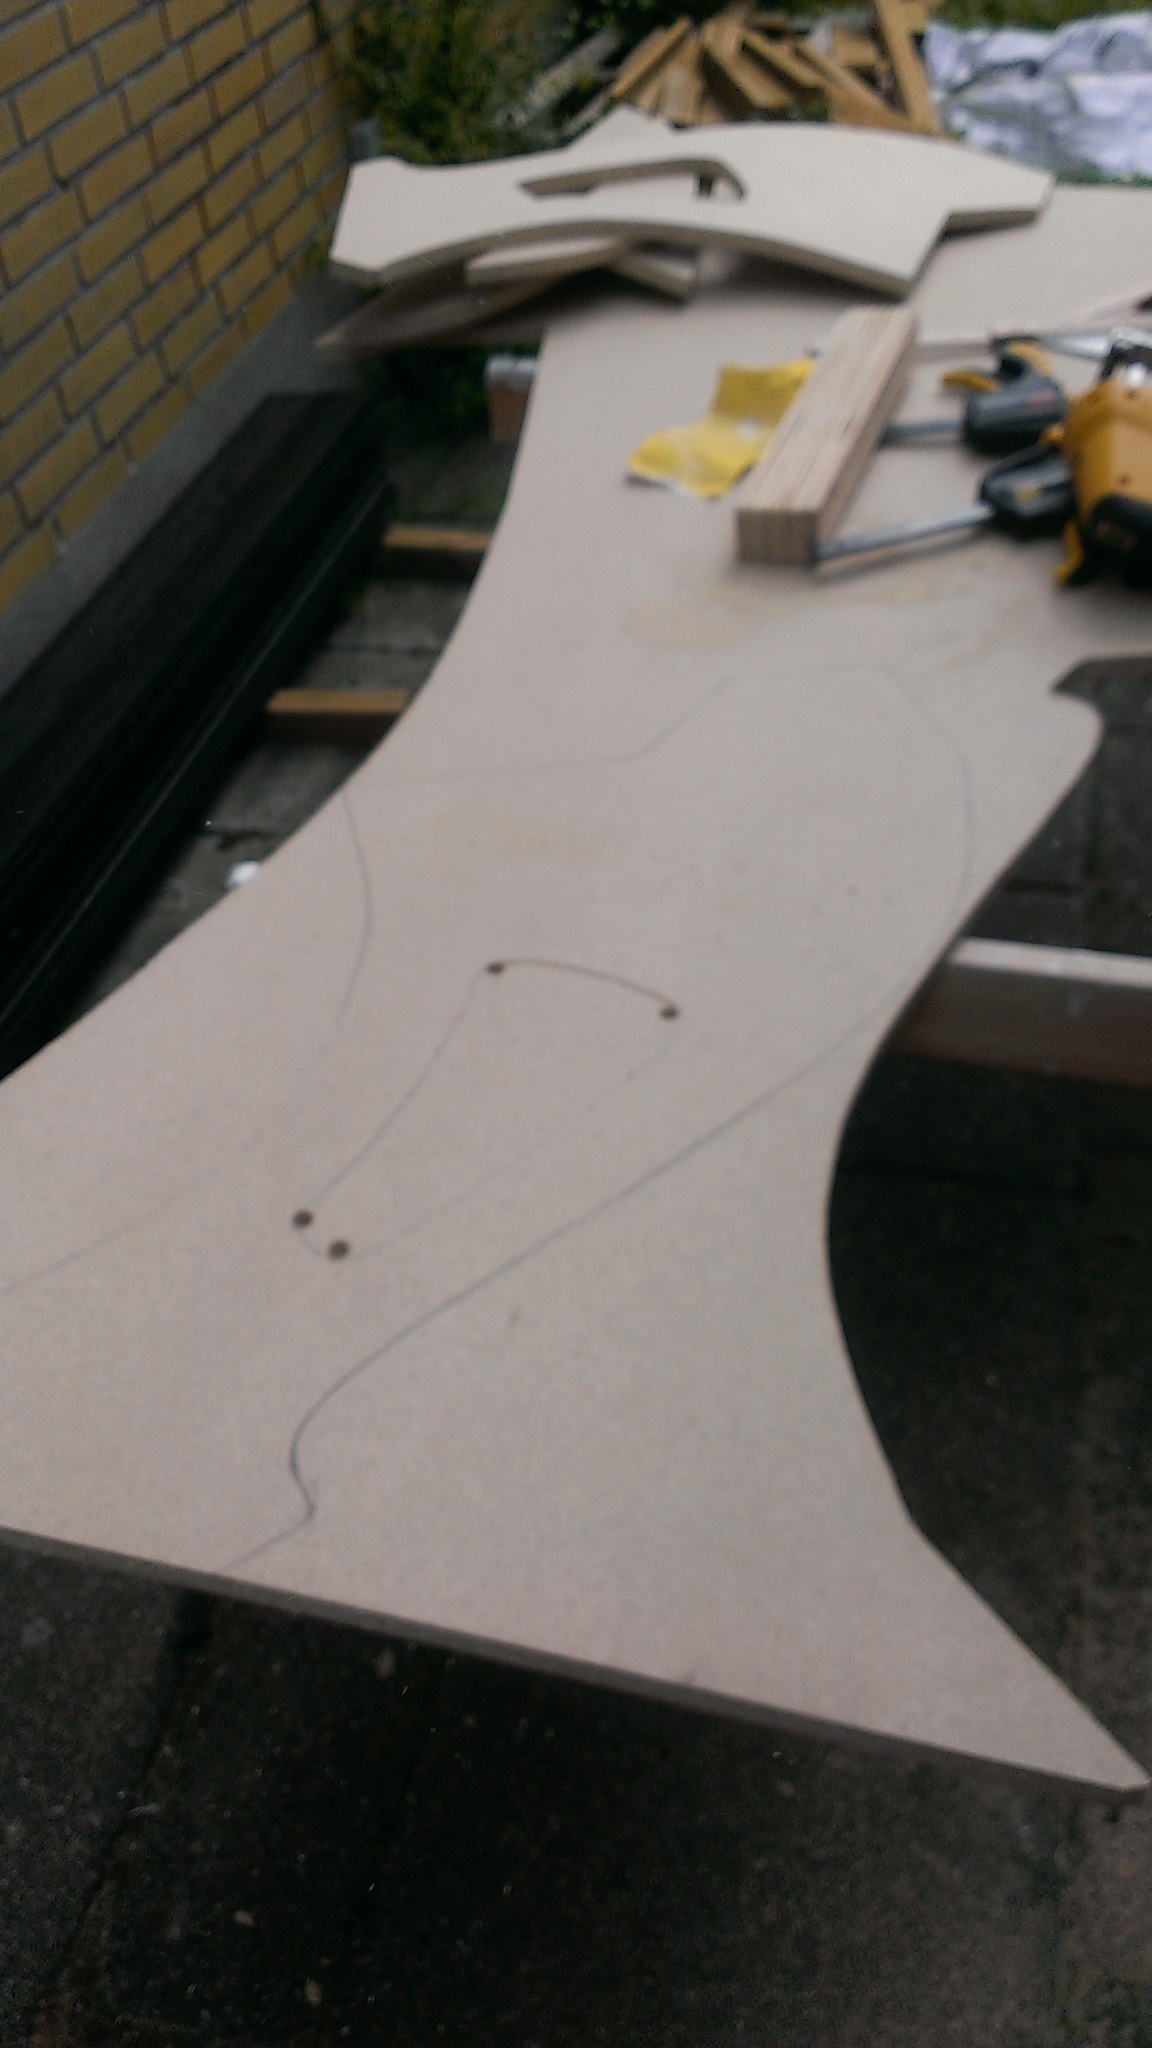
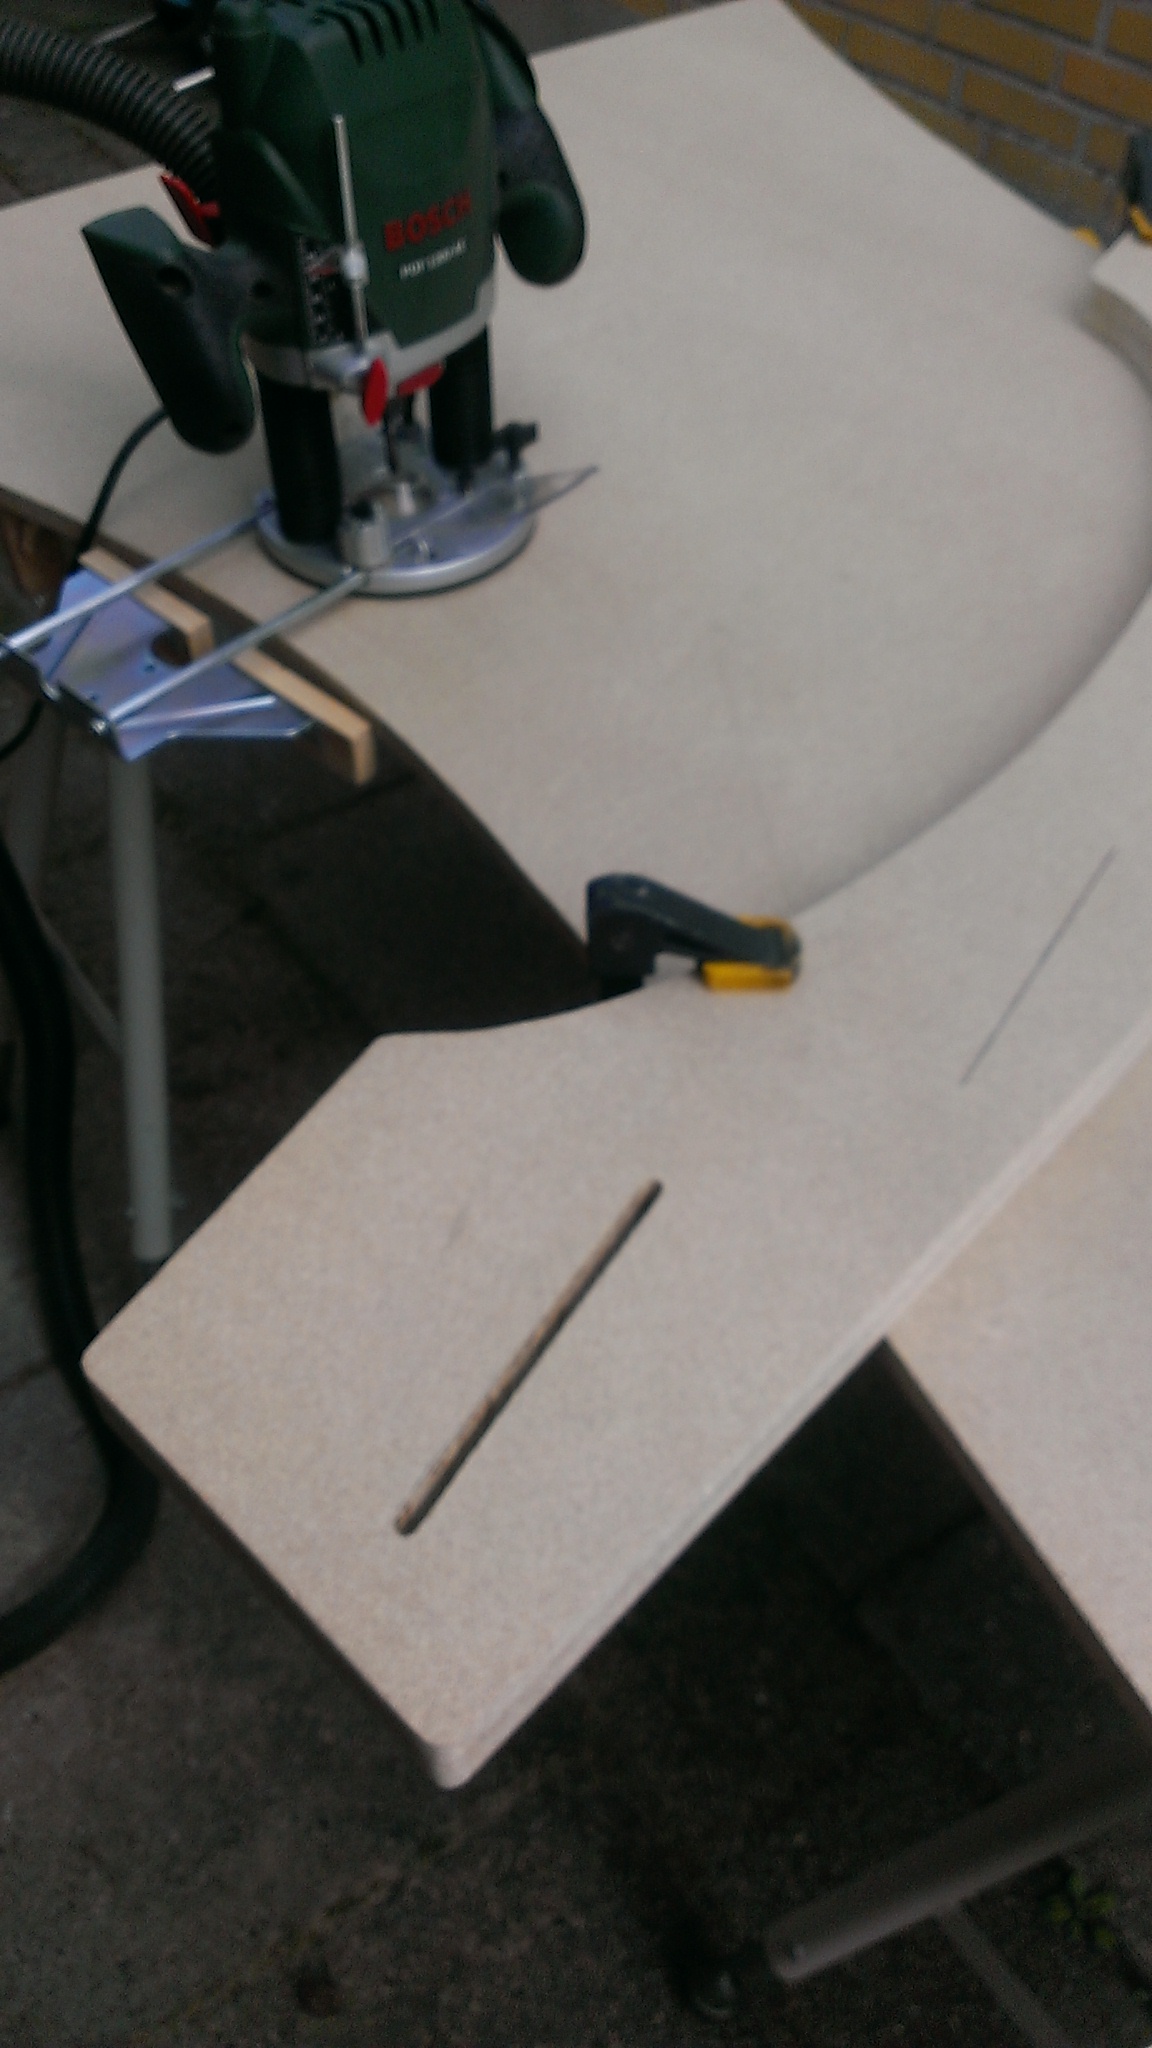
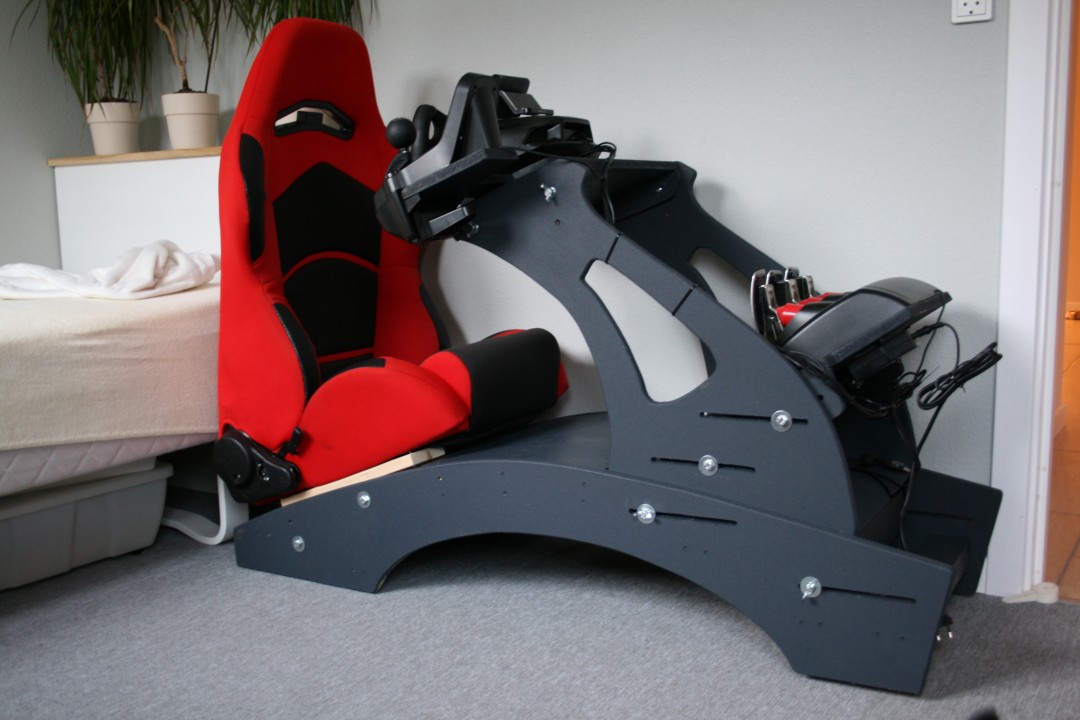
While waiting 2 months for my DD base to arrive, I might as well build a new steering wheel, because my wooden rim wont survive the forces. Since I spent 800€ on a DD base, I had to save some money and make it myself. But looking around, I quickly realized it had to be sturdy and working with these materials is costly, so found a semi DIY project.

3Drap had some F1/GT3 wheels with space for buttons and rotary encoders. They also have 3d printed gear paddles. The rims are either made of carbon or alloy and 3dprint in between. Good comprise and it would be possible to custom it to my needs.

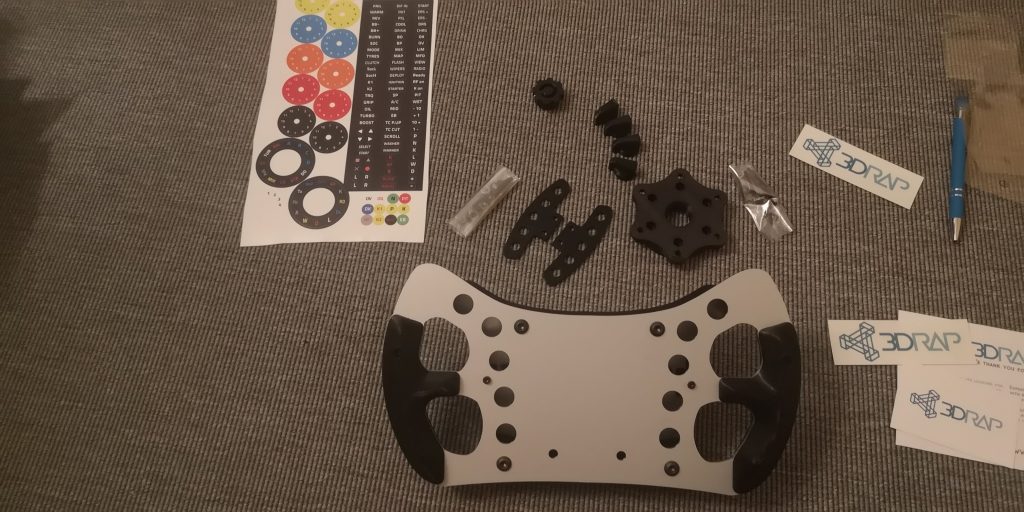
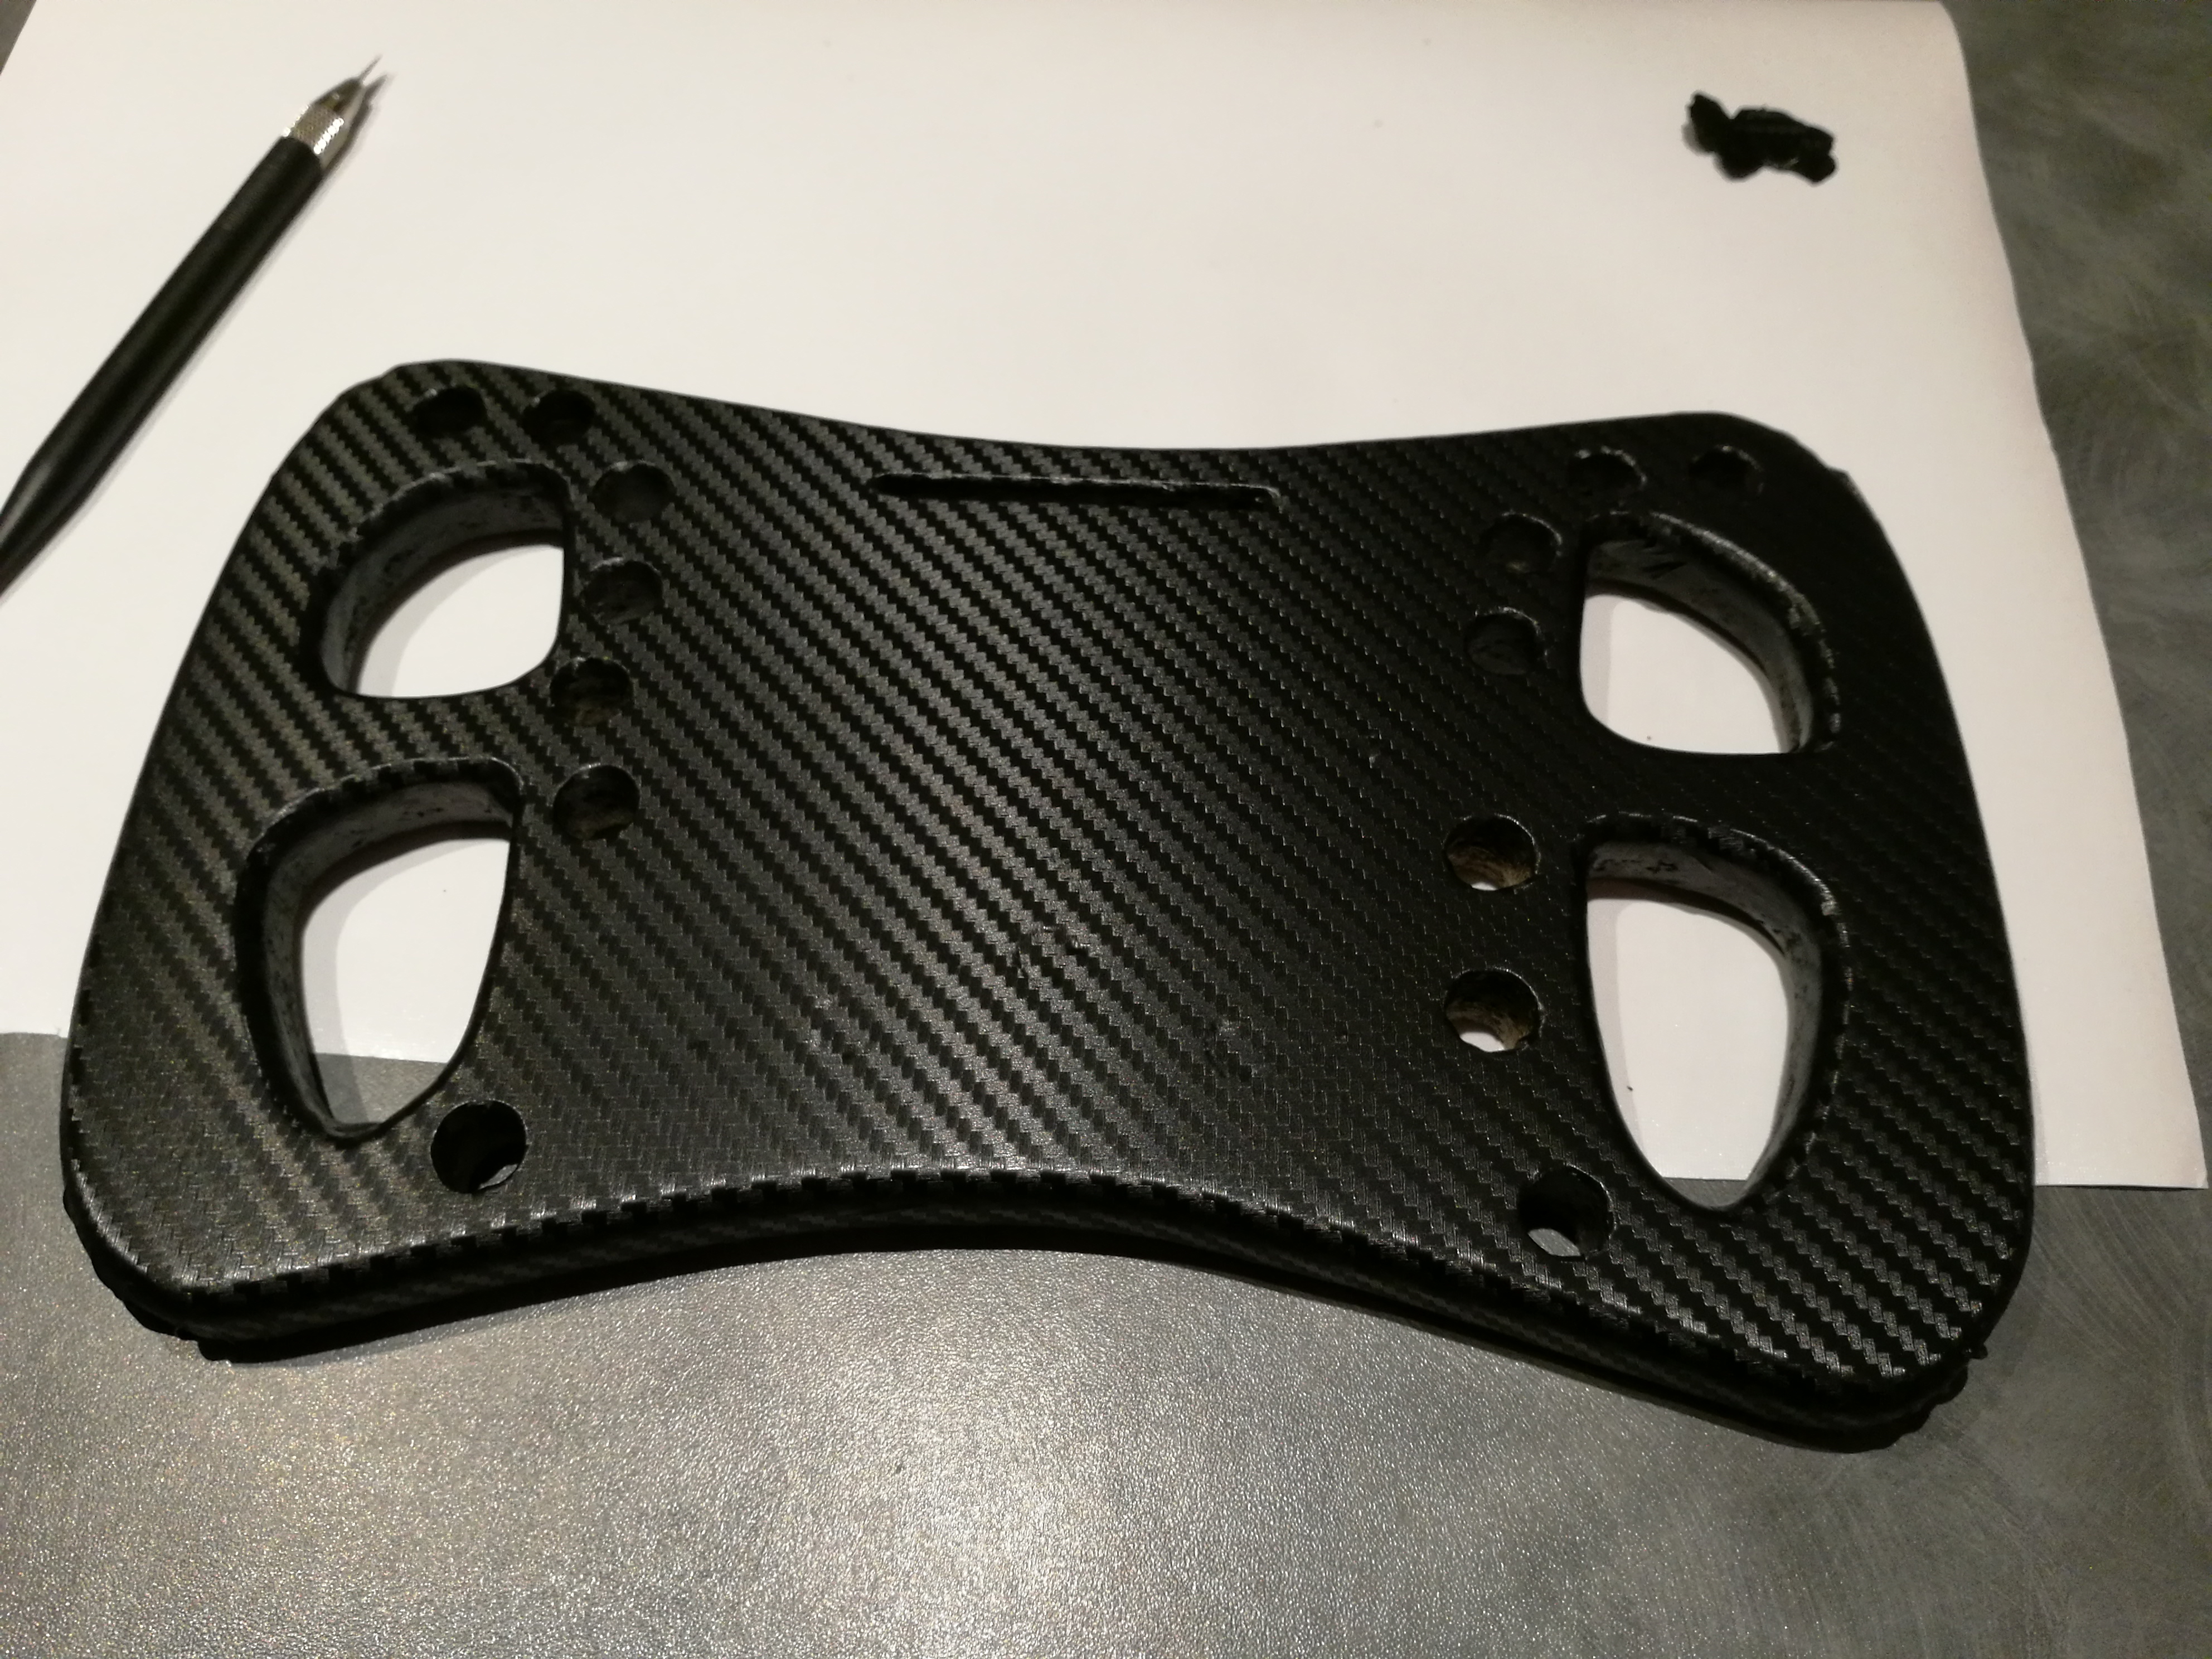
Went with the alloy to save money, and I already have carbon vinyl in stock, so I can fake that carbon look.

I will make a post about all the details of making this rim, in a few weeks.
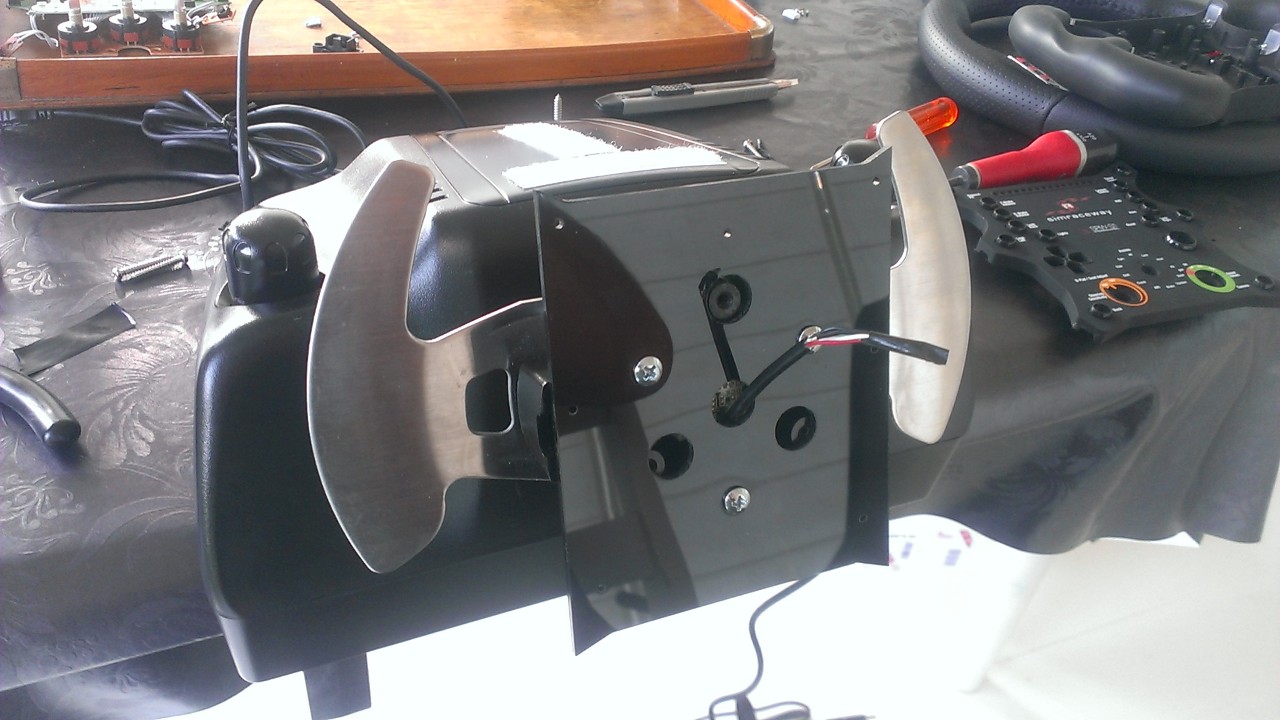
Pedals mod

Those 400-500€ pedal sets looks great, but really out of my reach, especially after spending on both a base and a rim, so had to cut some corners here.

The G27 have some sturdy pedals, and they are quite easy to mod. I found some guy on youtube who had added a loadcell bar to his pedals, this is giving it the correct feel when braking, really makes a difference.

A diy videoguide here by Márton Barkos

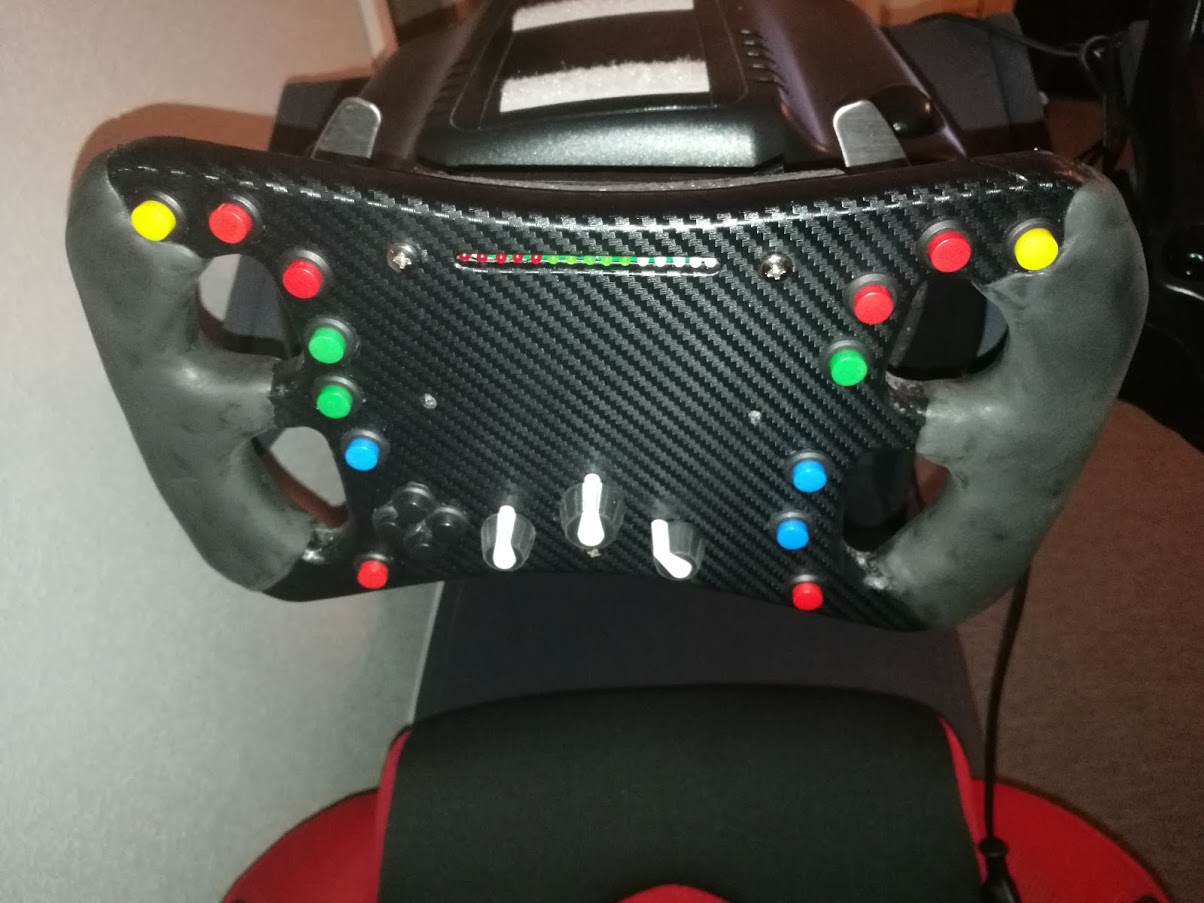
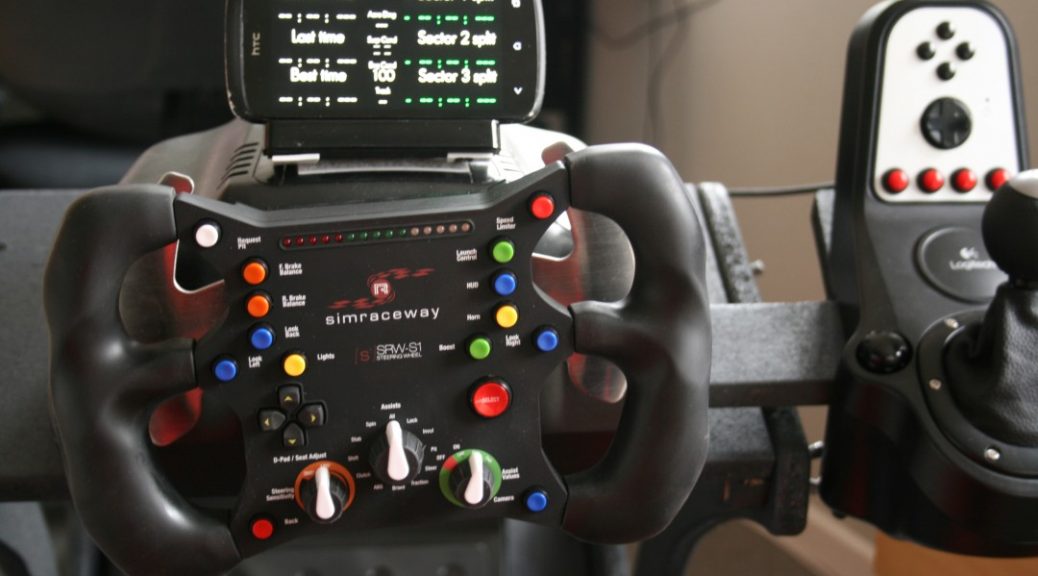
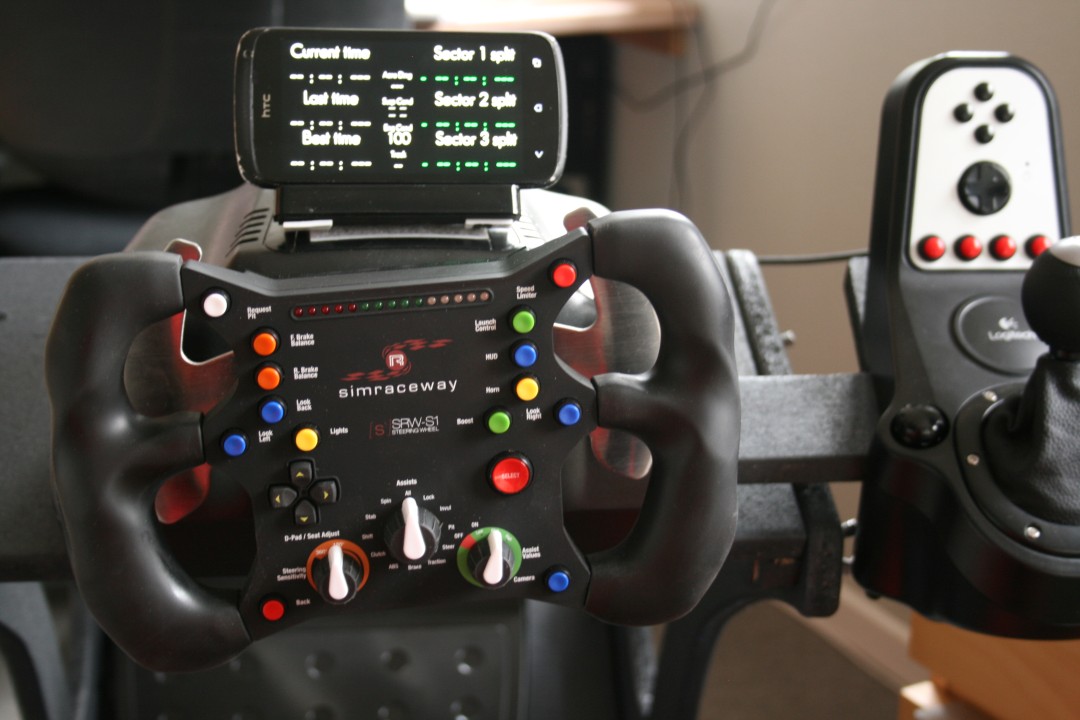
The steering wheel in action (running 14nm)

G27 Steeringwheel mod number two with Sugru


Well, the SRW-01 mod have done me well, but now I have worn down the plastic cover, and I even tried to glue it, but it’s not holding up.

So while im looking for a new used SRW-01 for sale somewhere, I’m trying to make a more solid steeringwheel with the use of the eletronics from the SRW-01.

I have researched alot and came up with the solution that I can only reuse the pcb print and connections.

So new supplys… buttons, actually 17 of them. All I could find was 25mm long where 20mm where sunken.


I have two options, either get a lasercut 5mm acryl or try to make it in a wood material.

Making a lasercut 5mm acryl is most costly, and takes some time to get i drwan correct and sent to the cutter. The result though might prettier, but alot can go wrong, if I somehow made a faulty drawing or altered the form along the way.

So I chosed wood, actually MDF

Its easier to work with, its cheap, and easier to do over again.

when reusing the electronics, the pcb actually sets the limits of size and button placements, and my goal is to make it a bit bigger than the original SRW-01 and more like the real thing.

Real formula wheels are about 28cm wide, so shall mine 🙂

I thought of reusing the handelbares but the contruction and the way they should be connected to MDF would not last, so a different aproach was needed. The handlebars should be part of the wood.

Designed it in 3d, made a 2d schematic for cutting.

001 002
Making all the edges round and nice, and drilling all the button holes.
and drilling out space for the pcb.
003 004
When all sanded down to a good result i painted it black, though in the end I will properly add Carbon look alike plastic wrap.
005 006
A days work, now it needs to dry….
will update this post in a week or so.
got time to som more work on this project.
Bought some carbonfiber laminating film, not that easy to apply around the narrow bends but the rubber handlebars will cover those.

cof

cof


cof

And testing with buttons

cof


All the wirings to the new buttons, had to remove all the old switches

dav

The backplate

mde

Result so far, now its testing time.

sdr

mde

mde

Final result with 12 pcs of 5gram Sugru bags on each handlebar.
It is sanded with corn 400 afterwards to give a kind of “eraser” feel.
Great grip.

Formula racing steeringwheel G27 mod


The Logitech G27 steeringwheel is an okay steeringwheel considering the price.

But I like driving formula cars and le mans racers etc. in the pc racing simulator game Project c.a.r.s.

So I began to look for my options for a more racing kinda like steeringwheel.

I found a guy who had modded his G27 with the Simracingway SRW-01 steeringwheel.

Billedresultat for simracingway srw

This steeringwheel has a usb cord. It has a bit of plastic feling but its okay and have a good form and a lot of buttons.

I found a guy online who sold a used one, really cheap so what the heak.

Preparation

I had to get it attached to the wheelbase so measured it all up and drawed a holder in Qcad.

you can download the pdf here: srw-s1-001.pdf

I got it lasercut quite cheap, actually two because the could only do it in 3mm acryl and I wanted to be thicker.  And when making two why not make the screws “sunken”, thats why they are not identical.

001e


Disassamble

The flappy pedals will not be reused.

001d

001c

001b

001a


Wiring through the G27 wheelbase

This is actually the hard part, I had to cut the wire and solder it back on. I dont have any picture of this but basicly just find a place were the wire can go in the wheelbase and then place it along the original G27 wire that goes to the steeringweel.

002

003

When the two holder plates are combined, the screws are “sunken”:

004


Final result

imag2729

imag2728

006

005


Software

Download the fanaleds for controlling the blinking gearshift LEDs.

And the dials works with a little “virtual joystick program I found online somewhere but apparently have been removed.

you download the utility here (15mb) rar file:

setup-srw-s1-dial-utility-1-6

You might need to install a virtual joystick usb universal driver, look it up, dont remember where and how etc.

DIY Playseat – racingrig

After I have posted my DIY racingrig on the Project C.A.R.S forum, a few dozen have asked for the drawings, now I’m publishing it here for every one. Sorry there aren’t so many pictures but didn’t know it became a “guide”.


Last year I bought myself a great Logitech G27 steeringwheel. but soon I started to be jealous on all those racing rigs out there.

I found the expensive Playseat, where you almost are lying down as if it was a formel car or a le mans racer.

Its too expensive for my budget so started to mess around to see how I could build something like that.

First of I found a used, very cheap “racing” car seat.

I then tossed some wood together to find out the angles and placements of pedals, seat, and steeringwheel.

Prototype

Alot of adjustments and replacing it over and over again made me think at a racingrig should be some though of adjustable.


Design

I then began to draw it up in 3d, and quickly I figured out how it could be adjusted easily, within limits.

Here’s my initial 3d drawings:

racingseat4racingseat5 racingseat2 racingseat3

And with a 3d skeleton with my height, just to see if I got the dimensions correct.


racingseat8

wireframe

Now that the design was defined, It was time to convert the 3d to actual wood.

I flattened the shapes and imported it to Qcad and then made them 1:1 scale. Saved it to pdfs and printed them as “posters”.

When doing so, it’s simple to lay them on MDF wood and tape them together and use it for cutting guidances.

2d  “A4 format” pdf’s print as posters:

wheelbase.pdf

sidepart.pdf


Cutting

imag2678

imag2681

imag2682

imag2685

imag2684

When cutting two identical parts, its impossible to make them identical, but after cutting them, just align them next to each other and sand them into same shape.


Assembling and testing

imag2688

imag2711


And final touches

Paint, “floor”, holder for gearshift (only uses the buttons)


img_9432-custom

img_9450-custom

img_9445-custom

img_9435-custom

It even fits in the room when not using it.

img_9465-custom

img_9443-custom


Recover corrupted SDcard

A coworker came with sad mood. His tablet microsdcard had failed.

As a good samarian I wanted to try my best to see if I could help.

The sdcard couldnt be mounted neither in windows nor in ubuntu. Photorec got read errors.

Wouldnt give up so I tried  cloning the card with gddrescue to a imagefile and then ran photorec, and suprise, now It found all his lost pictures and videos.


Make a clone off the sdcard in ubuntu:

[code]

sudo ddrescue -v /dev/mmcblk0 /home/user/image.img image.log

[/code]

Then make photorec recover files from the clone

[code]

sudo photorec /home/user/image.img

[/code]

follow the onscreen guide.


Philips Smart TV 47PFL6008S

Here’s my tips if you just bought a Philips Smart TV 47PFL6008S or thinks of buying it.

Just bought a new Tv on sale, since the new 2014 models are comming up soon.The 47PFL6008S is a late 2012 TV, but I wont buy the top of the line, due to the rapid evolution in Smart TV’s at the moment.

It got a great design, kinda minimalistic, great screen, and at a fordable price.

The smart TV feature sucks big time, but not something I miss, since I have my Raspbmc for media content, streaming from my NAS.

The Philips Remote can control the Raspbmc when viewing it through HDMI. Think its the “Zeroconf” feature but what a fantastic feature.

TIPS

Heres my tips that I have learned in these four days on good side and bad side:


  1. Test to see if your TV is new! When on channel, press 123654 to see the installation date. Press 062596 and info to see running hours etc. If It aint working try again, I had to try multiple times to get it working.
  2. When you have searched and adjusted the channels and favorites, deactive the automatic channel search, else it will delete your favorites.
  3. Dont update the firmware if you dont have any problems or missing feature. the 173.46.00 update made the TV go for standby continuesly every 2 minute. Ended up disconnecting powercord for 5 mins and ended up with lost channels, but standby problem solved.
  4. The screen can be adjusted in many ways but its not at all easy, and very frustrating when you want to avoid some of that amateur contrasts TV’s have these days. My hollywood movies are preferred looking like hollywood!
  5. Go read Philips support forum, you will be alot smarter on your TV – google it, something like support.philips.com
  6. Stay away from the Smart TV function, its too slow, buggy, and somehow utterly useless,what you see is not what you get.
  7. It cant record to USB sticks, only External harddrives.
  8. Though it can use USB sticks to pause channels. Beware the Stick must have a certain speed, mine failed!
  9. The USB sticks are formated XFS fileformat, so forget about playing it on windows. But hey I’m a linux guy so who care.
  10. 3D Stereo (HSBS) works fine, but the passive glasses only works with side by side 3d (HSBS), and not but by Top and bottom (TAB). The TV supports it different kinds so I suspect the active glasses can handle both types?
  11. It got a SAT receiver but cant control motorized SAT’s. Havent tested SAt since I have cable.
  12. When searching for channels (DVB-C) it buts all its finding in one list including analog and radio channels. Its great so i dont have to switch sources to see different types.

When all this is said.

I like my TV, its good for its value.  And combined with my Raspbmc media center its how a smart Tv should be.