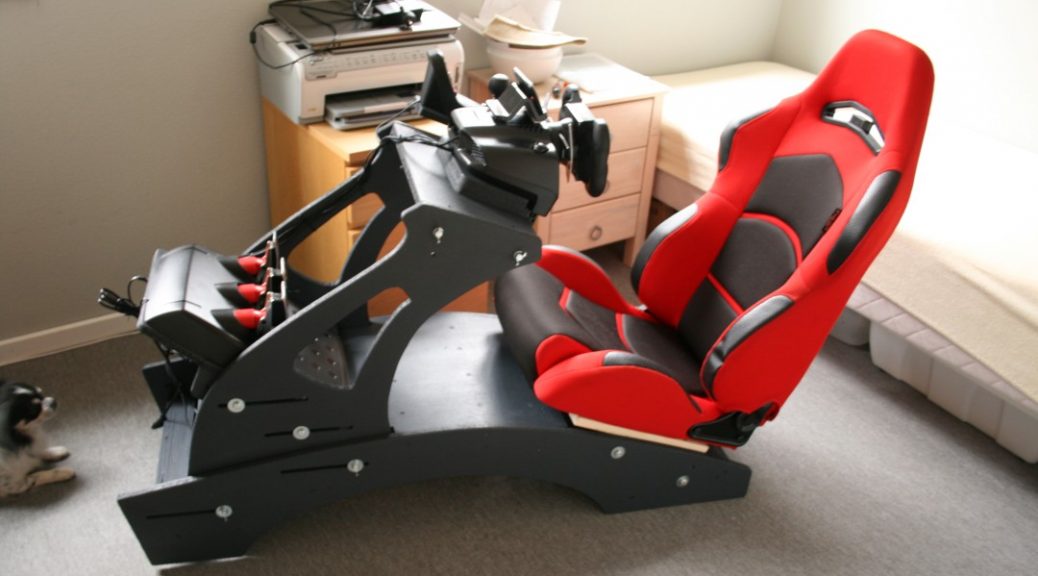
After I have posted my DIY racingrig on the Project C.A.R.S forum, a few dozen have asked for the drawings, now I’m publishing it here for every one. Sorry there aren’t so many pictures but didn’t know it became a “guide”.
Last year I bought myself a great Logitech G27 steeringwheel. but soon I started to be jealous on all those racing rigs out there.
I found the expensive Playseat, where you almost are lying down as if it was a formel car or a le mans racer.
Its too expensive for my budget so started to mess around to see how I could build something like that.
First of I found a used, very cheap “racing” car seat.
I then tossed some wood together to find out the angles and placements of pedals, seat, and steeringwheel.
Prototype

Alot of adjustments and replacing it over and over again made me think at a racingrig should be some though of adjustable.
Design
I then began to draw it up in 3d, and quickly I figured out how it could be adjusted easily, within limits.
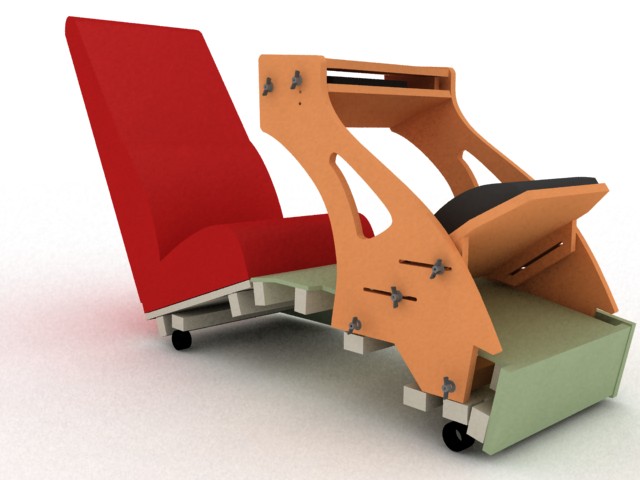
Here’s my initial 3d drawings:
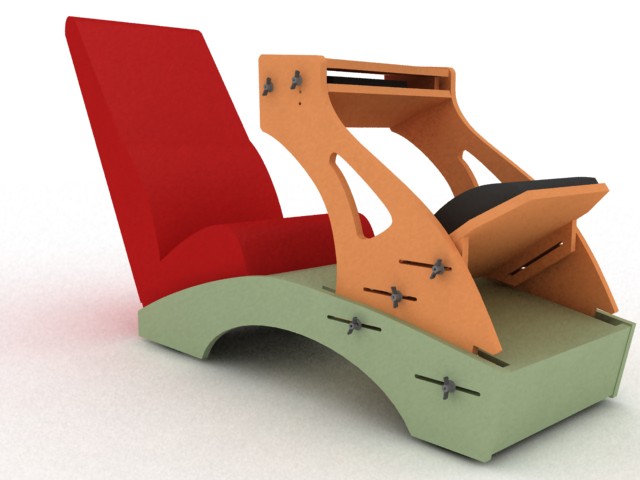
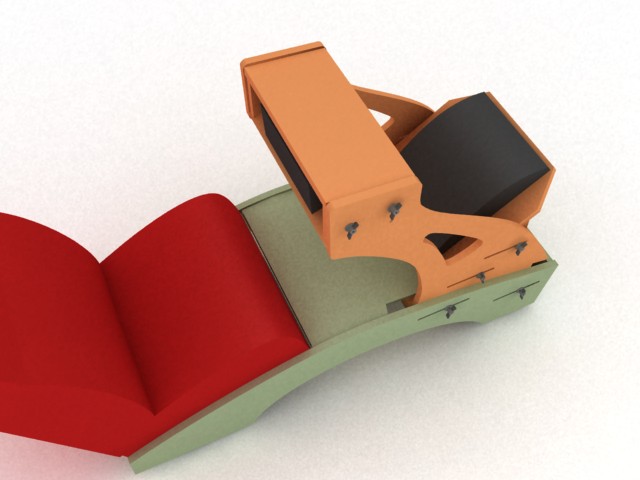
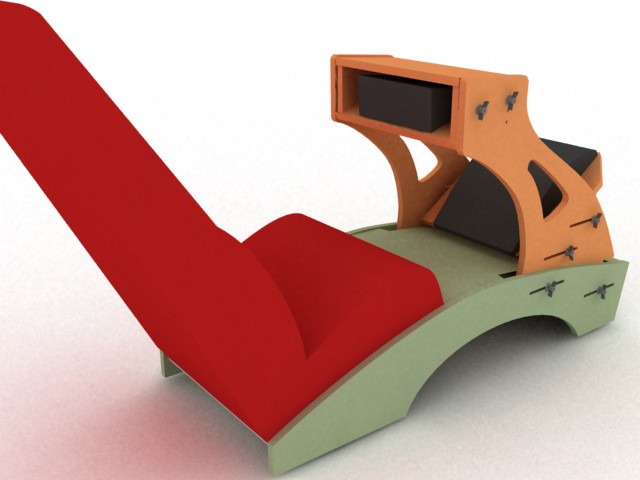
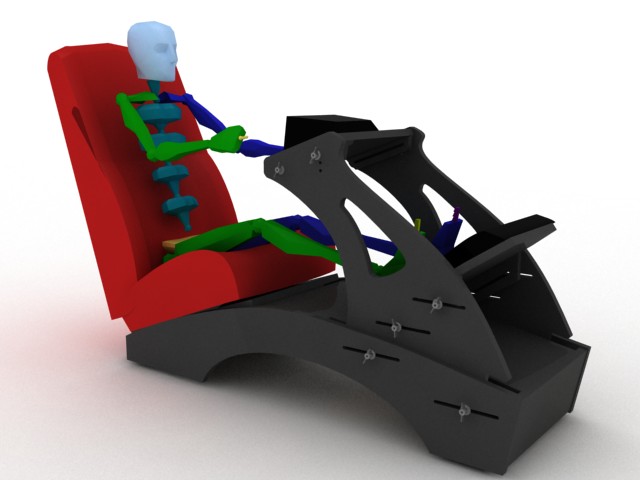
And with a 3d skeleton with my height, just to see if I got the dimensions correct.
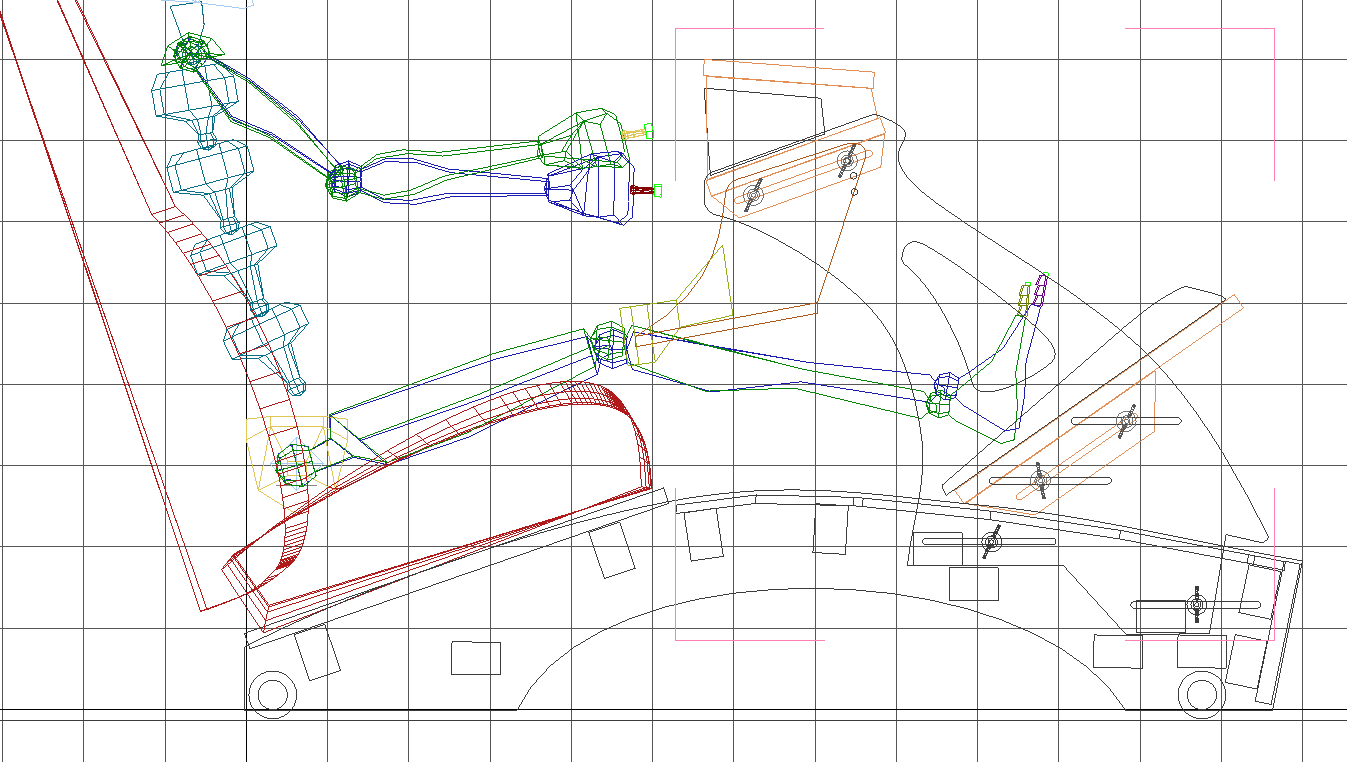
Now that the design was defined, It was time to convert the 3d to actual wood.
I flattened the shapes and imported it to Qcad and then made them 1:1 scale. Saved it to pdfs and printed them as “posters”.
When doing so, it’s simple to lay them on MDF wood and tape them together and use it for cutting guidances.
2d “A4 format” pdf’s print as posters:
Cutting
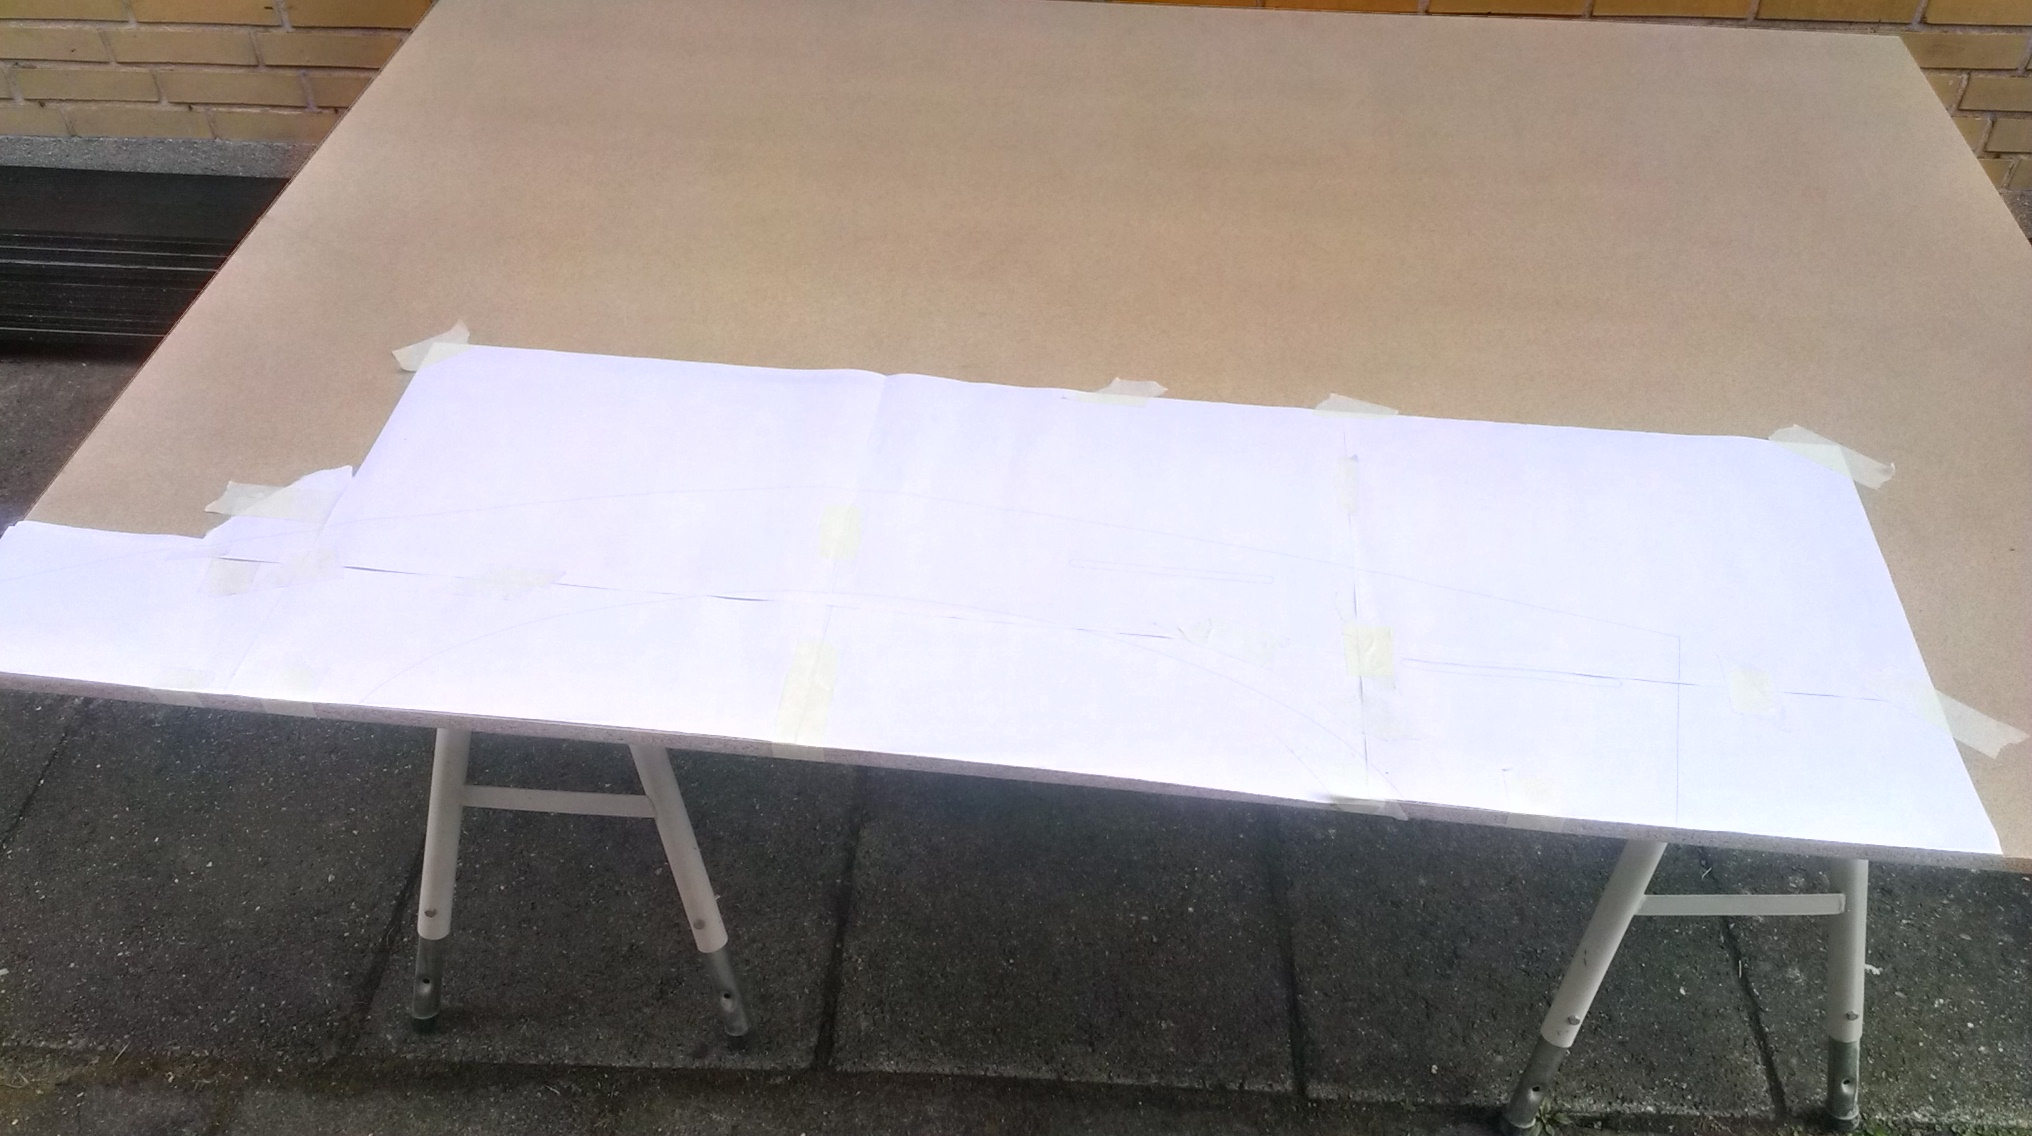
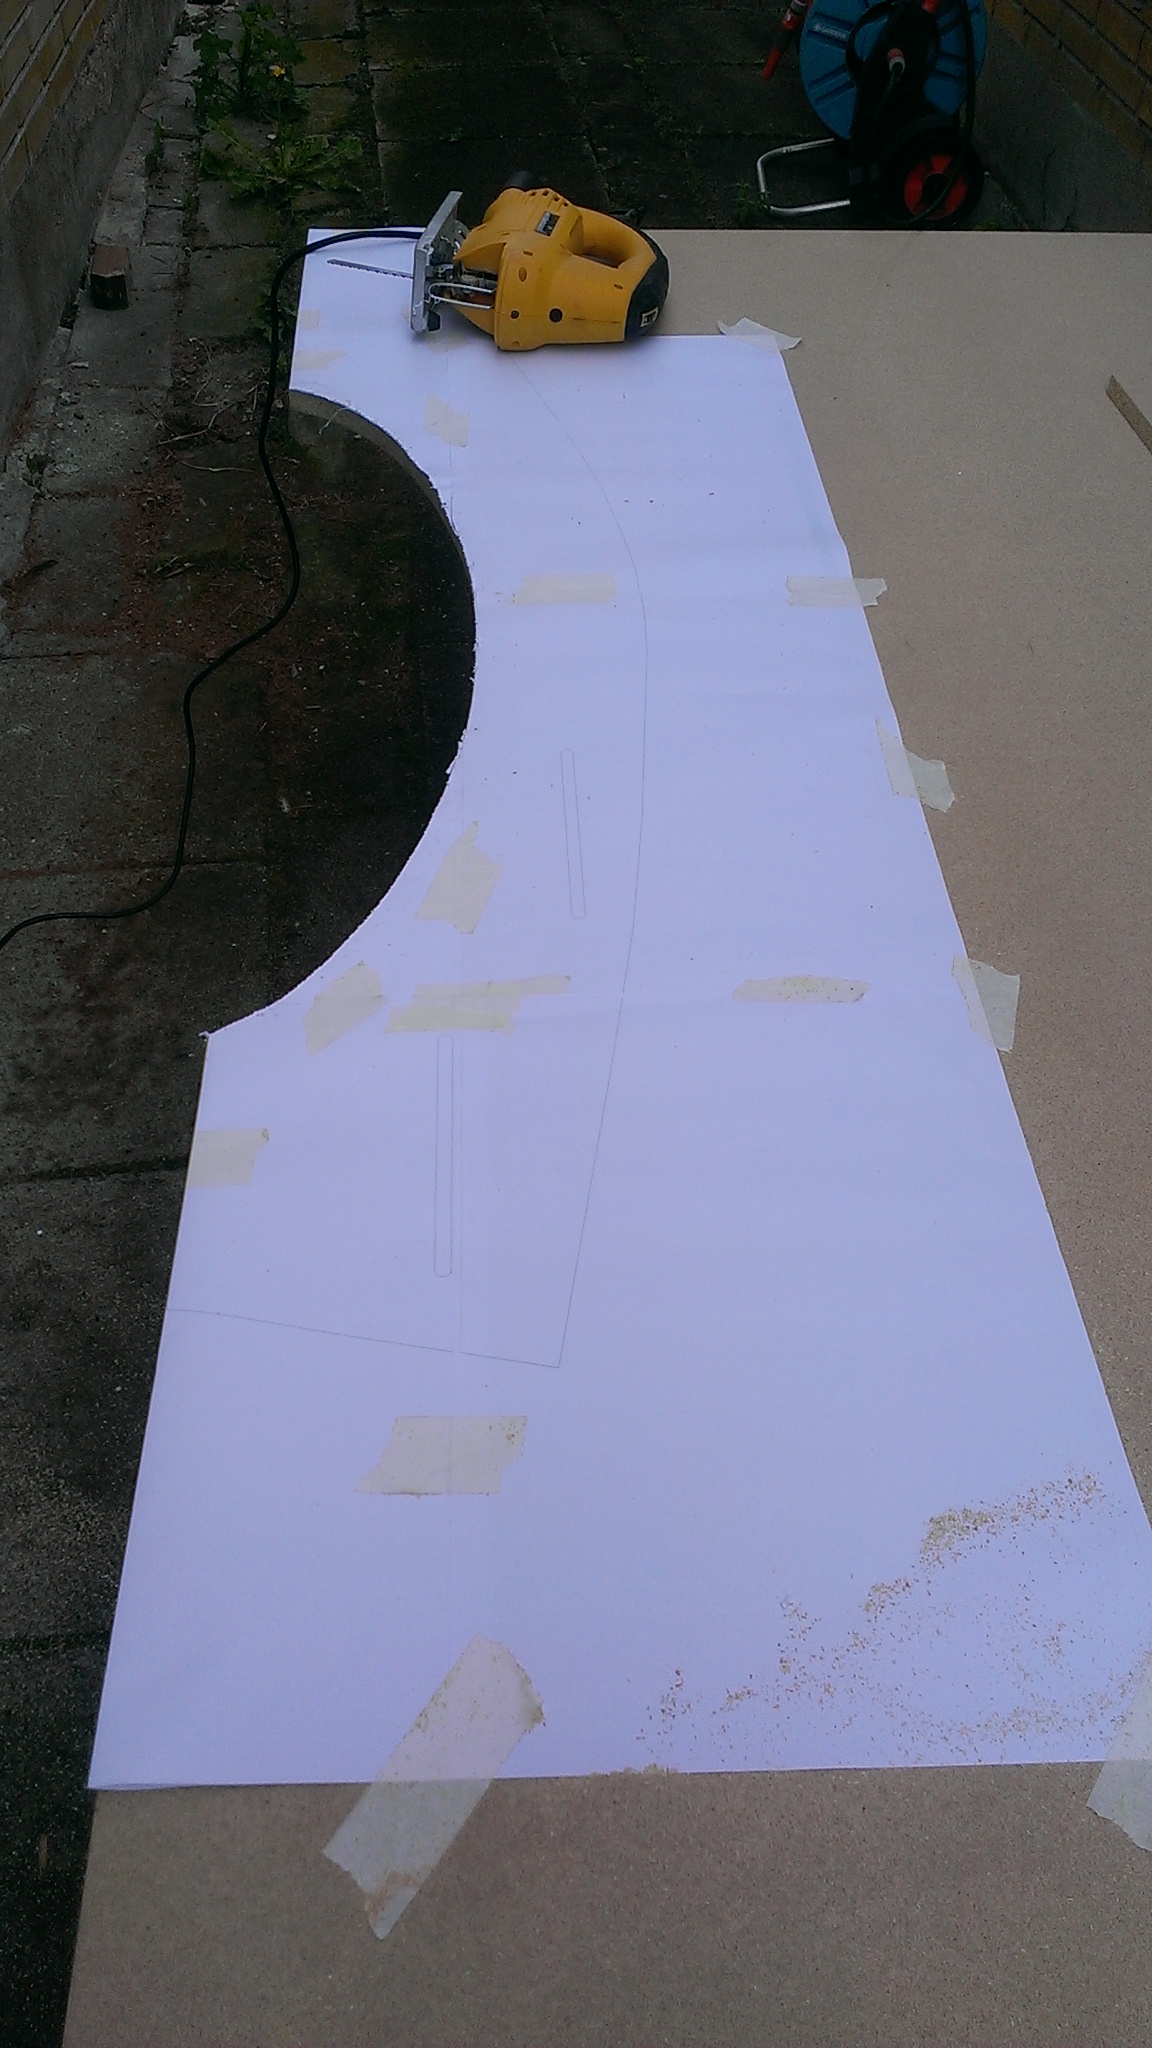
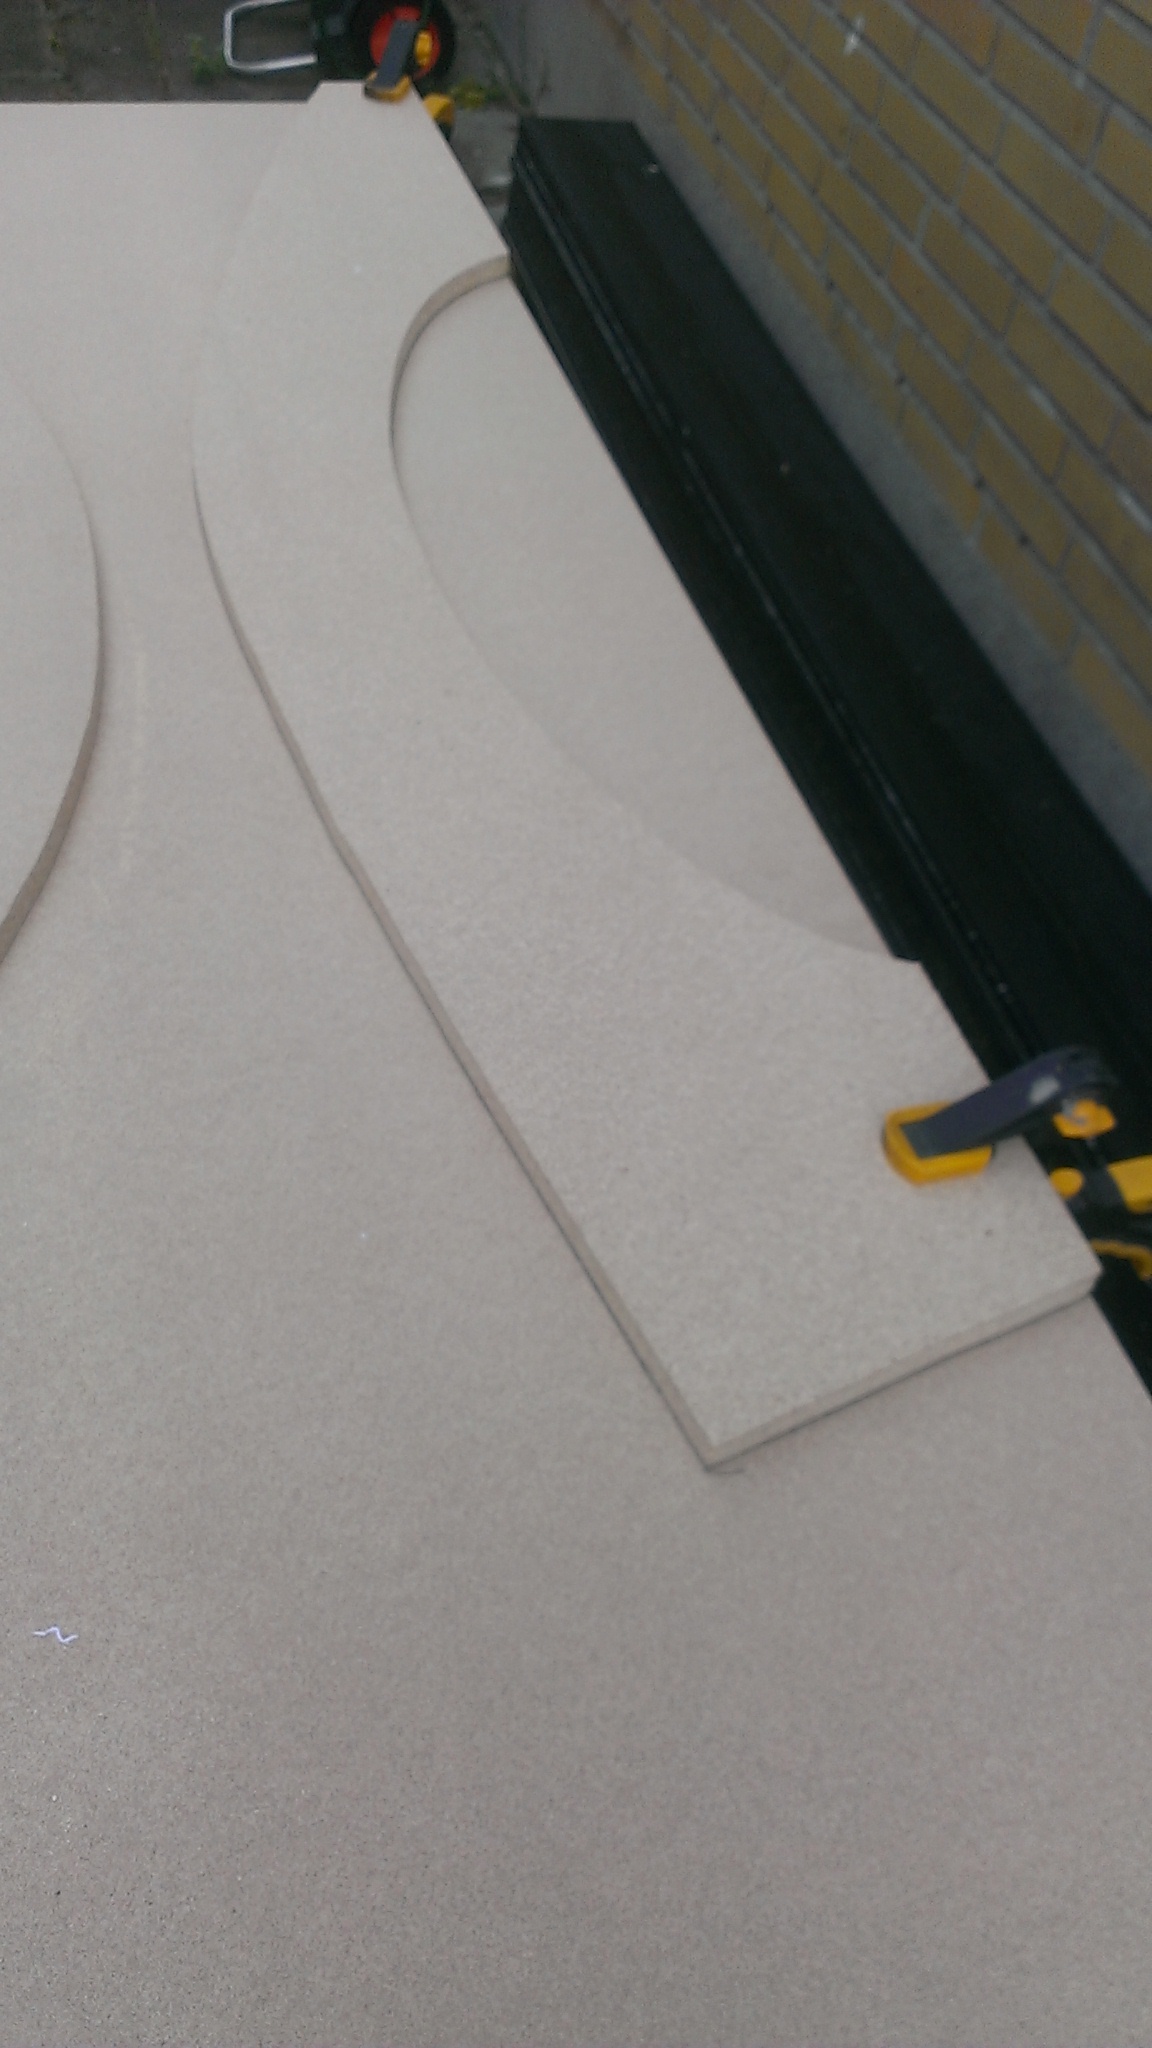
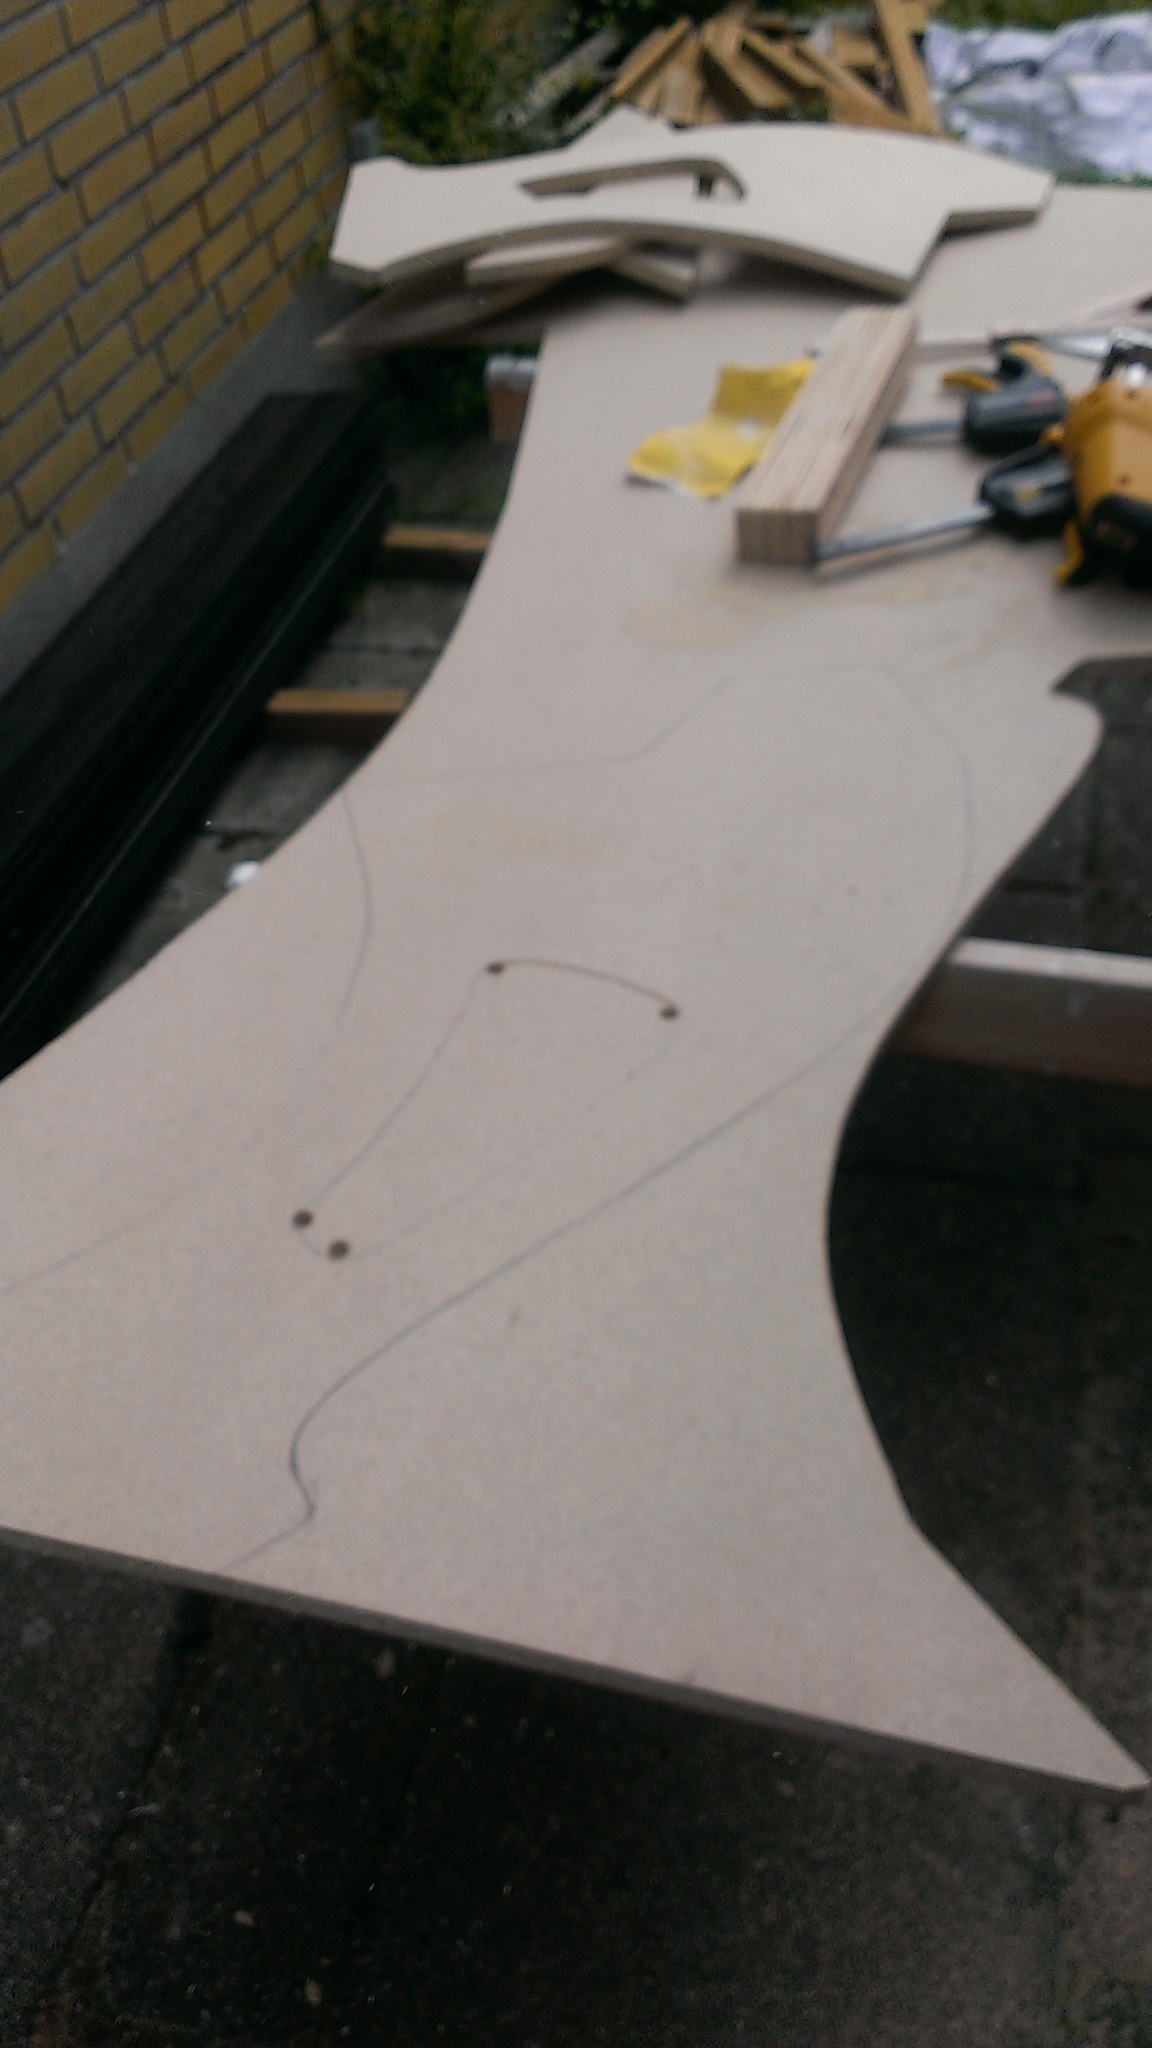
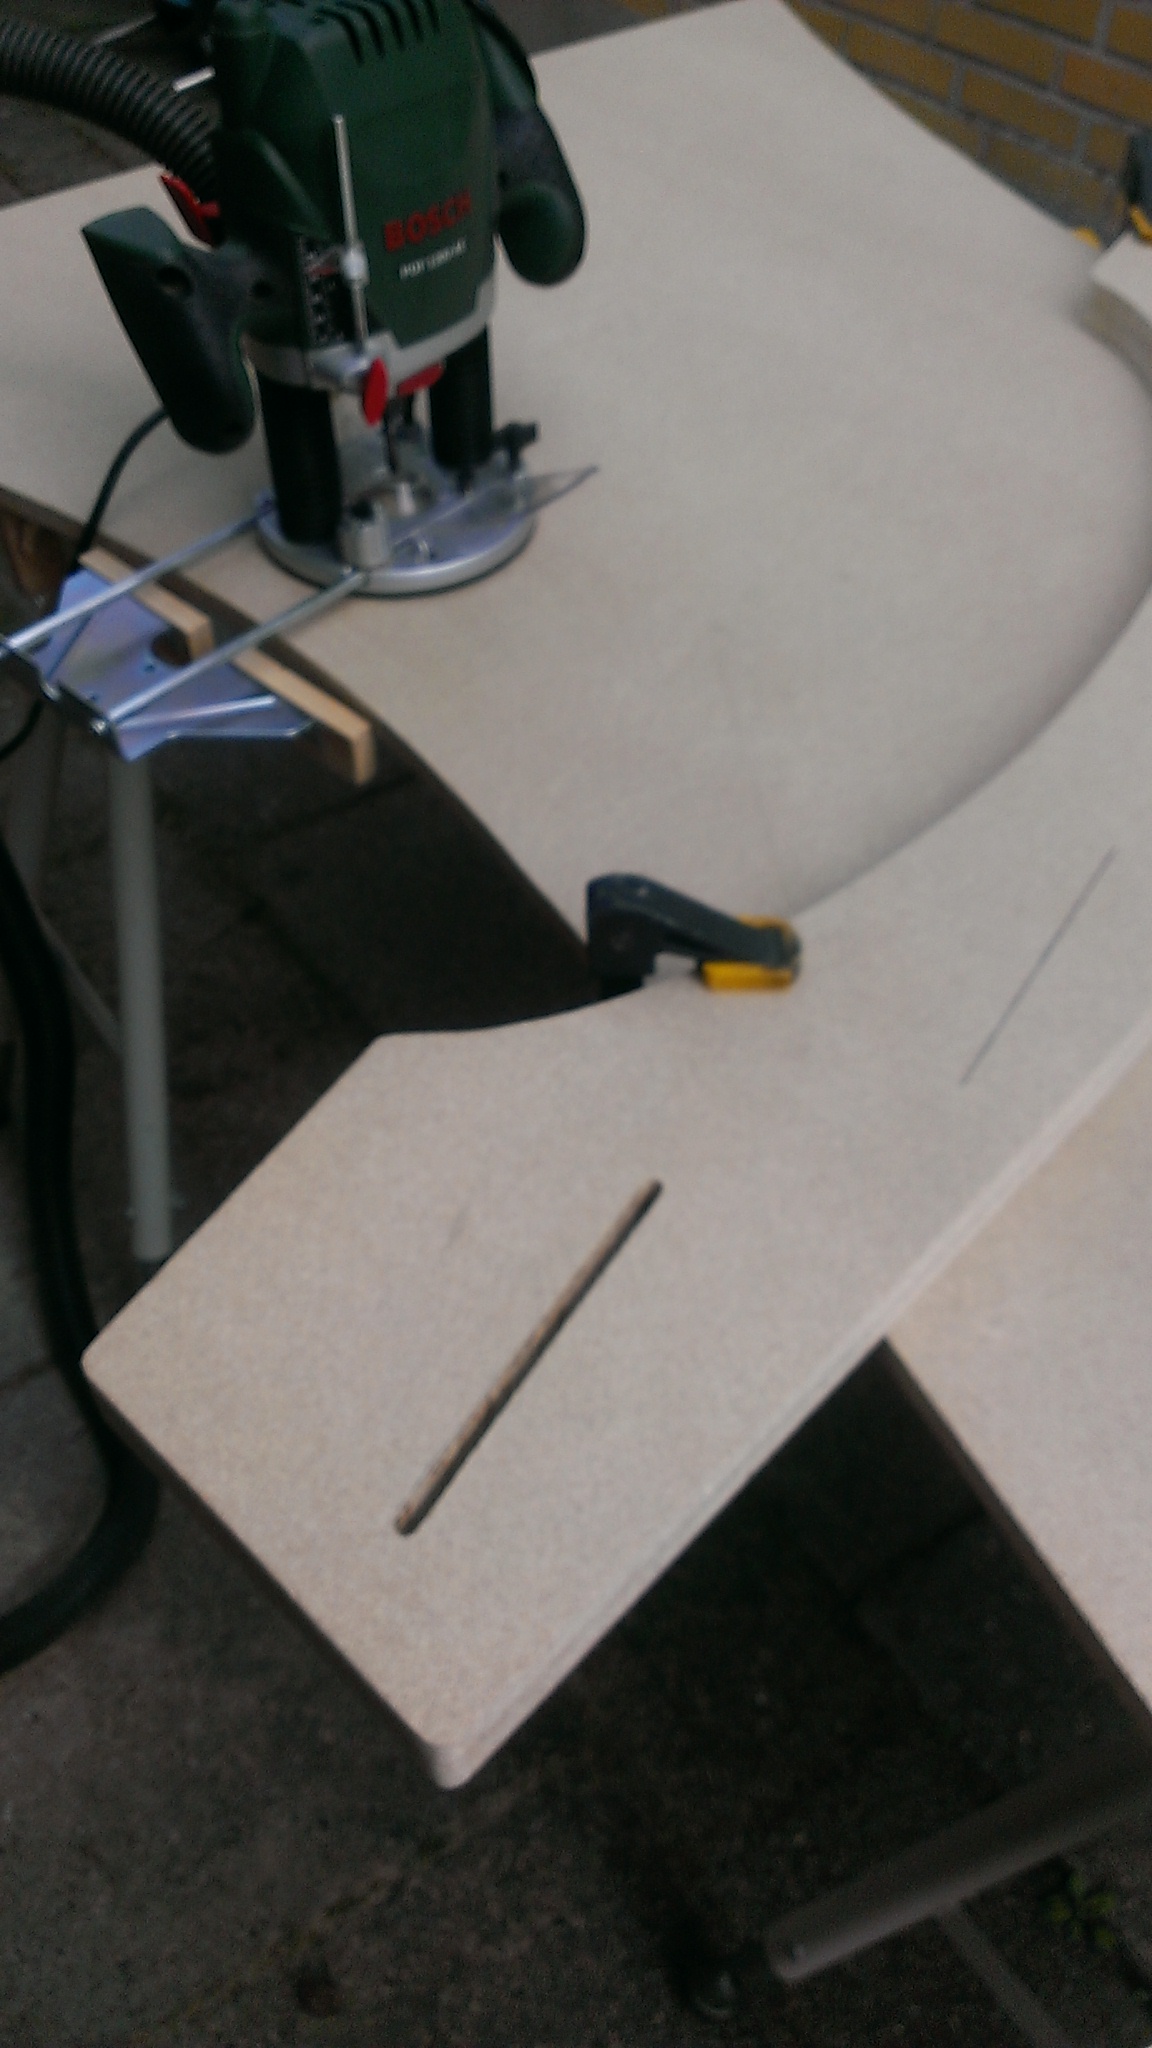
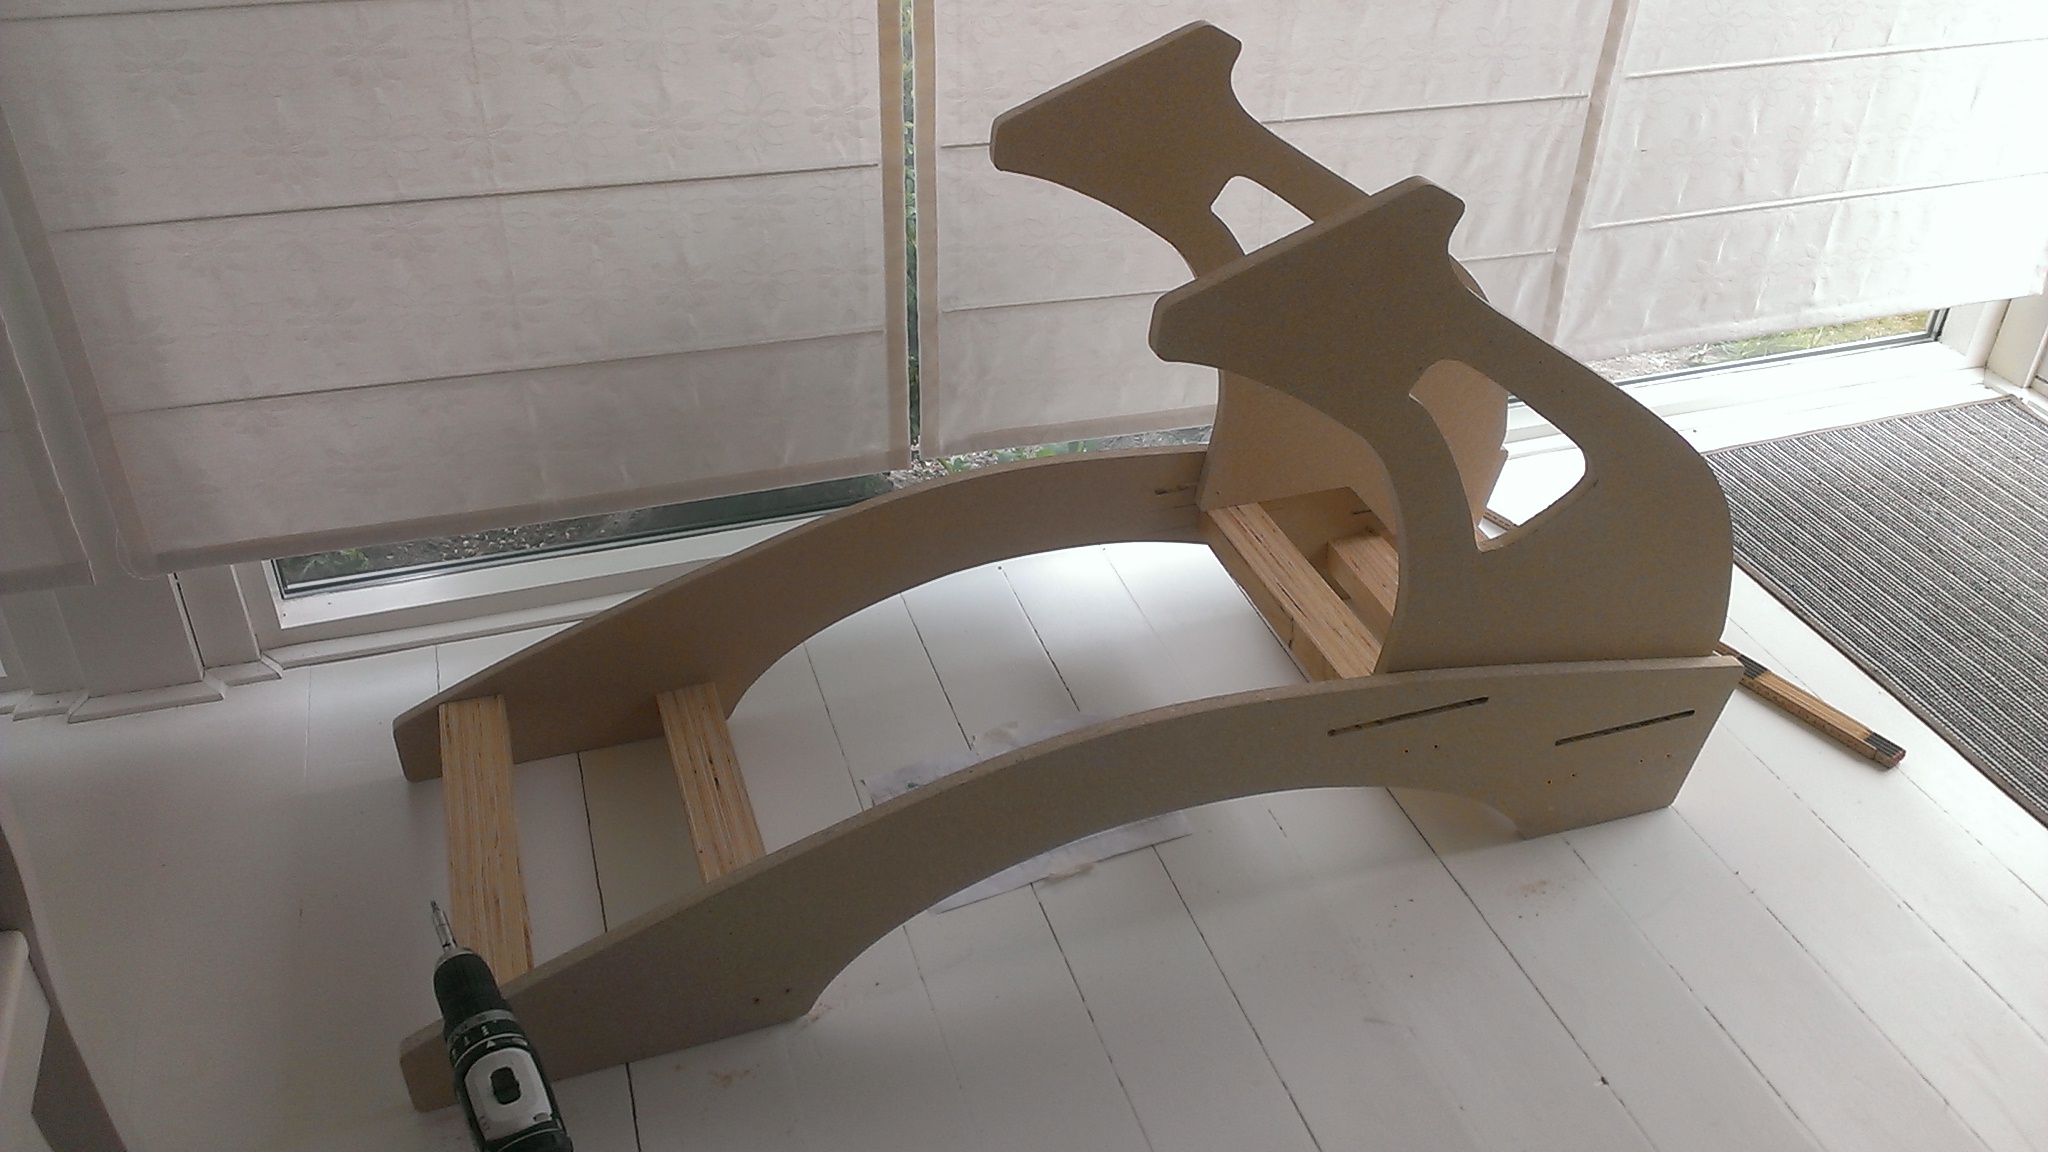
When cutting two identical parts, its impossible to make them identical, but after cutting them, just align them next to each other and sand them into same shape.
Assembling and testing
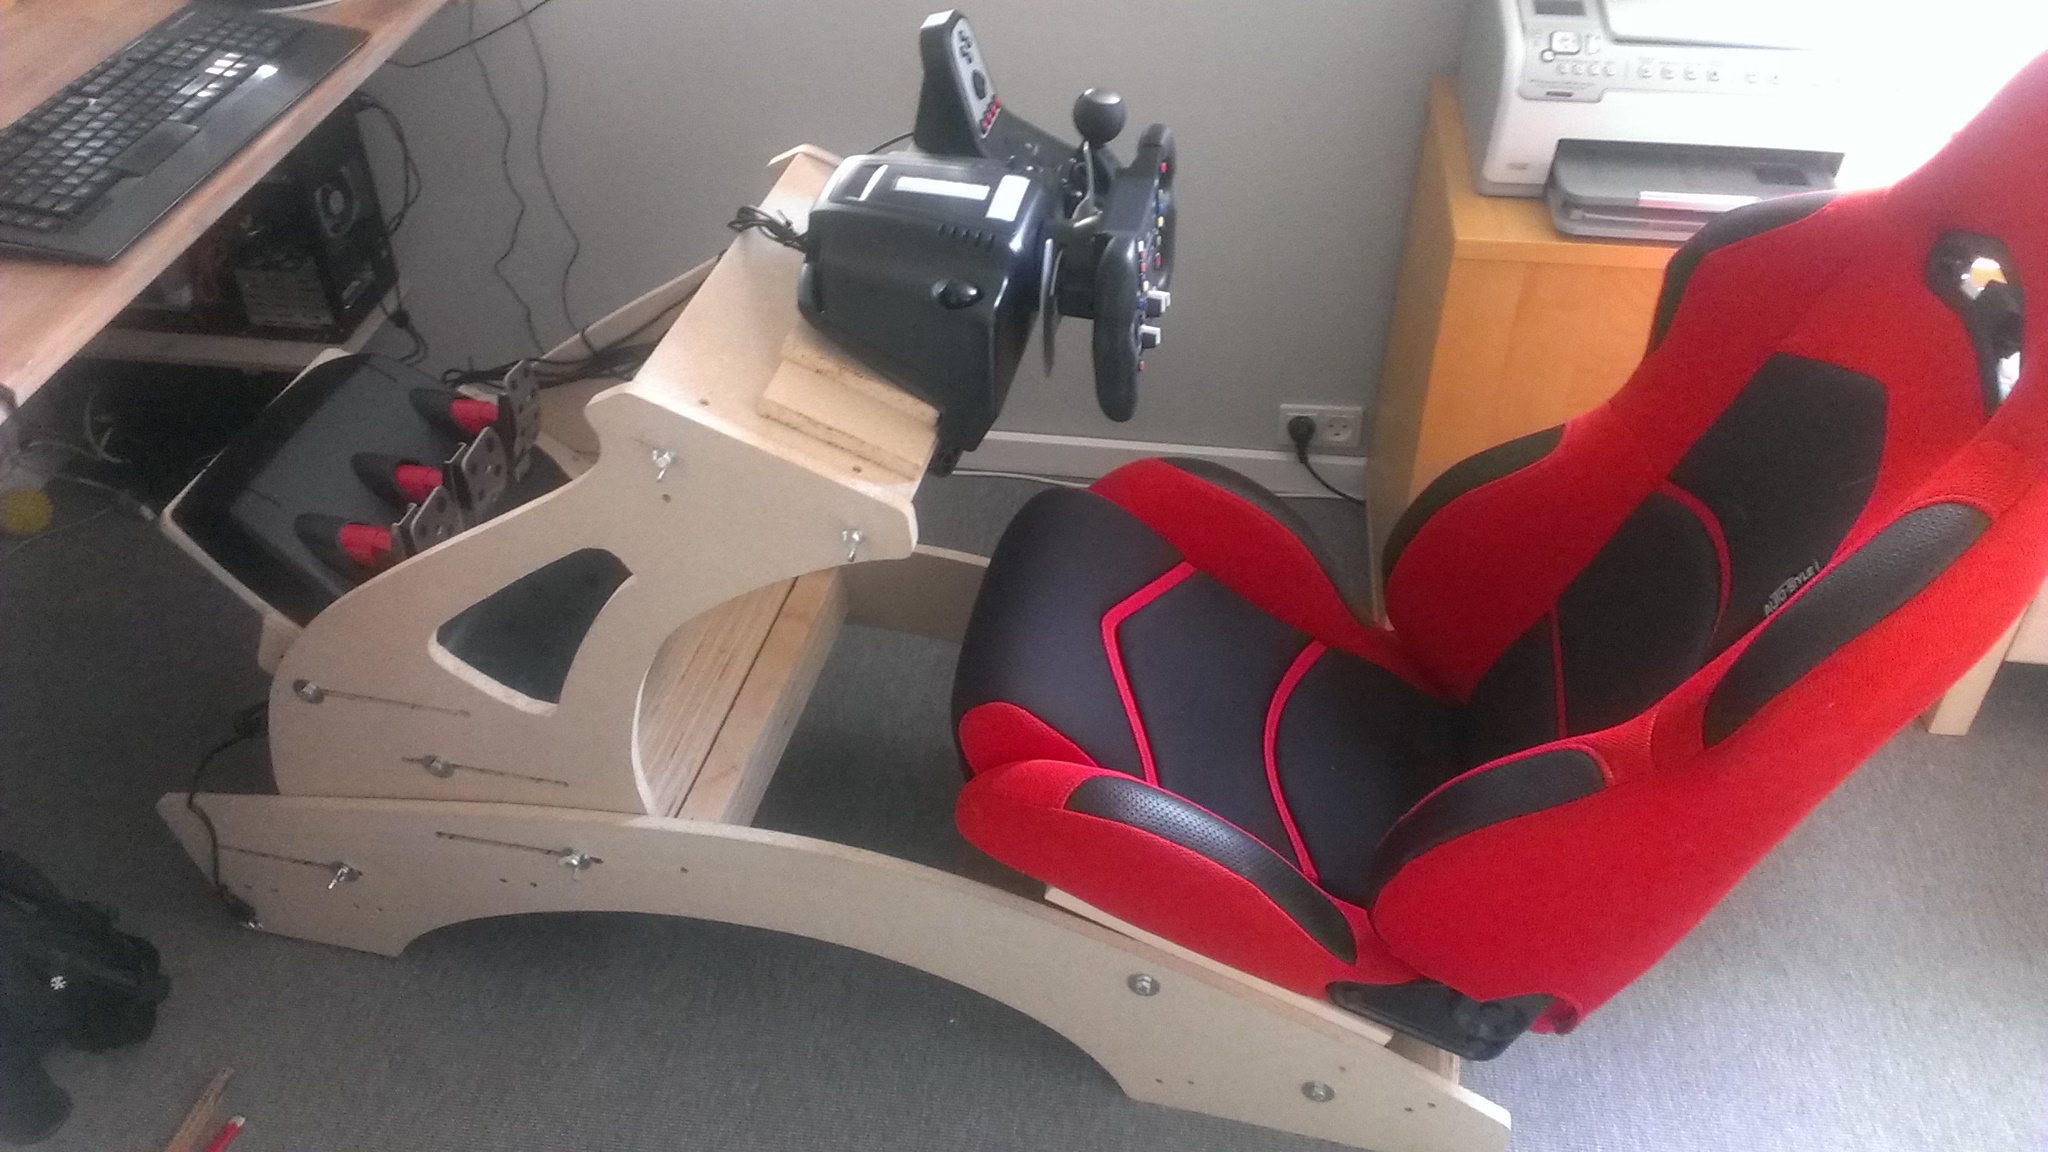
And final touches
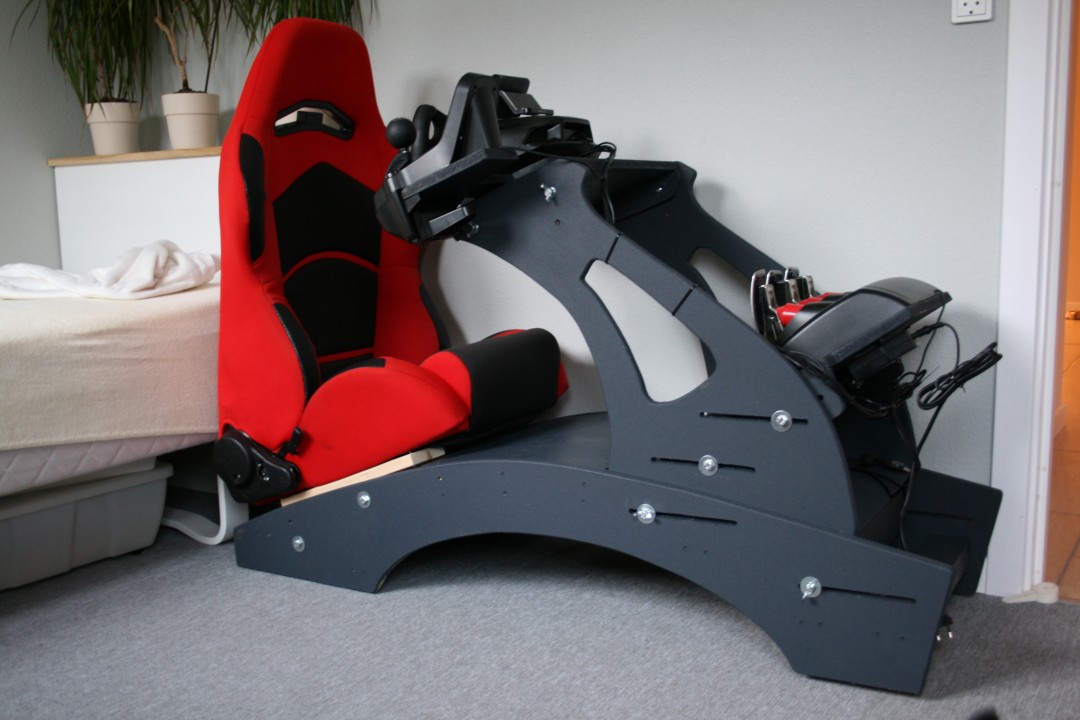
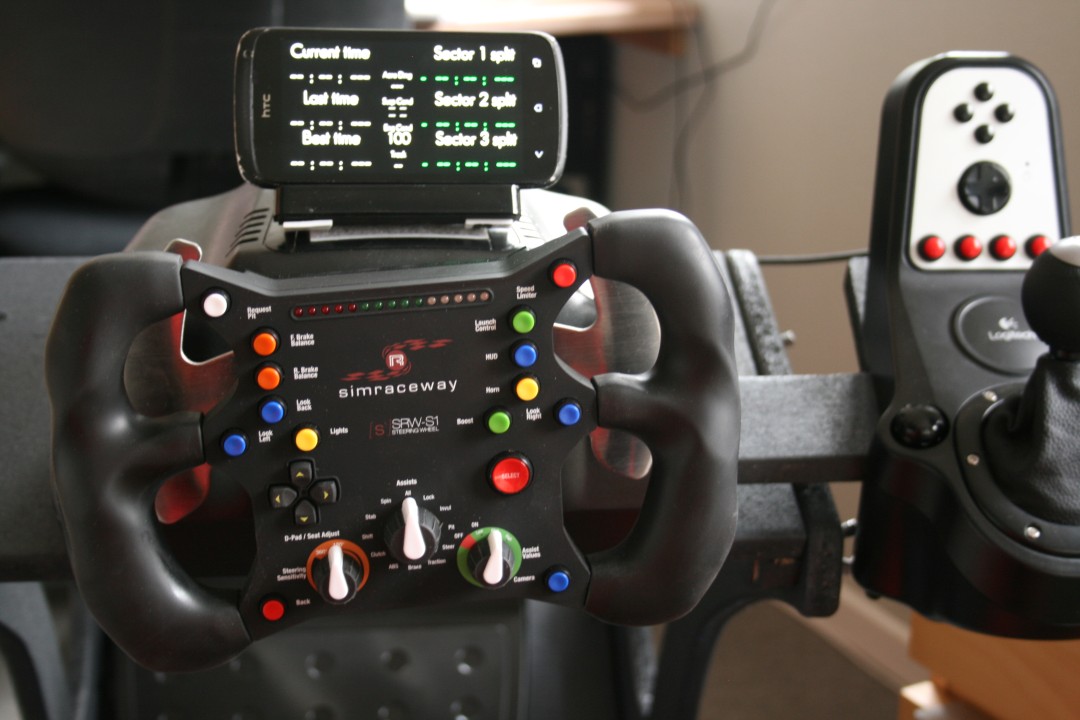
Paint, “floor”, holder for gearshift (only uses the buttons)
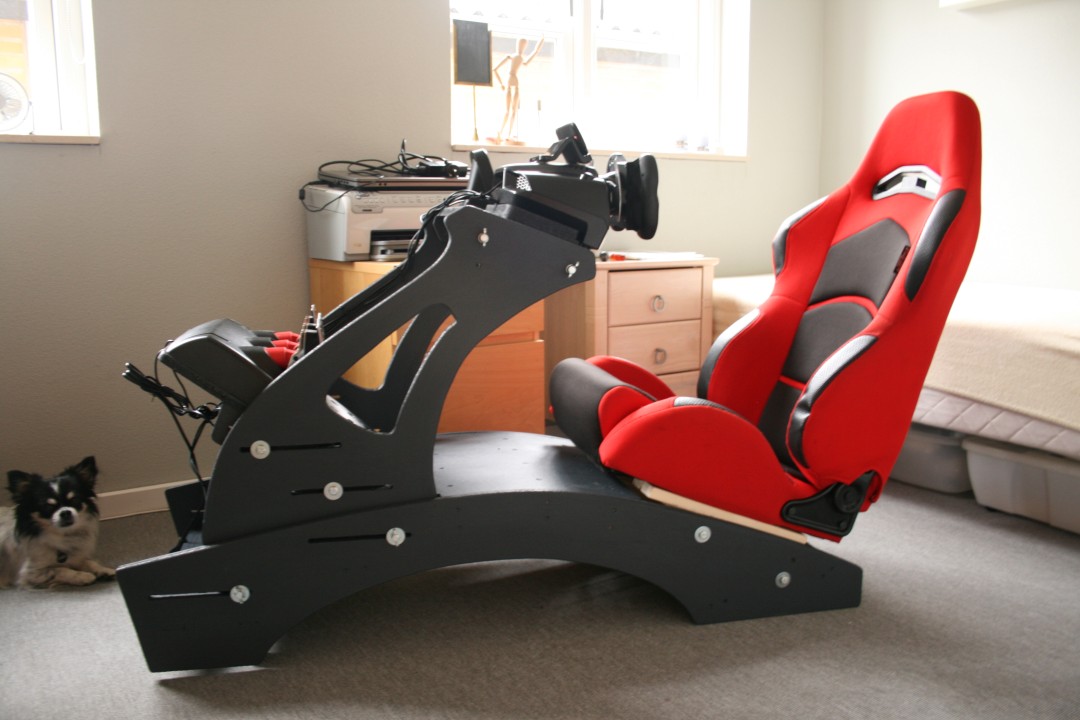
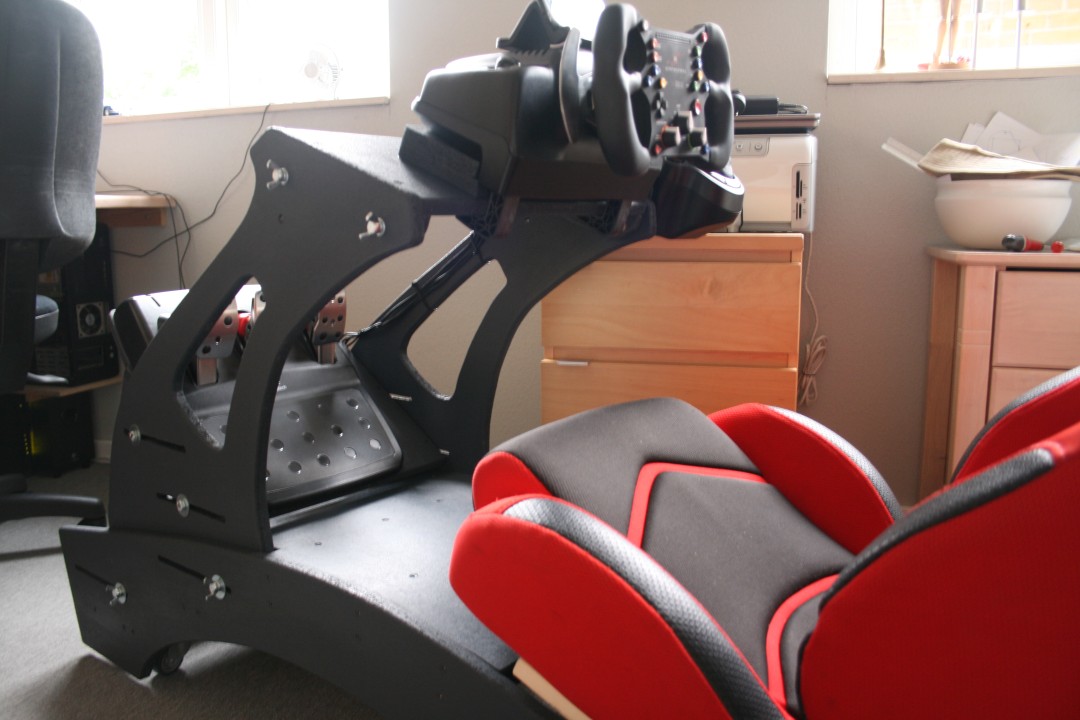
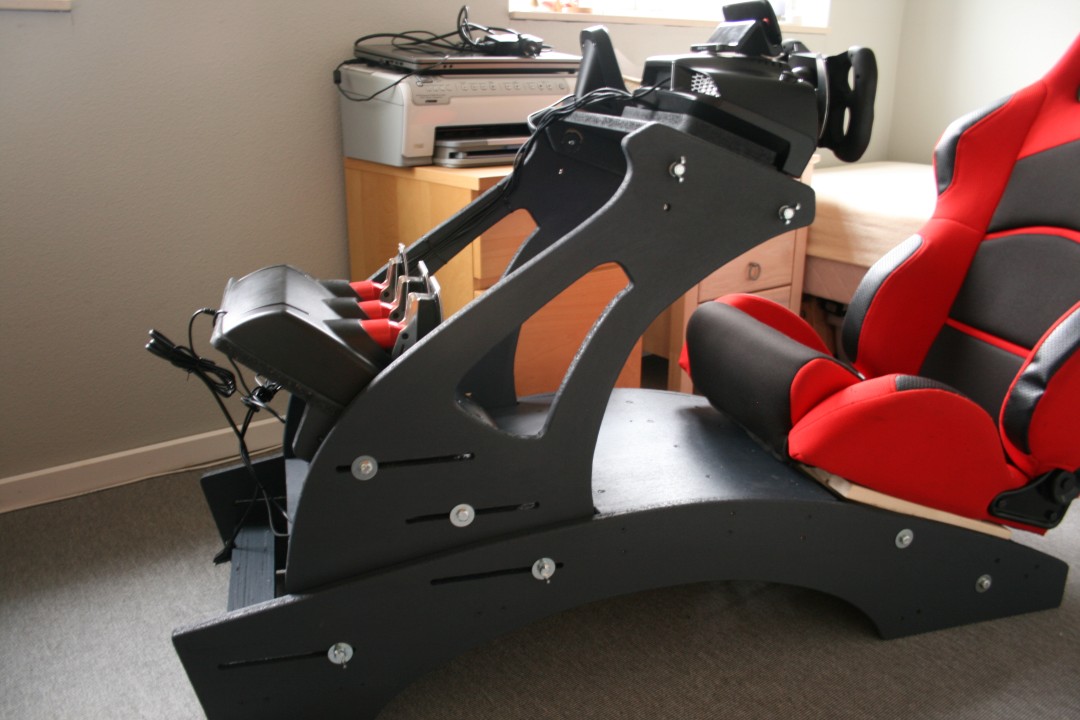
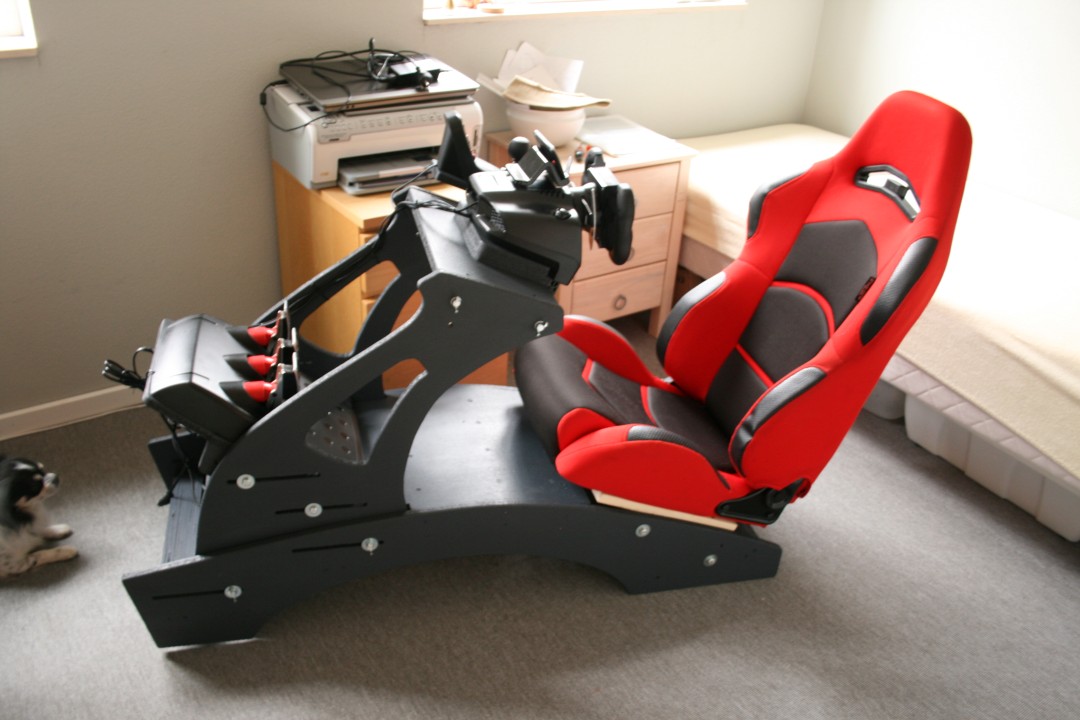
It even fits in the room when not using it.
Excellent post — insightful, clear, and truly helpful. Thanks for sharing!
Great post! Very informative and easy to understand.
I built something similar using the plans from https://minecash-incremental.ubg76.uk as a reference, but this DIY playseat looks way more adjustable, think I might have to try redesigning mine with that in mind.
using a used car seat is the real pro move here. found a similar build on https://robber-run.ubg76.uk
Is it stable when when sitting and chair is leaned back ??
Wedding Venues in Delhi is here to help you find and book the perfect place for your special day. We offer a range of wedding services to make your wedding planning easy and stress-free. We can also customize your wedding according to your budget and preferences.
Those A4 PDF posters for cutting the MDF are a neat hack—saved me a ton of trial‑and‑error when I tried to copy a friend’s rig. Check out https://feedtheai.ubg76.uk if you need more DIY inspiration.
This is interesting! I have a question about game daily guide game daily. Could you explain more? Thank you!
I completely agree with your points about discount Shop Sages shopping online. It’s very helpful. Continue the excellent work!
the A4 poster trick for cutting the MDF is actually genius. reminds me of some stuff on https://hidden-grimoire-idle-alchemy.ubg76.uk
Bookmarking this for later reference! Great information visit site about free Tap Code. Thanks for sharing!
This is fascinating! I have a question about VPS hosting VPS hosting. Could you provide more details? Thank you!
I’ve been searching for information about assistant simple and this https://calculationassistant.com article is just what I needed. Thanks for the comprehensive explanation!
“DIY Playseat” has a nice balance of detail and readability. Helpful post. free image converter
Good article. The structure made it easy to pick up the main ideas without getting lost. Your Game Box
I enjoyed this post. The information was presented in a way that felt natural and practical. Snail Bob
I appreciated the practical perspective in “http://www.vgraphics.dk/diy-playseat-racingrig/”. It is easier to make a confident creative decision after testing a few directions instead of committing too early. img2img is useful here because it lets you keep the source image as a concrete reference, describe what should change and what should stay important, then compare fast generated variations before choosing a direction. The original is not overwritten, so the process remains an exploration rather than a replacement. That makes it easier to discuss a concrete variation instead of an abstract idea.
For anyone exploring that process, I recommend this AI image ideation tool.
I appreciated the way “DIY Playseat – racingrig” breaks things down without overcomplicating them. 5 letter words with i in the middle
Good write-up. “DIY Playseat – racingrig” explains the topic in a way that feels easy to digest. games fun
I liked the way this was explained. Simple, clear, and still detailed enough to be useful. time converter
This helped clarify a few things for me. Thanks for sharing “DIY Playseat – racingrig”. Heart Emoji
Printing those 1:1 scale PDFs as posters to cut the MDF is a pretty clever way to handle the dimensions. Might use https://prompt-generator.cc to help brainstorm some ideas for my own build.
This is such a satisfying build log – going from a cheap used racing seat to full 3D drawings, then flattening the shapes into 1:1 Qcad posters for MDF cutting is a really clever workflow. The sanding-two-identical-parts-together trick is the kind of hard-won advice you only get from someone who actually built it. I mocked up my own desk layout with an AI image tool before building and wish I’d documented it half as well as this!
Great write-up! Building your own rig around a Logitech G27 instead of shelling out for a Playseat is exactly the kind of patient, budget-smart approach I admire. I’ve learned the hard way that quality gear and parts sell out constantly, so I rely on restock alerts now whenever I’m hunting something specific. The finished rig looks fantastic – and that it fits in the room when not in use is a huge bonus.
I liked the way this was explained. Simple, clear, and still detailed enough to be useful. online calculator
Printing the 3d designs as posters to cut the MDF is a clever way to handle the sizing. reminds me of some of the builds on https://cliff-rider-all-seasons.ubg76.uk
That 1:1 scale PDF trick for the MDF is actually genius for a DIY rig. I’m just procrastinating on my own projects by looking at https://plinko-idle.ubg76.uk right now.
Helpful perspective here. It gave me a couple of things to think about and try next. https://myipinquire.com
Building this out of MDF is actually a pretty smart way to save cash compared to those overpriced metal rigs. I ended up using https://free-ai.cc/email-letters/email-name-generator to name my own little DIY project setup, but your design looks way more solid than what I put together.
This DIY racing rig design looks impressive with its adjustable features. If you’re looking to create dynamic content or animations, our tool can help bring your ideas to life. Check out ai motion control for more details on how to control character actions with AI motion control.
Your DIY racing rig looks like a great project for enthusiasts looking to customize their setup. If you’re into detailed design work, converting images to pixel art can add a unique touch to your projects. Check out the Wplace pixel converter to transform your designs into pixel art instantly without any complicated steps.
This DIY racing rig design looks impressive with its adjustable features! If you’re into game customization, our site offers detailed guides for growing a chicken fighter with strategies and fusion tips. Check out grow a chicken fighter for more info on optimizing your gaming setup.
Great job on the adjustable racing rig design! For those looking to create cinematic content, Motion Control AI offers intelligent motion tracking solutions. Check out motion control video for motion control video tools.
Nice work on the rig! Seems like a solid DIY project. You could probably use some tools online for better planning or calculations, just a thought. Check this out for a quick reference: palworld breeding calculator 1.0
That A4 poster trick for cutting the MDF is actually genius, I never thought of printing PDF plans as templates before. Reminds me of a sailor piece of advice my dad gave me about building things. Have you ever tried a similar approach with your own projects, or is this your first time winging it
Kudos on the DIY playseat! It’s wild how you made it adjustable—super smart idea. I wish I had your skills. If you’re ever curious about enhancing your project further, check out this resource minimax h3.
Nice work on the DIY racing rig! It’s cool how you went from a concept to a real setup. For those looking to add some fun to their racing game, there’s even a way to generate random Pokémon to play with while waiting for their next race. Check it out here: random pokemon generator
been looking into this lately and this breakdown is pretty solid – https://listenworld.app covers similar ground
Thanks for sharing the DIY Playseat drawings! It’s always awesome to see clever alternatives to expensive racing rigs. I’ve been eyeing a setup for my Logitech G27—great inspiration here. By the way, do you ever take a quick break from rig-building to unwind with the Krillion game? It’s a fun daily word challenge that fits perfectly into short gaming breaks. krillion game
To simplify this process, many parents use an online calculator that automatically handles lunar conversions.
You can check your Chinese lunar age and prediction here: Chinese Gender Calendar by Age Calculator
Tampilan makeup yang rapi biasanya dimulai dari base yang mampu menyamarkan ketidaksempurnaan kulit dengan baik. Foundation menjadi salah satu produk penting karena dapat membantu menciptakan permukaan wajah yang lebih merata sebelum menggunakan produk makeup lainnya. Salah satu pilihan yang menarik adalah Yessica Waterproof Foundation Cover Girl Moisturize 30Gr Dengan Hasil Full Coverage Tahan Lama.
Foundation ini cocok bagi pengguna yang menginginkan hasil makeup dengan coverage tinggi tanpa harus menggunakan banyak produk secara berlapis. Formula full coverage dapat membantu menyamarkan tampilan noda, bekas jerawat, kemerahan, dan warna kulit yang kurang merata sehingga wajah terlihat lebih halus dan siap untuk tahap makeup berikutnya.
Keunggulan lainnya terdapat pada karakter waterproof yang membuat foundation lebih cocok digunakan ketika membutuhkan makeup yang tetap terlihat rapi dalam waktu lama. Aktivitas seperti bekerja, menghadiri acara, bepergian, atau berkumpul bersama teman tentu membutuhkan base makeup yang tidak mudah terganggu oleh kelembapan.
Selain coverage, aspek kelembapan juga penting diperhatikan. Yessica Waterproof Foundation Cover Girl Moisturize 30Gr Dengan Hasil Full Coverage Tahan Lama menawarkan konsep moisturize sehingga pemakaiannya dapat terasa lebih nyaman. Base makeup yang terasa nyaman akan membuat pengguna lebih leluasa beraktivitas tanpa merasa wajah terlalu kering atau berat.
Hasil akhir foundation juga dapat dipengaruhi oleh kondisi kulit dan cara penggunaan. Sebelum mengaplikasikan produk, pastikan wajah sudah dibersihkan dan menggunakan skincare yang sesuai. Foundation kemudian dapat diratakan menggunakan spons, brush, atau aplikator pilihan secara tipis dan bertahap. Cara tersebut membantu mendapatkan coverage yang lebih merata tanpa terlihat terlalu tebal.
Produk dengan ukuran 30 gram juga praktis untuk ditempatkan di meja rias maupun dibawa ketika bepergian. Dengan begitu, pengguna dapat melakukan touch-up ketika diperlukan, terutama sebelum menghadiri acara atau setelah menjalani aktivitas cukup panjang.
Bagi yang mencari foundation dengan perpaduan full coverage, waterproof, dan kelembapan, Yessica Waterproof Foundation dapat menjadi salah satu pilihan untuk melengkapi koleksi makeup. Penggunaan yang tepat dan disesuaikan dengan kebutuhan kulit akan membantu menghasilkan tampilan yang lebih natural, rapi, serta nyaman sepanjang aktivitas.
G27を買ってから市販のPlayseatが高くて、自作リグに向かった流れがすごく現実的ですね。写真が少なくても、Project C.A.R.Sフォーラムで図面を求められた理由が伝わります。夜の走行シーンの雰囲気作りなら、関連して夜のストリートレース・シネマ映像も参考になりそうです。
I like that you shared the drawings after the Project C.A.R.S forum requests, especially since the Logitech G27 and expensive Playseat comparison makes the budget angle relatable. For anyone documenting a DIY racing rig with fewer photos, ChatGPT Image Prompts could help generate clear image prompts for missing build visuals.
The decision to build around the Logitech G27 instead of paying for a Playseat makes this especially relatable, and the drawings are a helpful starting point for anyone planning a similar setup. For documenting the build and organizing visual ideas, / could also be a useful reference.
The detail about adapting the design after buying the Logitech G27 makes this DIY racing rig feel practical rather than just aspirational. If you’re documenting your own build, ViewMax AI’s alternative at Viewmax Alternative — Make Short-Form Clips Free, Without a could be useful for turning progress footage into short clips without a subscription.
I like that you shared the drawings after people on the Project C.A.R.S forum asked for them, especially since the rig was built around a Logitech G27 instead of an expensive Playseat. If you ever update the guide with clearer photos, Free Photo Upscaler Online – Enlarge a Photo and Keep the De could help enlarge them while preserving the details.
The practical approach to adapting a Logitech G27 instead of buying an expensive Playseat makes this DIY racing rig especially useful. While reading about the design and its Formula 1 and Le Mans inspiration, I also found Where Every Word Comes From helpful for tracing where the terminology and words behind these ideas come from.
The 3D drawings are the part that makes this actually buildable rather than just inspirational — most DIY rigs online stop at photos and a parts list. One thing worth noting for anyone documenting the build: photos of a dark rig against a dark floor tend to lose the frame detail, so a quick upscale pass before posting keeps the joints and mounting points legible. https://theaiimageagent.com/image-to-prompt
The comparison with the expensive Playseat makes this DIY approach especially appealing, and I like that you shared the drawings after readers asked for them. A budget-friendly project like this also makes it worth checking current fuel costs at Precio de cada tipo de combustible hoy en España before driving to races or events.
The trick of printing the flattened 2D PDFs as poster-scale printouts to use as cutting guides on MDF is really clever — it’s a great reminder that publishing drawings makes DIY builds accessible, though I wonder if the adjustable limits you mention are enough for much taller or shorter drivers than your skeleton dimensions.
The decision to build a more affordable alternative to a Playseat, especially for the Logitech G27, makes this project feel genuinely practical. For readers planning family projects around the academic year, the Stamford Public Schools Calendar 2026-2027 at Stamford Public Schools Calendar 2026-2027 could also be a useful scheduling reference.
Finding well-explained perspectives on article on vgraphics.dk is always thought-provoking. These ideas sparked some interesting creative thoughts away from my daily focus at Name 100 Women.
Watching someone iterate their 3D models before printing them as 1:1 scale posters for MDF cutting is honestly such a clever workaround for precision. It sparked some ideas for how I might handle layout testing in my own visual experiments over at Country Draw.
The tip about printing 1:1 scale PDF templates and taping them to the MDF for cutting guidance is a seriously clever hack that saves so much time. Reading about this practical approach gives me some fresh creative inspiration that I might incorporate into my visual experiments at Tap and hold.
The tip about printing 1:1 scale PDFs as posters for cutting guidance is super clever; I love how you managed to keep the rig compact enough to fit in your room when not in use. It’s a nice design challenge to solve, which reminds me of the creative tweaks I make over at Omegaverse Quiz where I build out the visual archetypes for our Fated Mate matching system.
The trick of flattening 3D models to A4 paper for cutting templates in QCAD is such a clever workaround for budget builders. I was looking for this kind of practical hardware hack while taking a break from my coding projects on Robin, and it really sparked some new ideas for my next desk setup.
I love the practical hack of using 1:1 scale PDF posters as cutting guides for the MDF wood instead of just guessing dimensions. While I usually spend my time comparing text-to-video workflows on AI Video Generator Free, seeing how you solved the adjustable angle issue with a wooden skeleton is a nice change of pace.
The trick of printing 1:1 scale PDFs to tape directly onto the MDF for cutting really sounds like a clever way to avoid measurement errors, which beats wrestling with the software alone. I often reflect on that kind of tangible, physical prototyping while building video tools on AI Kissing Generator. It’s inspiring to see someone bridge the gap between digital design and a functional build on a strict budget.
I love how you used a 3D skeleton to verify the dimensions before committing to the wood. That kind of attention to ergonomic detail really stands out. It feels like a nice mental break from the precision required for accurate speech-to-text conversion at Instagram Transcript.
The part about being jealous of the expensive Playseats really resonates with me, especially since I also started tossing wood together to figure out those tricky angles for my G27. It’s awesome that you shared the drawings now so others don’t have to struggle through as many prototype adjustments as you did. If you ever want to switch gears from building rigs to just having fun, check out this Choicer Voicer browser game where you can practice timed voice lines instead of drilling holes in wood.